Arsenal strengthened their position at the top of the Premier League table after defeating Tottenham Hotspur in Gameweek 27 of the 2025/2026 season.
Before this fixture, Manchester City had reduced the gap to just two points following a run of three consecutive victories.
Arsenal dropped four valuable points in their previous two matches with consecutive draws against Brentford and Wolverhampton Wanderers.
This win at the Tottenham Hotspur Stadium allowed the Gunners to rediscover their winning momentum and extend the lead to five points.
Although Tottenham are not at their strongest, particularly following the departure of Thomas Frank, the match still presented a significant challenge for Arsenal.
Beyond the intensity of the North London Derby, it also marked the first game under new head coach Igor Tudor, adding uncertainty to the tactical landscape.
This Arsenal vs Tottenham tactical analysis will break down some of Mikel Arteta’s tactical ideas and how he tried to play against Spurs under the new management of Igor Tudor, which secured this important win for Arsenal.
Tottenham Hotspur Vs Arsenal Lineups & Formations
Arsenal lined up with a 4-3-3 formation.
David Raya started in goal.
Arsenal’s back four were William Saliba and Gabriel Magalhães as right and left centre-backs, with Jurrien Timber and Piero Hincapié as the right and left full-backs.
Martín Zubimendi and Declan Rice started in central midfield, with Eberechi Eze playing as a 10.
Bukayo Saka was Arsenal’s right winger with Leandro Trossard on the left, and Viktor Gyökeres up front.
Arteta made four substitutions in the match.
Cristhian Mosquera (57′) came on for Timber, Gabriel Martinelli (76′) for Trossard, Martin Ødegaard (77′) for Eze, and Noni Madueke (90′) for Saka.
Igor Tudor opted for a 5-3-2 system for the Tottenham Hotspur starting XI.
Guglielmo Vicario started in goal, with a defensive line featuring Radu Drăgușin, Micky van de Ven, and João Palhinha operating as the three centre-backs.
Archie Gray and Djed Spence as wing-backs.
Their midfielders were Yves Bissouma, Pape Matar Sarr, and Conor Gallagher.
Up front, they had Xavi Simons and Randal Kolo Muani
Tudor made three substitutions.
Dominic Solanke (62′) came on for Gallagher, Richarlison (68′) for Kolo Muani, and Mathys Tel (82′) for Palhinha.
Arsenal Build-Up Vs Tottenham Man-Oriented Pressing
Arsenal Build-Up Shape
Arsenal began in a 4-2 structure, with Raya positioned between the two centre-backs, Gabriel and Saliba.
The two holding midfielders, Zubimendi and Rice, operated ahead of the first line of defence.
Eberechi Eze occasionally dropped close to the double pivot to provide an additional passing option.
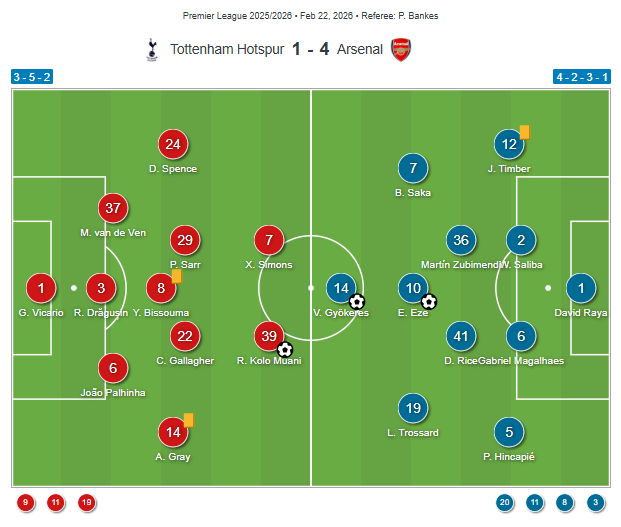
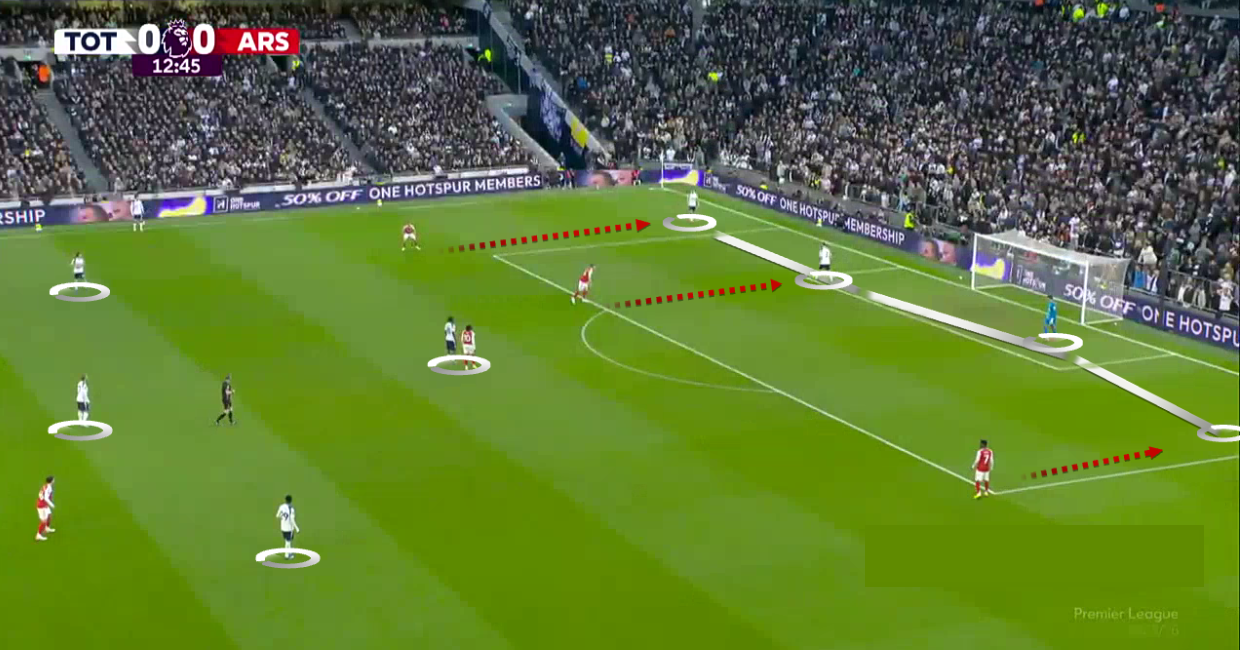
Tottenham implemented a strict man-marking approach in their high press.
Simons and Kolo Muani marked Arsenal’s centre-backs, with Kolo Muani pressing Raya while curving his run to shadow Gabriel.
Sarr tracked Zubimendi, while Bissouma marked Eze.
Gallagher was responsible for Rice.
The wing-backs, Gray and Spence, marked Arsenal’s full-backs, Timber and Hincapié.
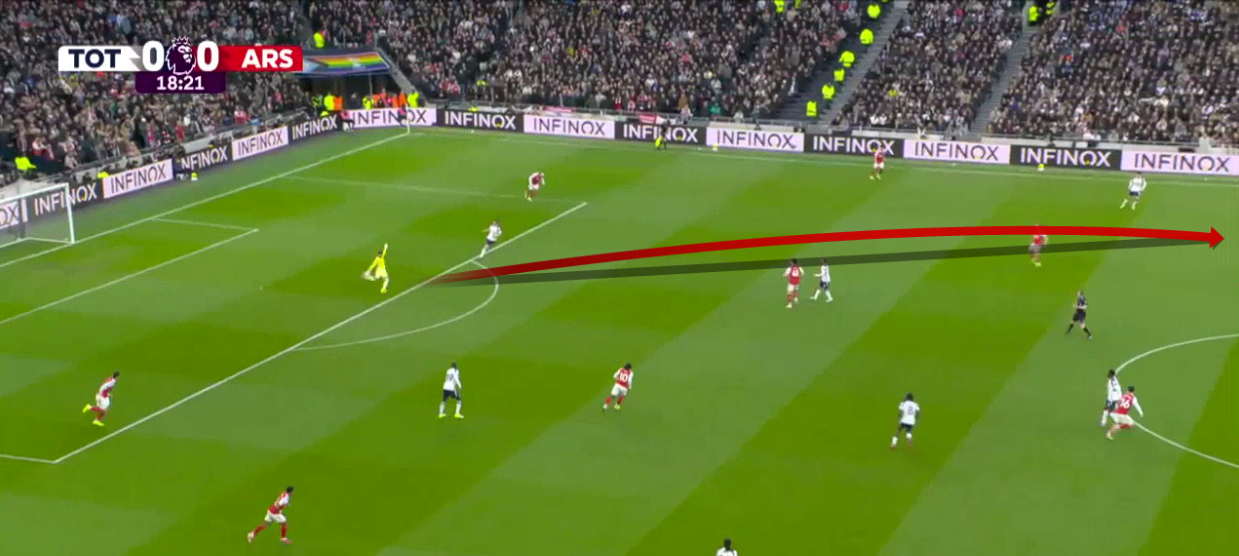
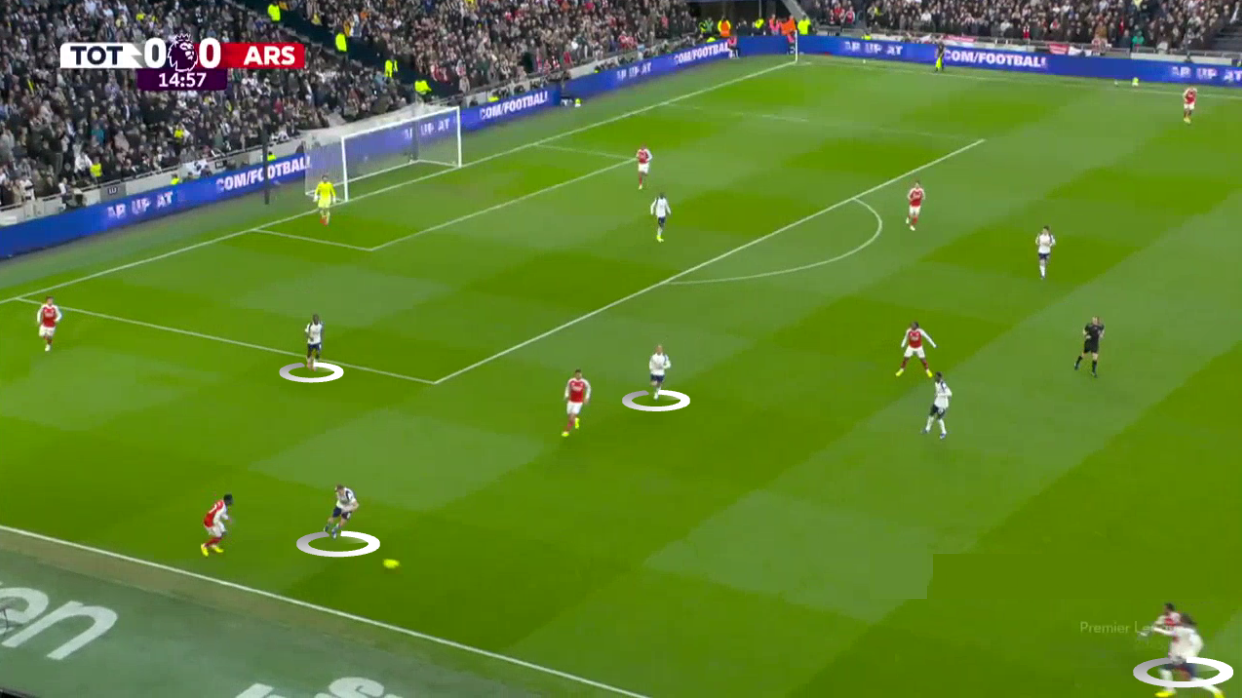
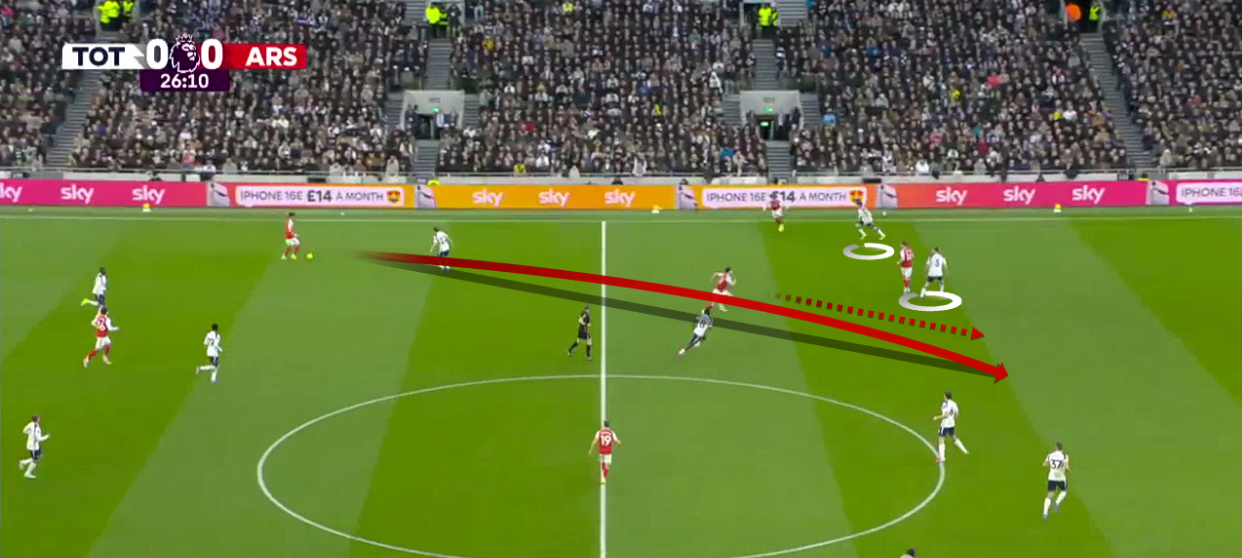
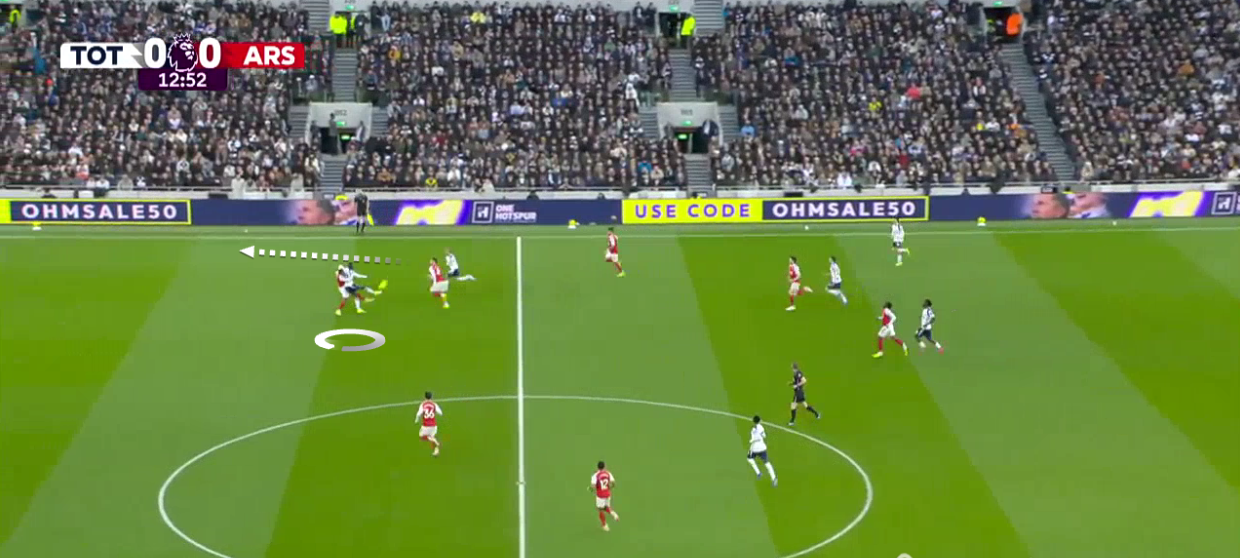
Against this aggressive system, Arsenal often opted for a long ball from Raya towards the front line.
Tottenham’s defenders tightly marked Arsenal’s front three.
In this instance, the long ball was directed towards Saka, who ran in behind Tottenham’s defensive line.
The move led to Arsenal’s first major chance, as Vicario rushed out to clear the ball.
It fell to Leandro Trossard, who attempted a shot on target while Vicario was out of position, but a Tottenham defender blocked the effort.
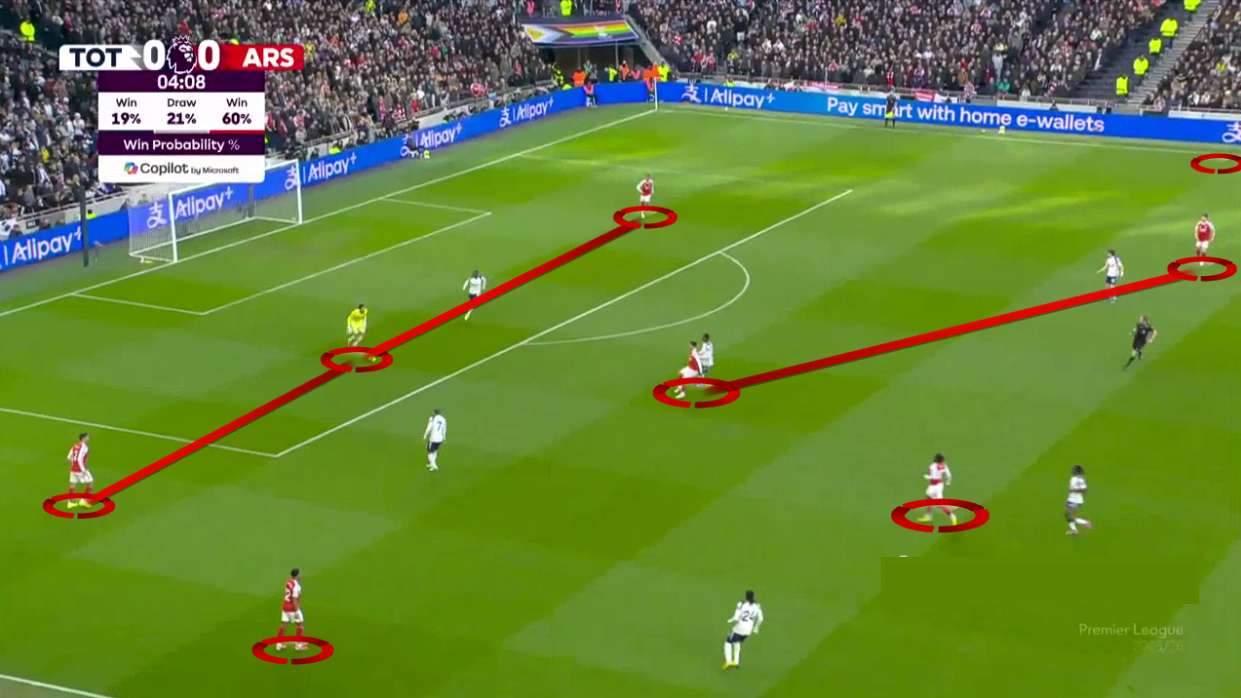
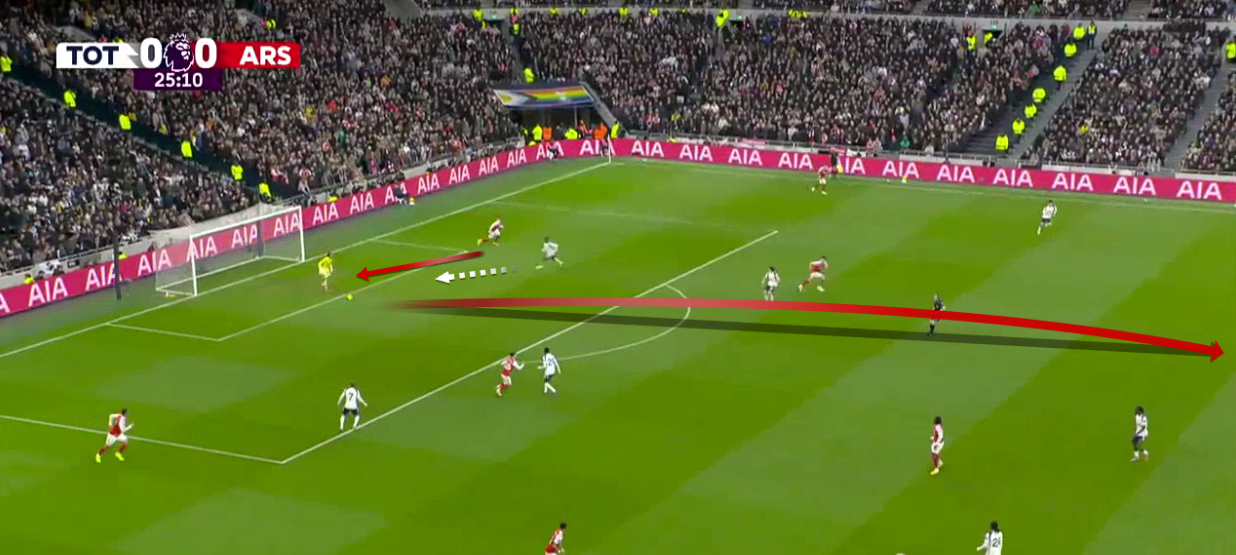
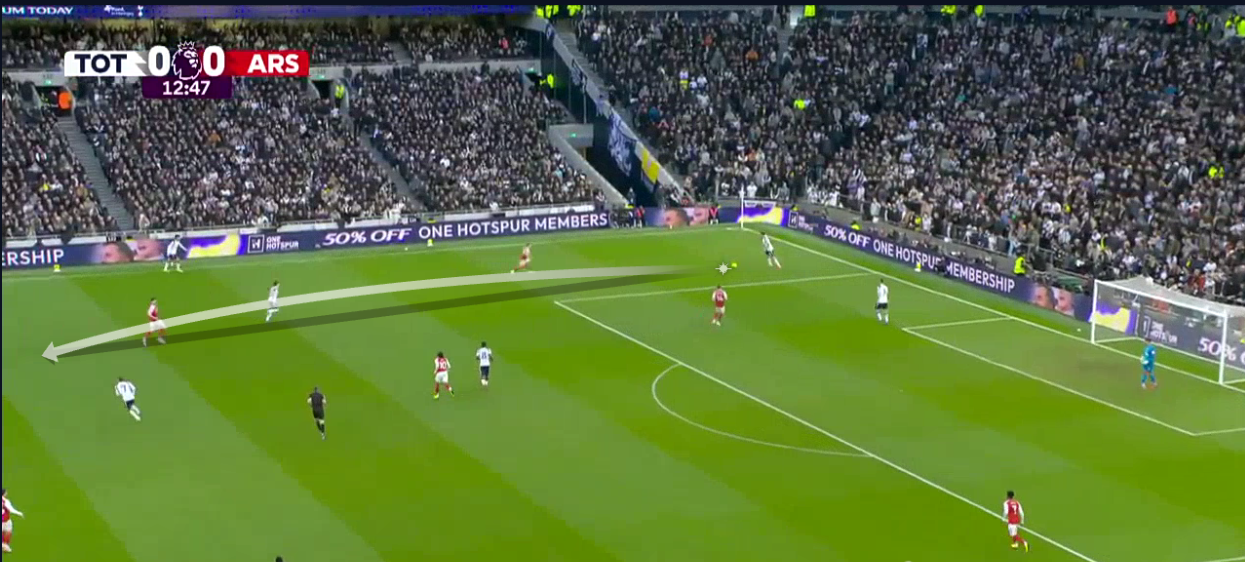
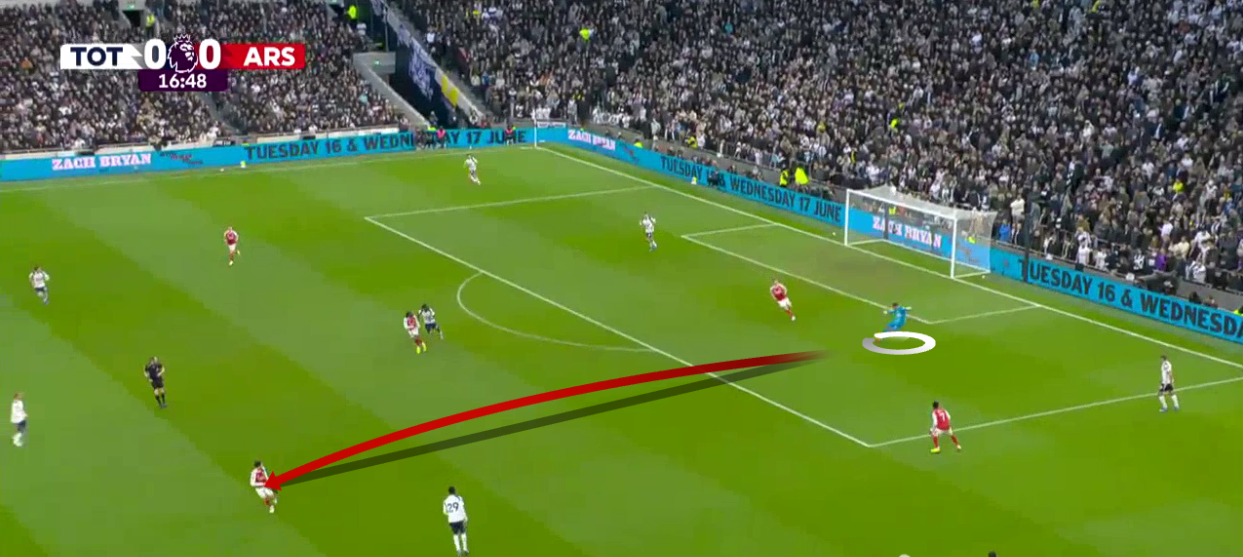
Arsenal Long Balls To Viktor Gyökeres
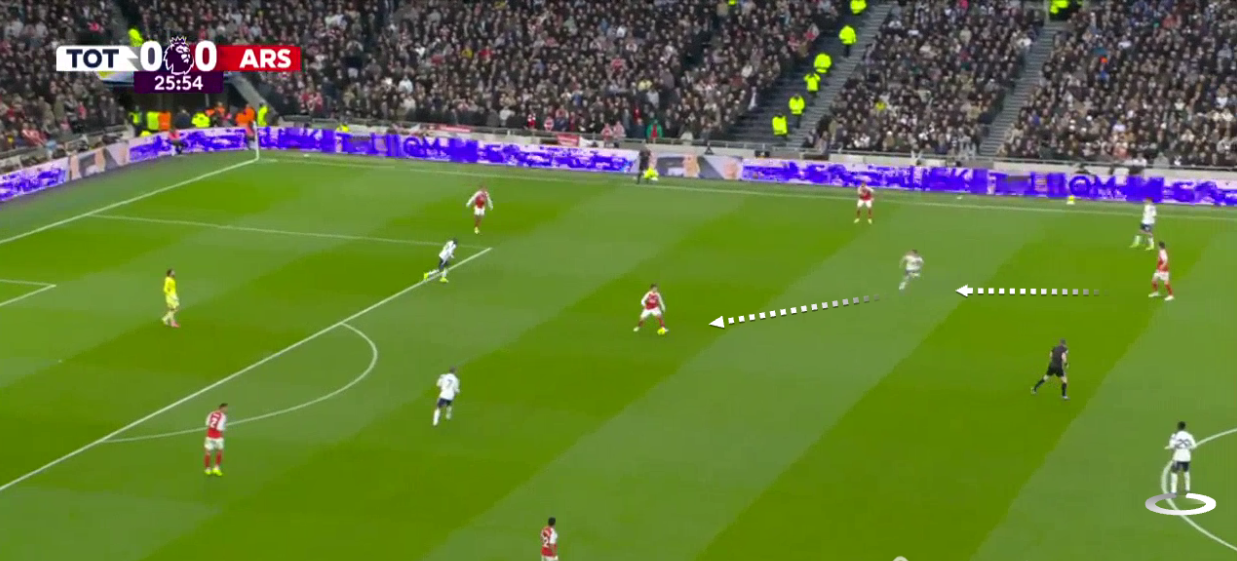
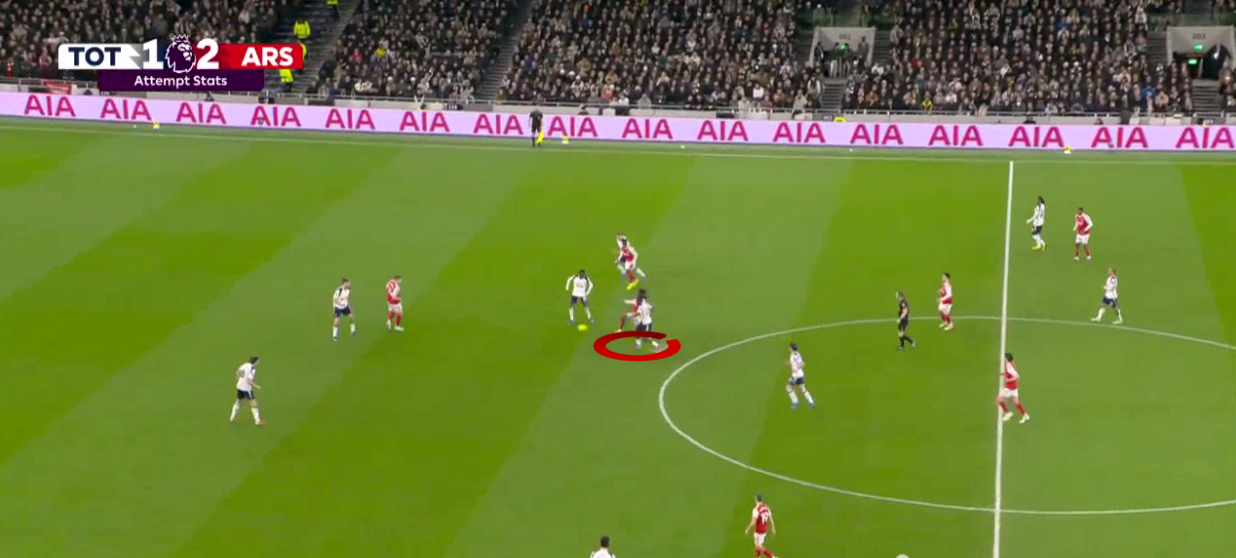
With the same structure against Tottenham’s aggressive press, Arsenal also attempted to target Gyökeres with long balls from Raya.
The intention was for Gyökeres to either lay the ball off to a teammate attacking the second ball or hold up play to allow Arsenal to progress up the pitch.
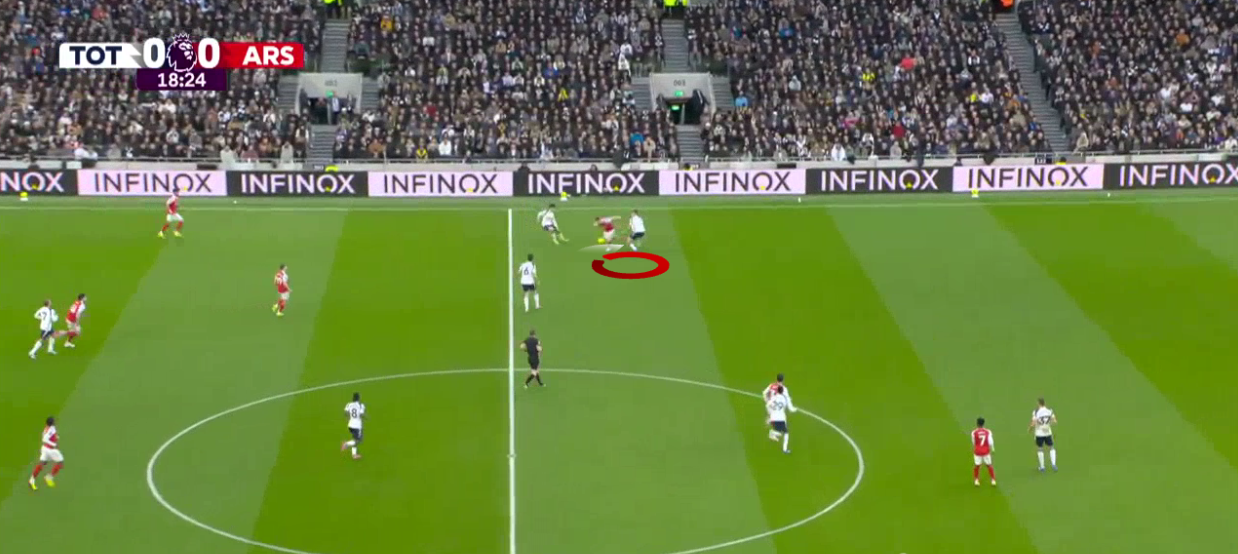
The difficulty was that Gyökeres struggled to link play or hold possession under the intense pressure from his direct marker.
As a result, Arsenal risked losing possession and becoming exposed to counterattacks, as seen in this situation.
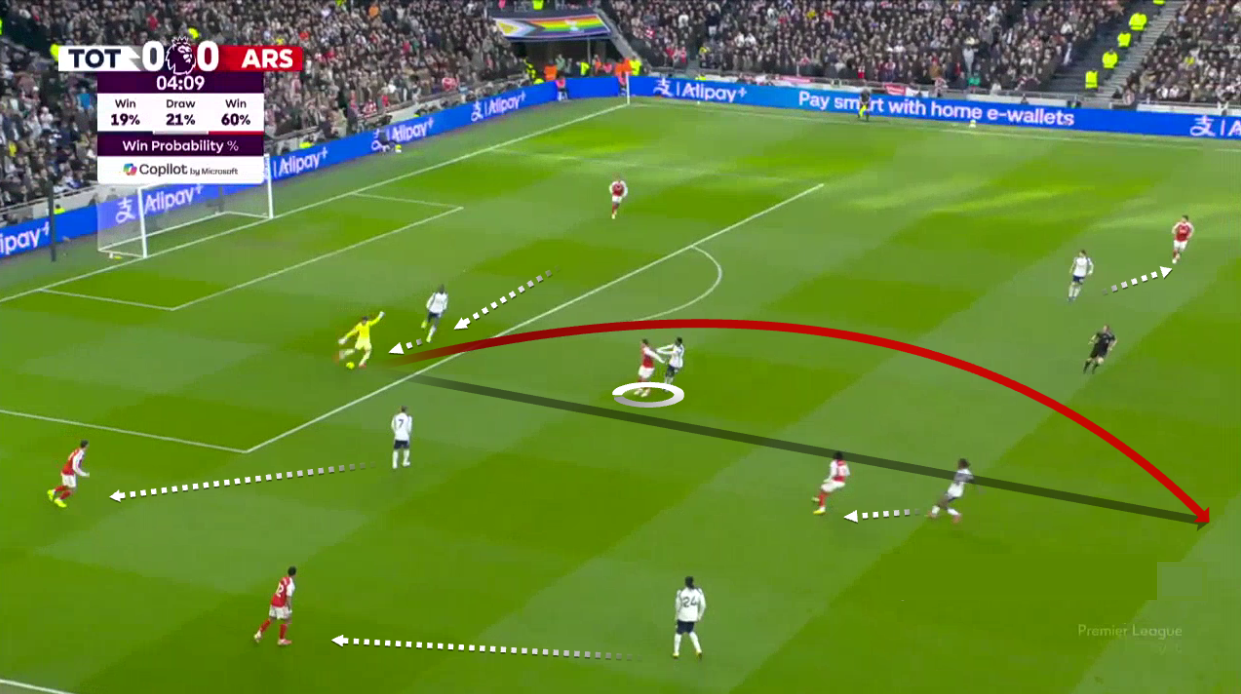
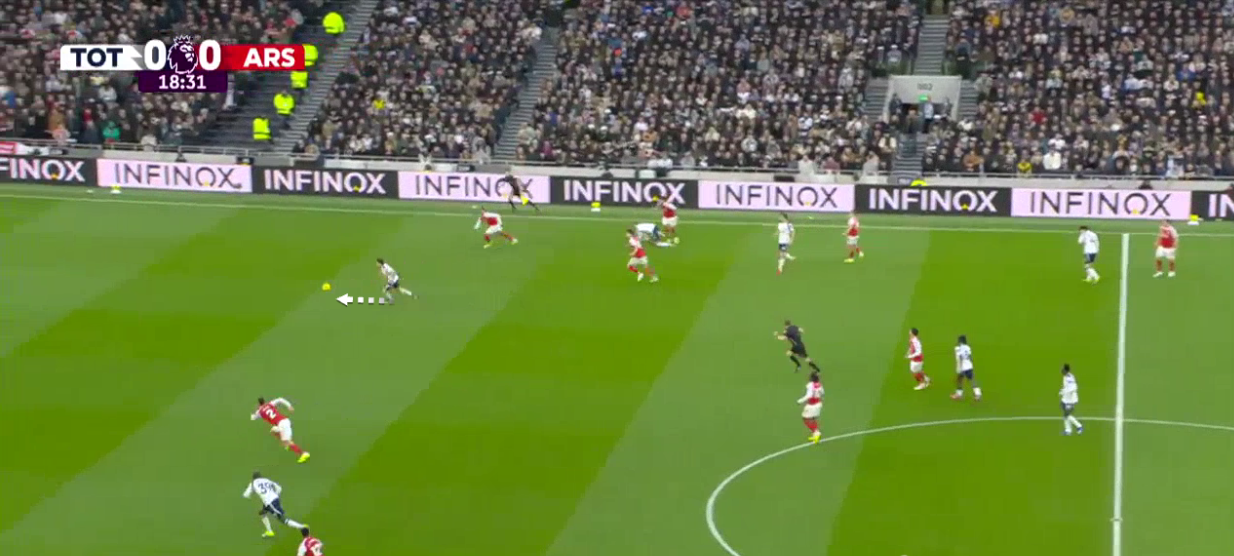
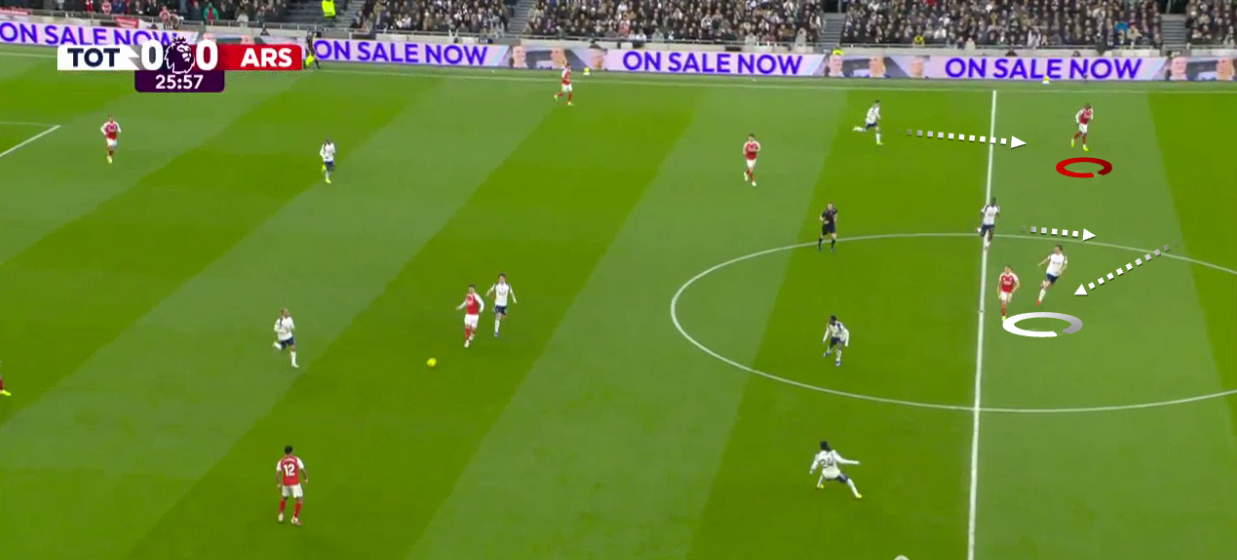
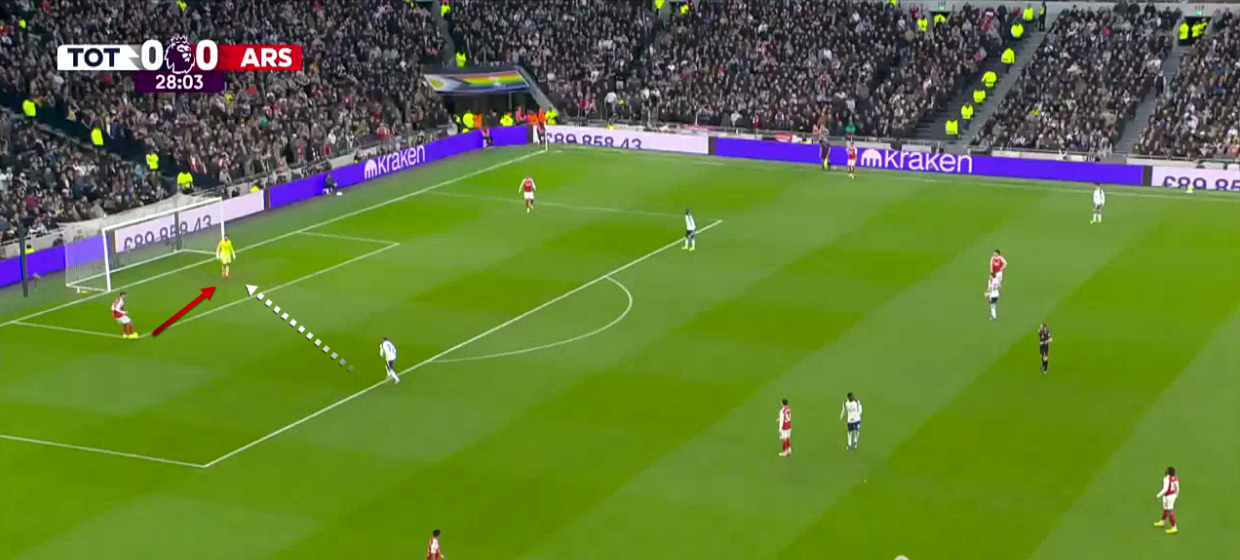
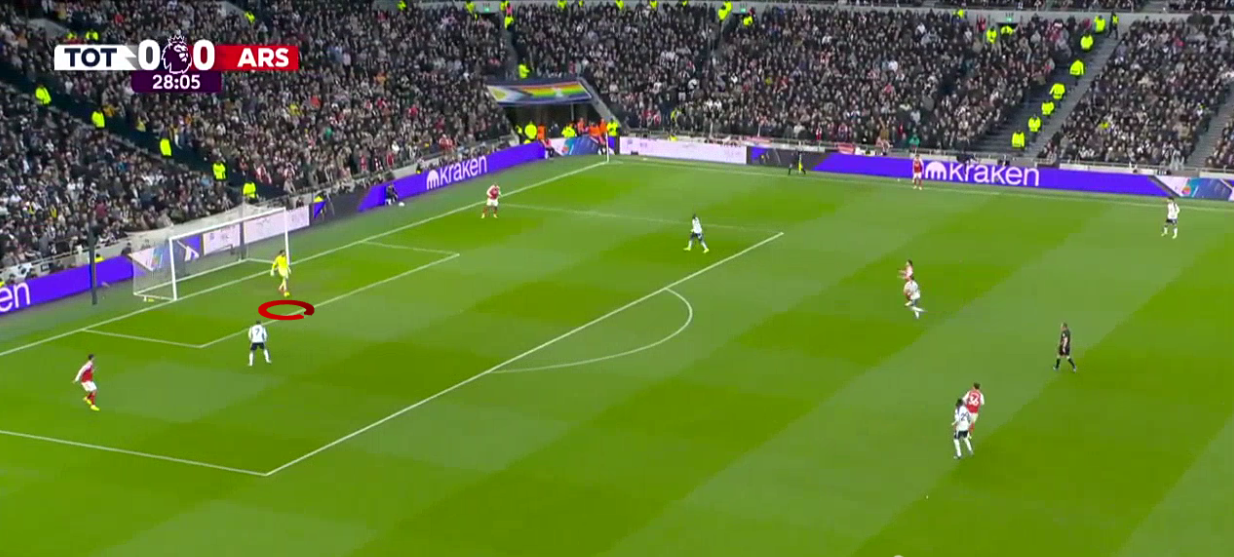
 Even when Arsenal managed to win the second ball, sometimes due to a Tottenham mistake, their next action was often to attack the space behind the defensive line.
In this example, Hincapié attempted a long pass into the space for Saka, who made a run behind Tottenham’s defenders.
The Benefits Of Tottenham Man-Marking Under Igor Tudor
Tottenham’s aggressive man-marking, with each player staying tight to their direct opponent, reduced the risk of miscommunication when switching markers.
Also, it placed significant pressure on Arsenal players in possession, limiting their ability to create separation.

This approach sometimes enabled Tottenham to regain possession and prevent Arsenal from breaking their high press.
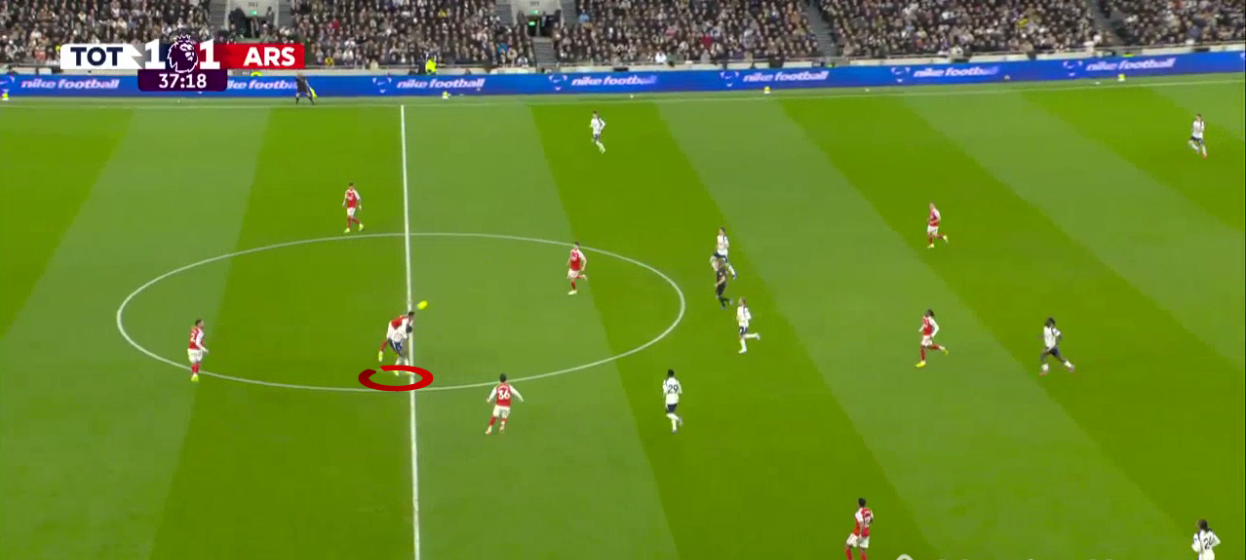
The Domino Effect
Although this aggressive man-marking system appeared straightforward and gave Tottenham’s defenders control, the natural flow of the game could disrupt it, triggering a chain reaction that destabilised the entire structure.
In this instance, the sequence began centrally before the ball reached Raya, who quickly passed to Zubimendi.
Sarr, Zubimendi’s original marker, was out of position.
Gallagher reacted by leaving Rice to press Zubimendi, initiating a chain reaction within Tottenham’s defensive shape.
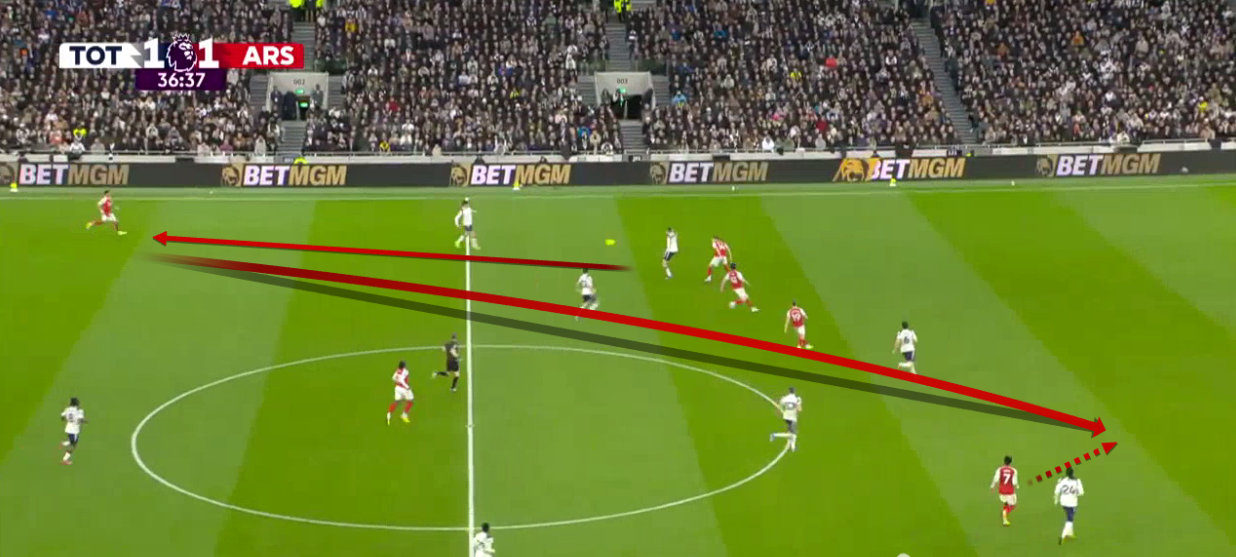
Another factor in disrupting Tottenham’s press was Trossard’s movement from the wing into central areas, drawing his marker, Palhinha, with him.
Bissouma then shifted centrally to cover, leaving Eze free after he moved wide.
With Eze unmarked on the flank, Gray was forced to leave Hincapié to close him down.
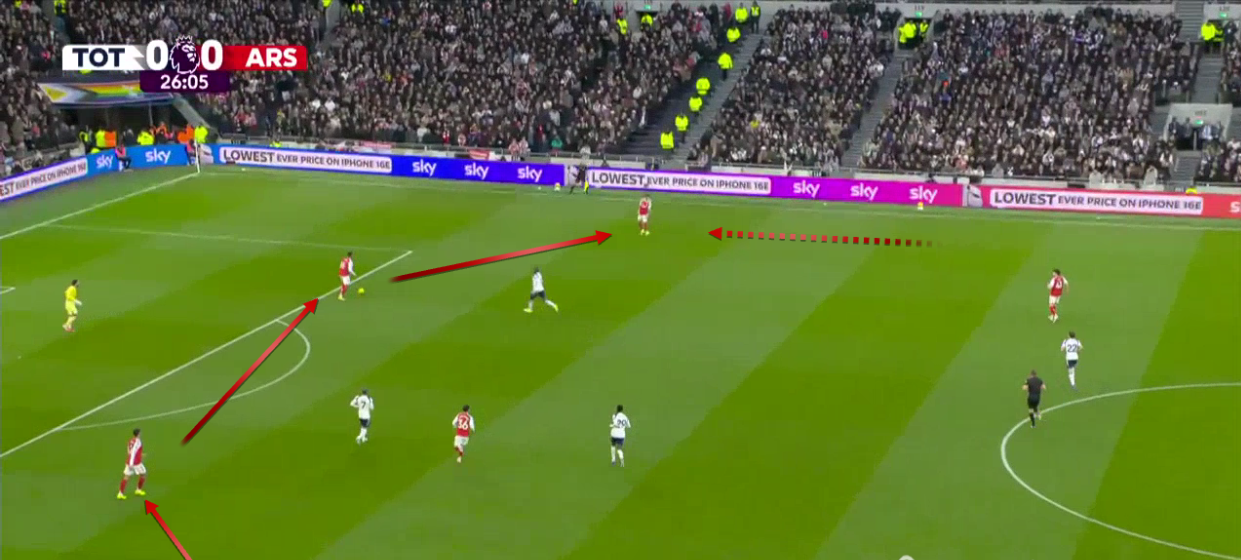
As Arsenal circulated the ball and Hincapié moved deeper, he became the free player available to receive possession.
Hincapié then carried the ball forward.
At the same time, Rice signalled for a pass into the space that had opened due to Palhinha and Gray following Gyökeres and Eze.
Arsenal Goal-Kicks
From goal kicks, Arsenal maintained the same structure against Tottenham’s persistent man-marking press.
Gabriel initiated the sequence by passing to Raya to provide the goalkeeper with multiple options.
However, with every teammate tightly marked and Kolo Muani pressing Raya while shadowing Gabriel, Raya was often forced to replicate his open-play solution and play long towards the front line.
Arsenal, therefore, sought an alternative solution.
In this instance, Saliba made the initial pass to Raya, which attracted Simons, now the closest Tottenham attacker, towards the goalkeeper.
Raya held onto the ball to ensure Simons was fully committed to the press, making it more difficult for him to recover and close Saliba again.

As Simons moved closer, Raya identified the passing angle to find Saliba in space.
This space was created by Timber’s advanced positioning and the vertical movements of Rice and Zubimendi, who pulled their markers away from the zone where Saliba aimed to receive.
In the second half, Solanke replaced Simons and altered the pressing angle, closing the lane from Raya to Saliba.
Arsenal responded with Rice dropping from his higher starting position towards Raya, offering a short passing option that enabled a wall pass to release Saliba.
Following Rice’s pass, Saliba looked to carry the ball forward and advance play.
Tottenham Build-Up Vs Arsenal Pressing
Here, Arsenal face Tottenham’s build-up, as Spurs adopt a 4-1 structure with a man-marking high press.
Tottenham uses Vicario as the fourth player in the first line alongside the three centre-backs, with two positioned outside the box and one inside the six-yard area.
In the second line, Bissouma operates as the single pivot, with Sarr ahead of him, while Gallagher and Simons drop deeper, leaving Kolo Muani alone up front against Gabriel.
Similar to Arsenal, Tottenham attempts to escape the aggressive man-marking press by playing long towards Kolo Muani, aiming for him to lay the ball off to a teammate attacking the second ball or to hold possession and allow Spurs to progress.
In this example, Drăgușin passes to Palhinha, who then delivers a long ball towards Kolo Muani.
Unlike Gyökeres, Kolo Muani occasionally demonstrates strong link-up and hold-up qualities.
In this situation, he lays the ball off to Simons, who attacks the space created by Kolo Muani’s isolated positioning high up the pitch.
Tottenham struggles when forced to rely on Vicario to play the long ball.
In this instance, Vicario attempts a direct pass but concedes possession to Martín Zubimendi.
Even when Tottenham successfully reaches Kolo Muani, whether through a centre-back or Vicario, he frequently finds himself matched against Gabriel.
This duel often favours Arsenal, with Gabriel repeatedly winning possession.
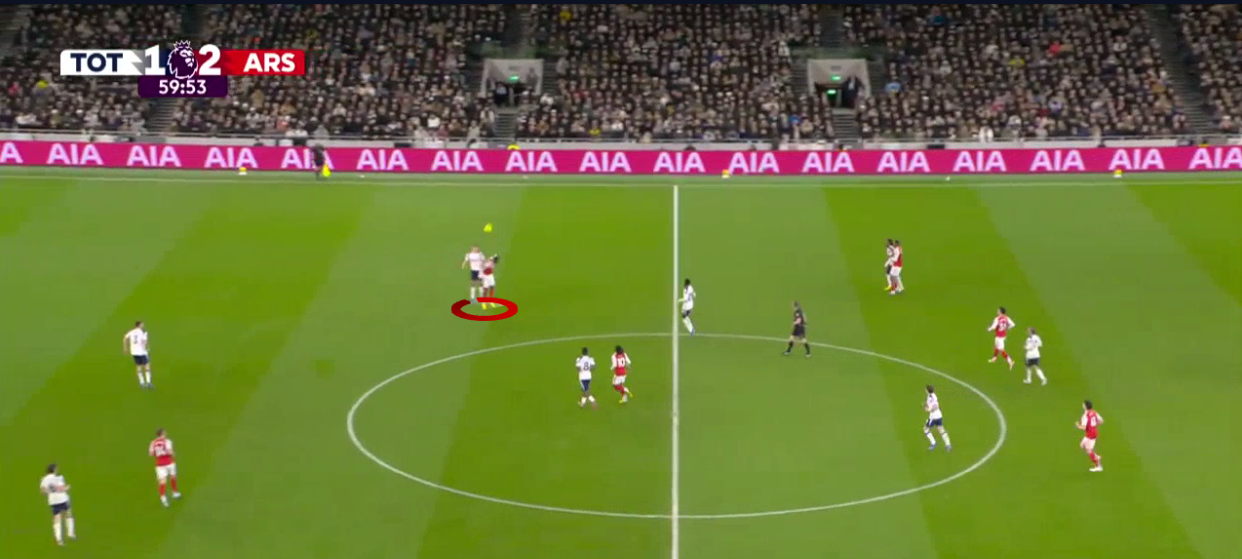
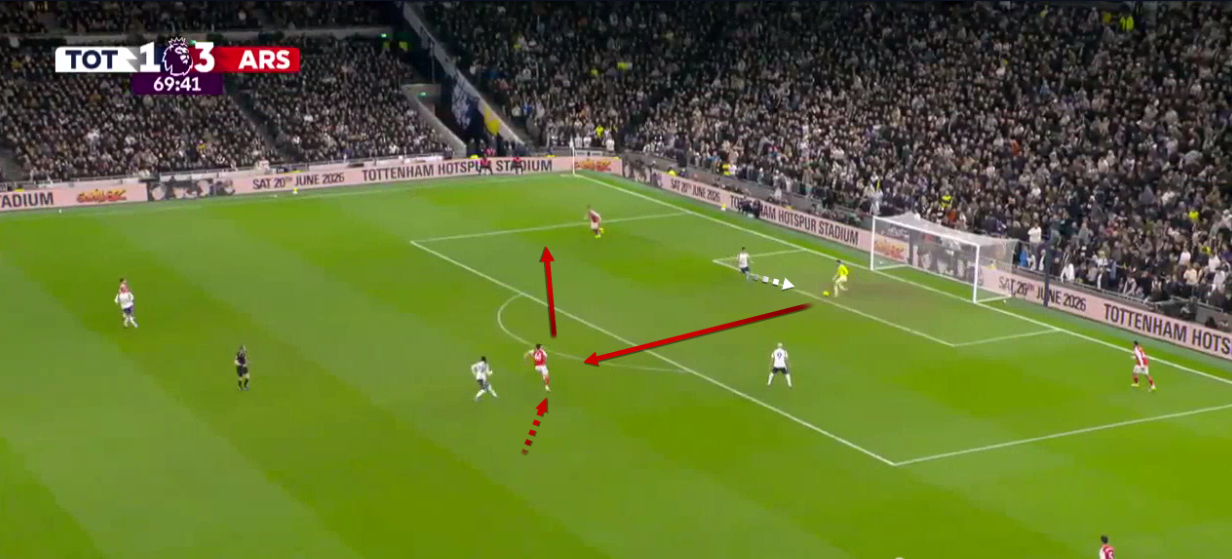
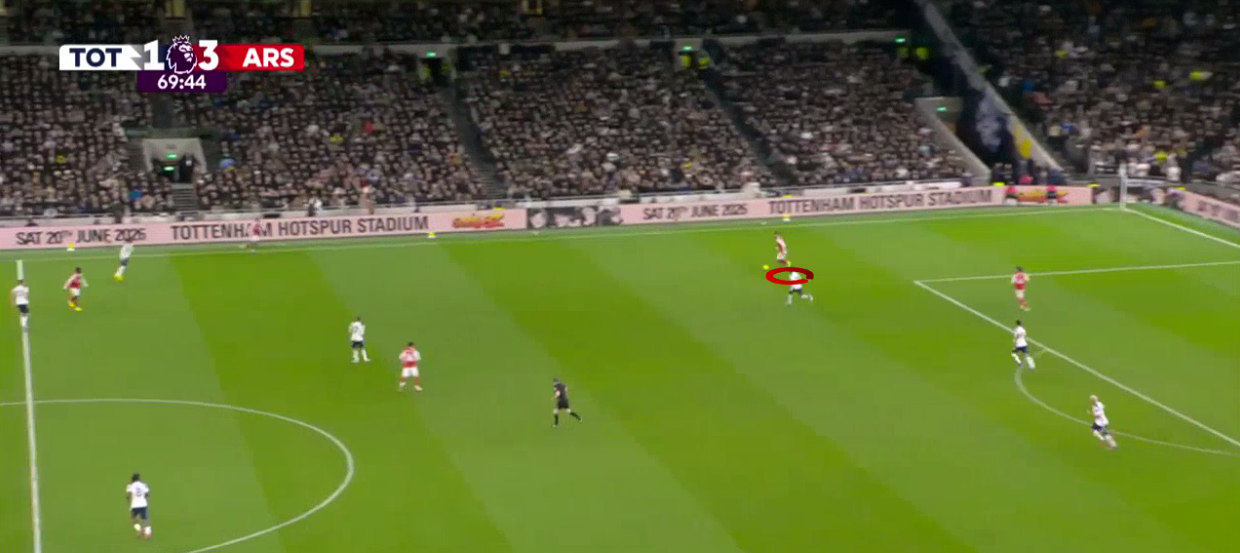
In the second half, Arsenal increased the intensity of their pressing, applying sustained pressure on Tottenham and recovering possession more frequently.
In this example, a long ball from Tottenham travels high into the air under pressure.
Arsenal’s high intensity allowed them to win the second ball and immediately launch a counterattack.
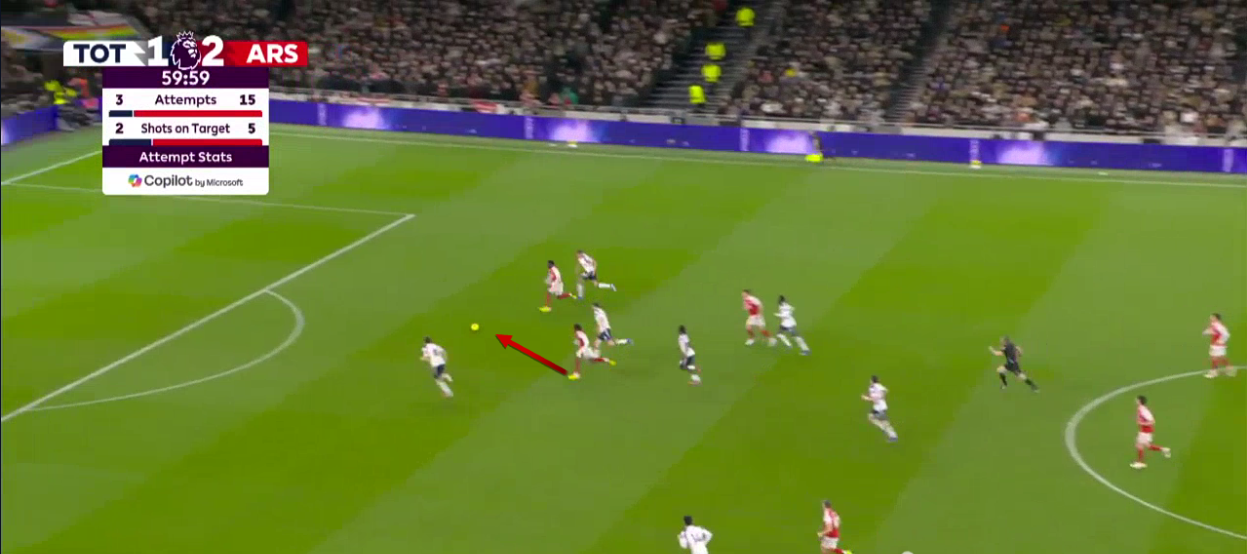
From this sequence, Arsenal went on to score their third goal.
Conclusion
Some may argue that Arsenal did not create a high volume of chances against Tottenham, and to some extent, that assessment holds weight.
Their first goal came from the second phase of a throw-in, while the fourth arrived from a counterattack immediately after regaining possession in Tottenham’s half during a defensive throw-in situation.
However, a closer look at the match shows that Arsenal controlled Tottenham tactically, both in and out of possession.
Defensively, they were extremely solid, limiting Tottenham to an xG of 0.76.
At the same time, debate remains over whether this dominance reflected Arsenal’s strength or Tottenham’s structural issues, particularly during Arsenal’s attacking phases. Despite scoring four goals, Arsenal finished with an xG of 2.07.
The key question now is whether Arsenal can maintain their position at the top for the remainder of the title race.