Manchester City welcomed Chelsea in Gameweek 20 of the 2025/2026 Premier League season.
The affair ended in a 1-1 draw as Tijjani Reijnders’ 42nd-minute strike was equalised by Enzo Fernández at 90’+4.
This was Chelsea’s first outing after head coach Enzo Maresca’s dismissal, which rendered it a crucial fixture to bolster team morale.
With City dominant in terms of possession statistics, they were expected to take control of the game and get the result after dropping points against Sunderland.
With another two points dropped, their gap to the top spot keeps on increasing as Arsenal went six points clear after beating Bournemouth.
Through this tactical analysis, we focus on the positives in Man City’s play and how Chelsea managed to hold them to a draw.
Manchester City Vs Chelsea Lineups & Formations
Let us look at how Pep Guardiola and Calum McFarlane fielded their squads.

The hosts, Manchester City, played in a 4-1-4-1 formation.
Gianluigi Donnarumma started in goal, behind a back four of Matheus Nunes (right-back), Rúben Dias (right centre-back), Joško Gvardiol (left centre-back), and Nico O’Reilly (left-back).
Dias and Gvardiol were replaced by Nathan Aké (81’) and Abdukodir Khusanov (51’).
Rodri played as the pivot.
Skipper Bernardo Silva, Rayan Cherki, Phil Foden, and Tijjani Reijnders played as the attacking midfielders.
Jérémy Doku came on for the latter at the 70th minute.
Erling Haaland played as the lone striker.
The visitors, Chelsea, played in a 4-2-3-1 formation.
Filip Jørgensen started between the sticks.
The back four were Josh Acheampong (right-back), Trevoh Chalobah (right centre-back), Benoît Badiashile (left centre-back), and Malo Gusto (left-back).
Jorrel Hato came on for Acheampong at the 62nd minute.
Skipper Reece James and Enzo Fernández played as the double pivot.
Estêvão (right) and Pedro Neto (left) played as the wingers, with Cole Palmer playing through the centre, right behind striker João Pedro.
Andrey Santos replaced Estêvão after 46 minutes.
João Pedro was taken off for Liam Delap at the 62nd minute.
Manchester City Attacking Tactics
Guardiola’s side took control of the game from the get-go, dominating possession.
They kept the ball in Chelsea’s half for a significant part of the first half, having 68% possession during the first period.
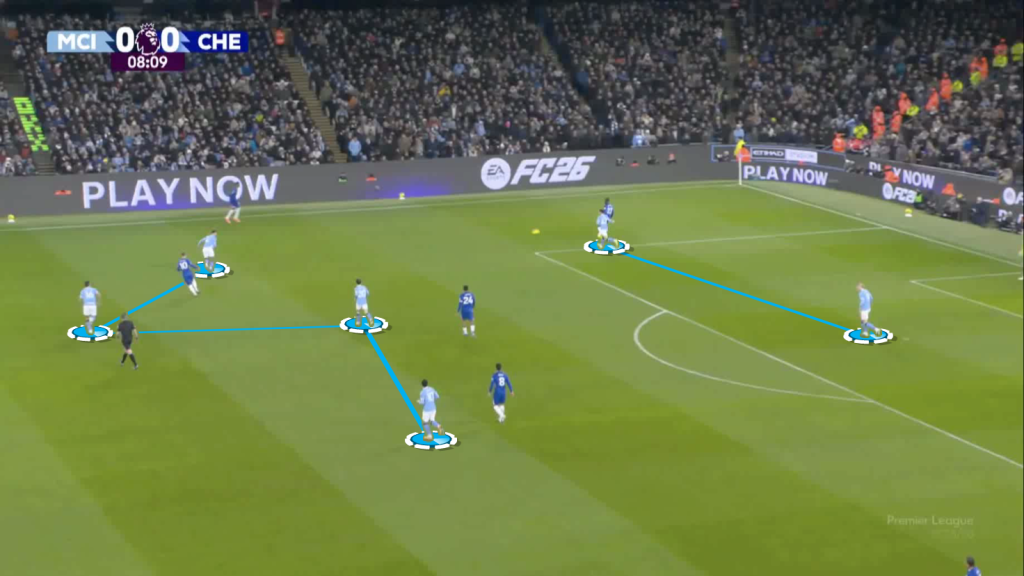
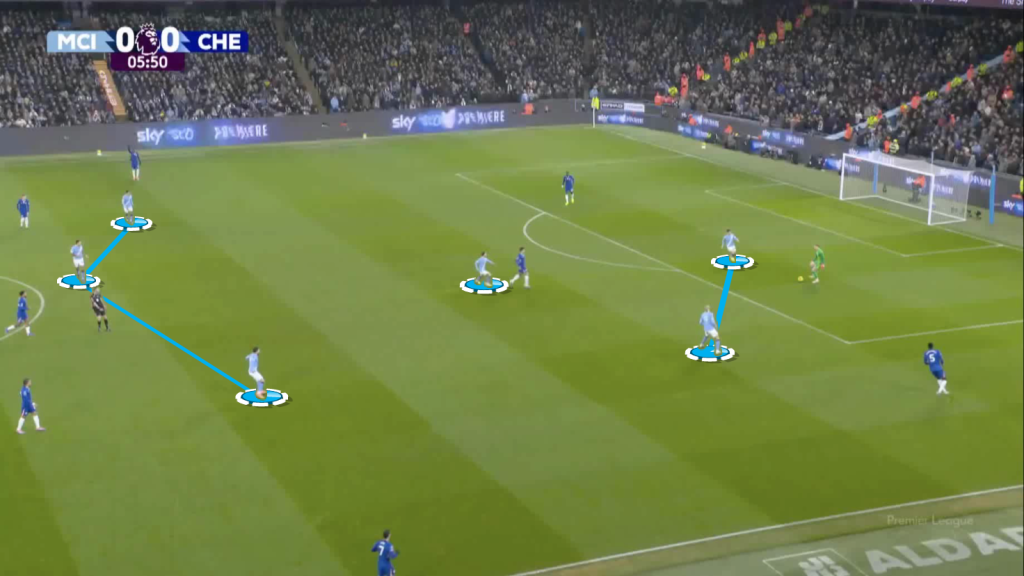
Build-Up Positioning
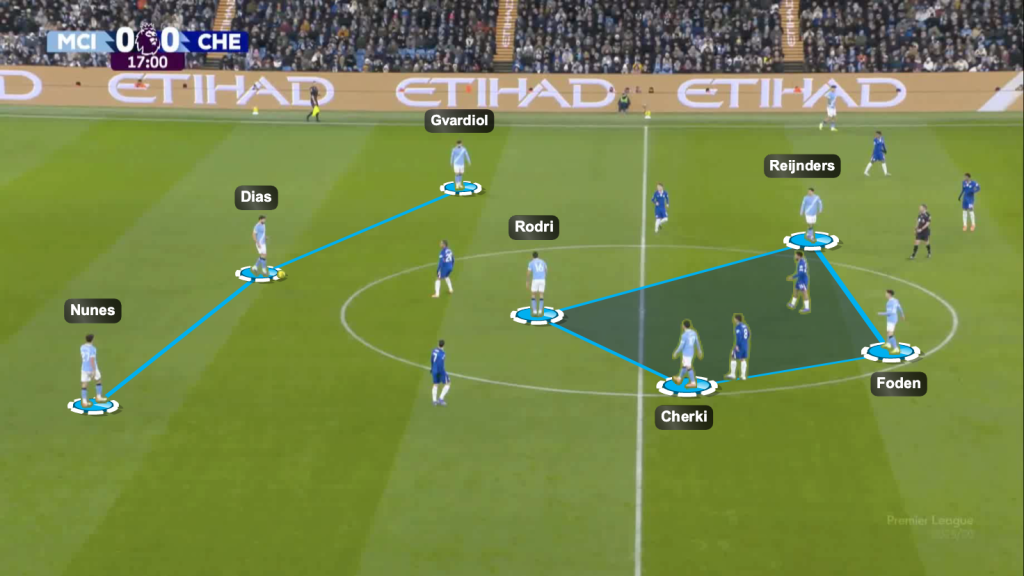
Although they played with a back four, their shape in possession had a back three.
Nunes stayed deep as the third centre-back.
Rodri frequently dropped outside the opponent’s structure to help with build-up.
When he stayed inside the structure, a diamond was visible in the midfield third.
Reijnders, who was deployed as the left-winger, tucked into the half-space.
Meanwhile, O’Reilly hugged the touchline on the left side.
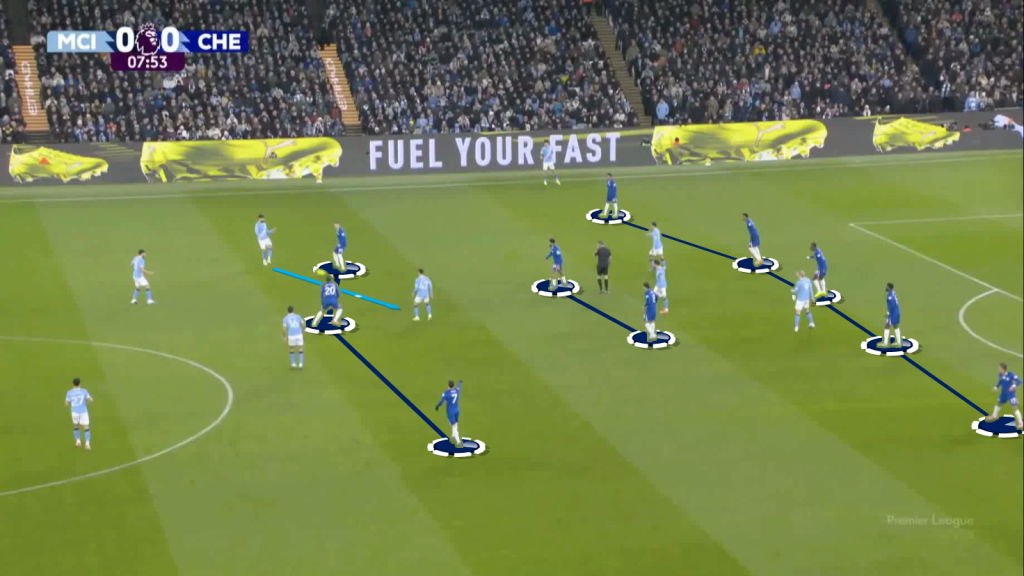
Silva provided width on the right, while Cherki and Foden operated in the central zone and the half-space.
Positioning In Mid-Third
Of the five starting midfielders, it was clear that Rodri played the deepest role, while Reijnders operated on the left, predominantly in the half-space.
Foden operated in the central channel and the half-spaces.
Silva was seen mostly in the wide channel on the right.
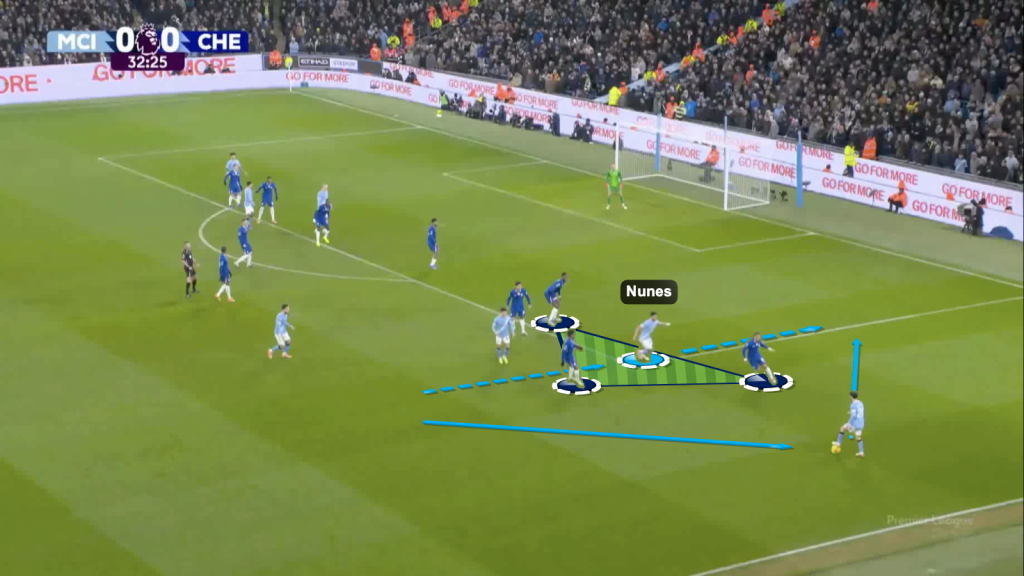
However, Cherki was seen operating the central zone, right half-space, and the right wide channel.
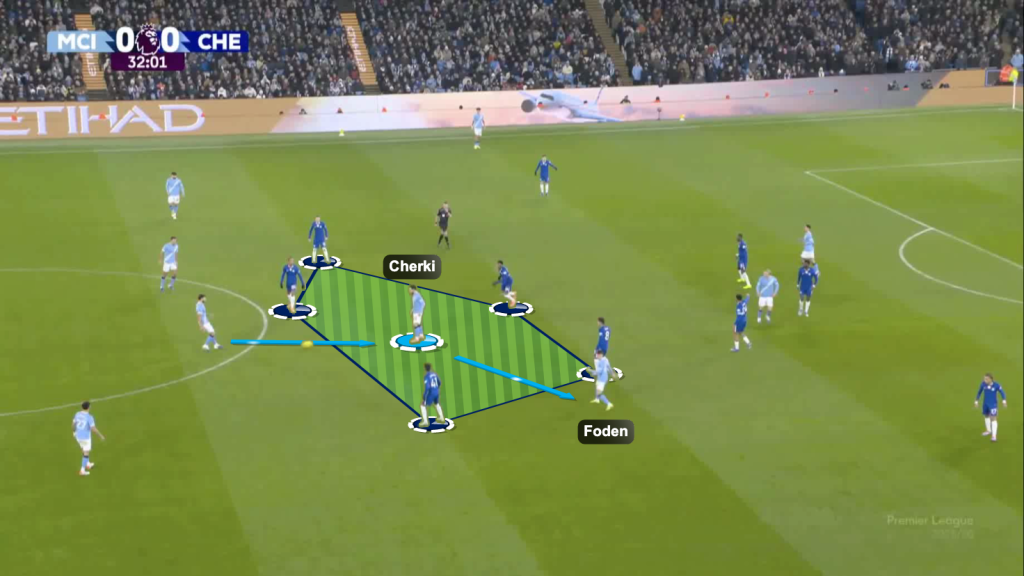
The Frenchman also received inside the opponent’s structure, helping execute in-to-out passes.
In this example, he receives in the central zone and finds Foden, who has positioned himself in the right half-space.
In continuation, Foden plays it to Silva, who is positioned in the wide channel, providing width.
We can see Cherki (central zone), Foden (half-space), and Silva (wide channel).
Rodri had 96 touches on the ball, the highest on the pitch.
It was possible because of his availability during the build-up.
However, it was not always possible for the centre-backs to find him.
This is when third-man passes came into play.
Reijnders drops to play a bounce pass to Rodri, who is facing the play.
In this way, the Spaniard can open up and make a switch of play.
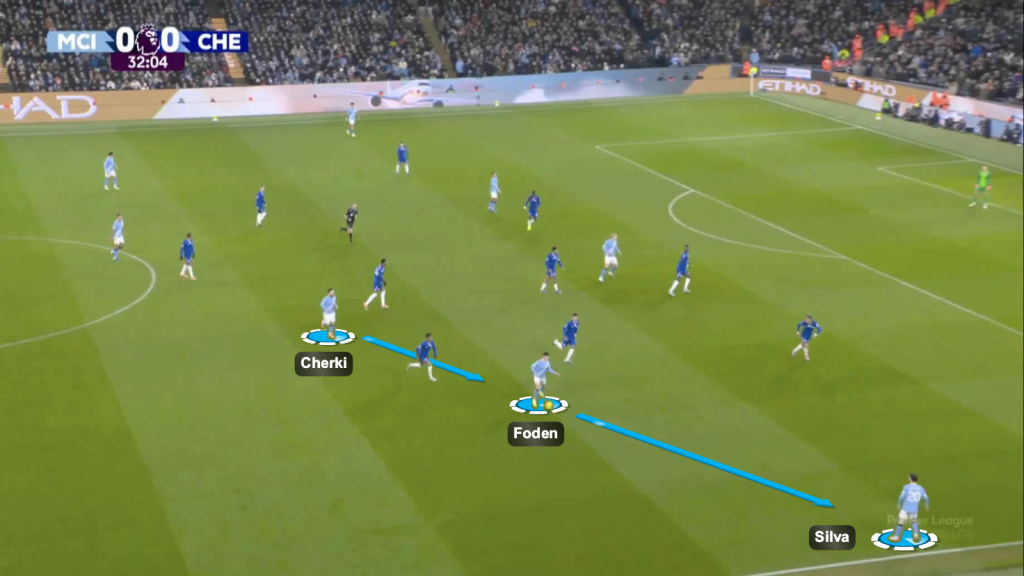
Attacking Third Movements
Man City attempted 15 crosses, five of which reached the intended targets.
This meant that a significant number of attacking third movements were made to execute crosses.
 Nunes finds Silva in the wide channel and moves vertically in the half-space.
With a well-timed underlapping run, the Portuguese receives in the attacking third to cross.
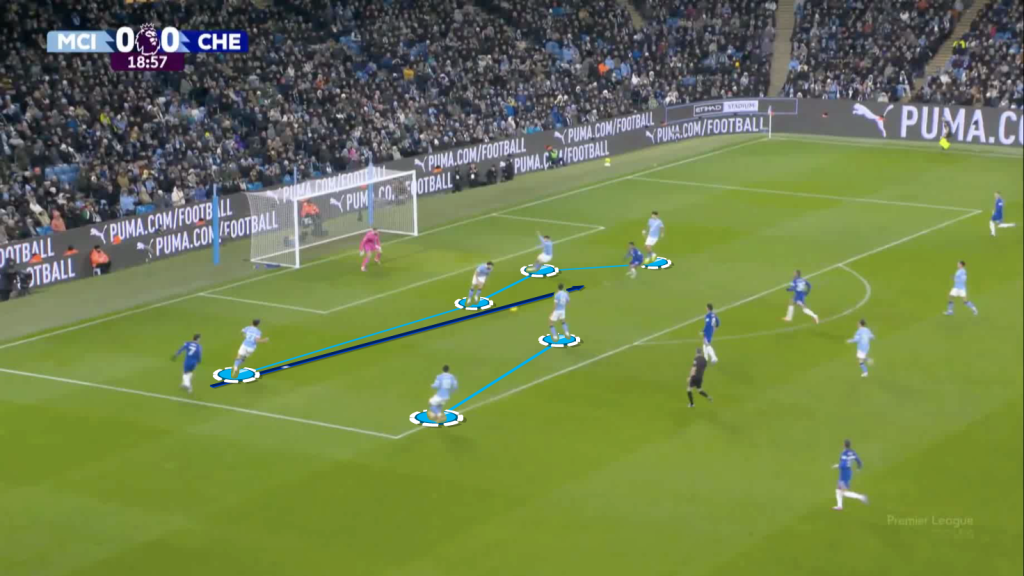
Man City made 57 final third entries, a majority of which were made possible by Reijnders’ movement.
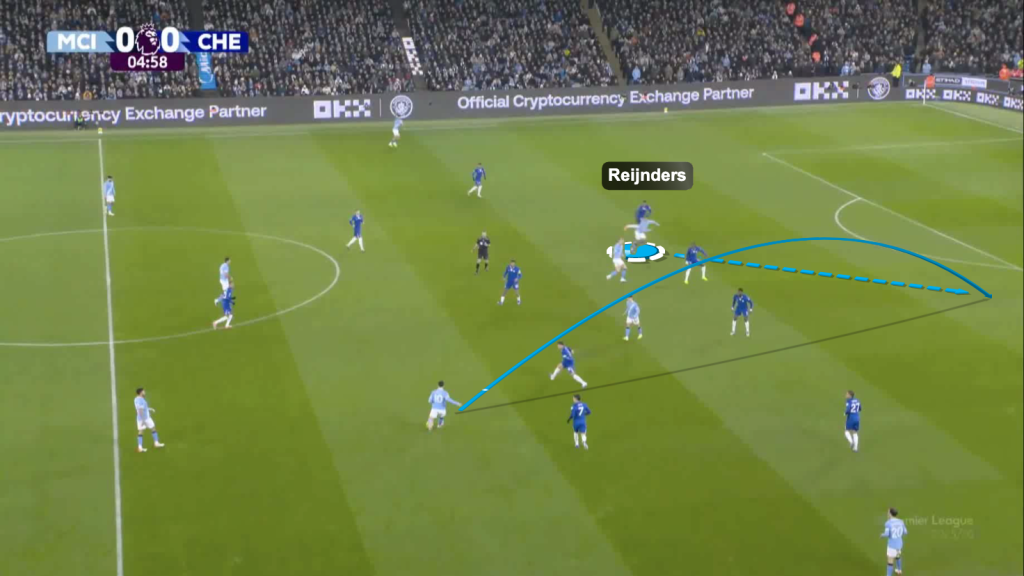
The Dutchman makes a diagonal blind-side run in-behind to receive a through pass from Cherki.
This was an effective way of stretching Chelsea’s back line deep, which ended up opening small pockets of space in the mid-third.
Manchester City also made use of these pockets.
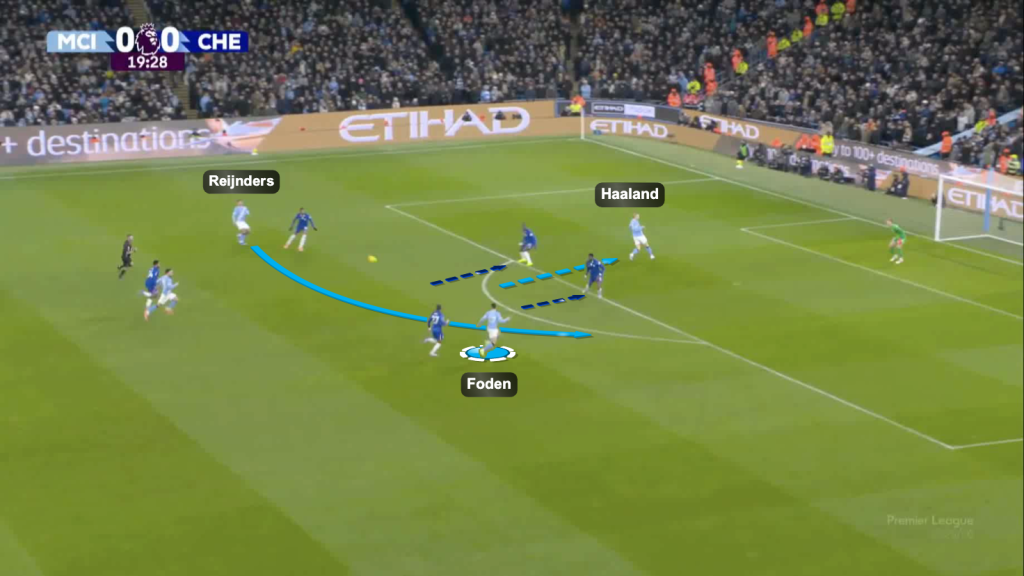
Reijnders drops outside the structure as Rodri stays inside.
As the Dutchman bounces a pass back to the source, dragging a Chelsea centre-back, he immediately starts making the run in-behind.
Man City executes a third-man pass through Rodri.
The opening goal also came from Reijnders running into the attacking third.
Haaland makes a run in-behind, dragging the opponent centre-backs.
Cherki’s intended pass to the striker is intercepted.
However, Reijnders, who is also on the move from a good starting position, picks up the second ball.
He enters the penalty area, gets the ball to his weak foot, and slots it at the near post.
Reijnders was also involved in setting up his teammates in the attacking third.
Man City are on a counterattack when Haaland drags the opponent centre-backs with his movement.
This opens the passing lane to Foden.
Reijnders plays a pass into the Englishman’s path.
This action leads to a shot that misses the post by a few inches.
Man City capitalised on a few attacking transition moments during the first half.
Here, they win the ball in the opponent’s half; Rodri finds Haaland in space.
The Norwegian baits the space on the outside to bring the ball on his stronger foot for a shot; he is rather unfortunate in the end to hit the post.
Manchester City Defending Tactics
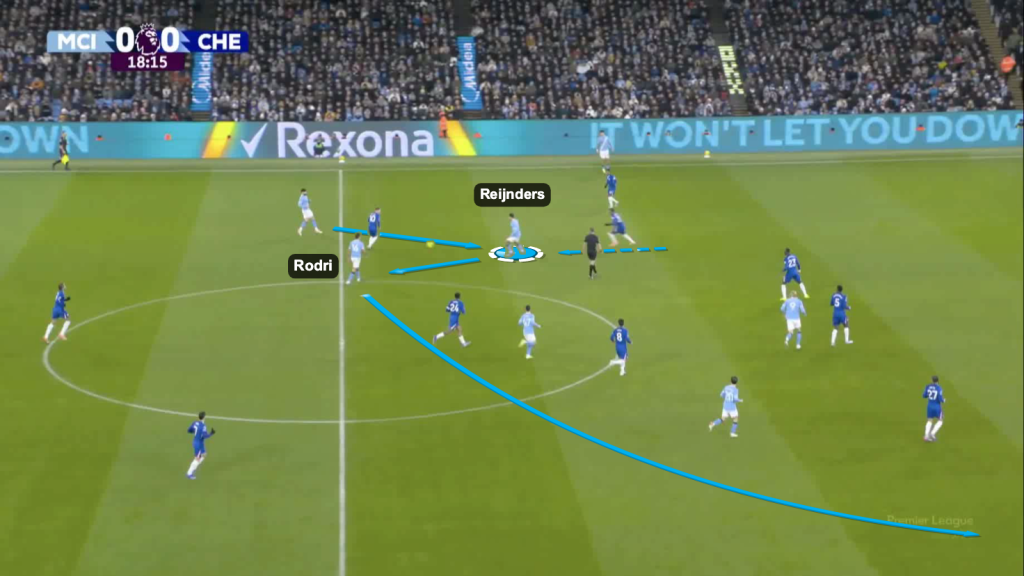
Guardiola’s side pressed high in a 4-4-2 shape.
Reijnders joins Haaland to make the first line of press; meanwhile, Rodri joins in to make up the second line, following his direct opponent.
In situations where Chelsea’s pivot dropped deeper, one of the Man City players followed him.
This altered the pressing shape slightly.
Man City pressing in a 4-3-1-2 shape.
Chelsea Attacking Tactics
Towards the end of the second half, Man City’s press lacked intensity, which made it simpler for Chelsea to play through the first line of pressure.
Hato, who came on as a left-back, inverts to help execute and in-to-out pass in the build-up.
Upon the ball reaching the wide area, the visitors progress into the midfield third.
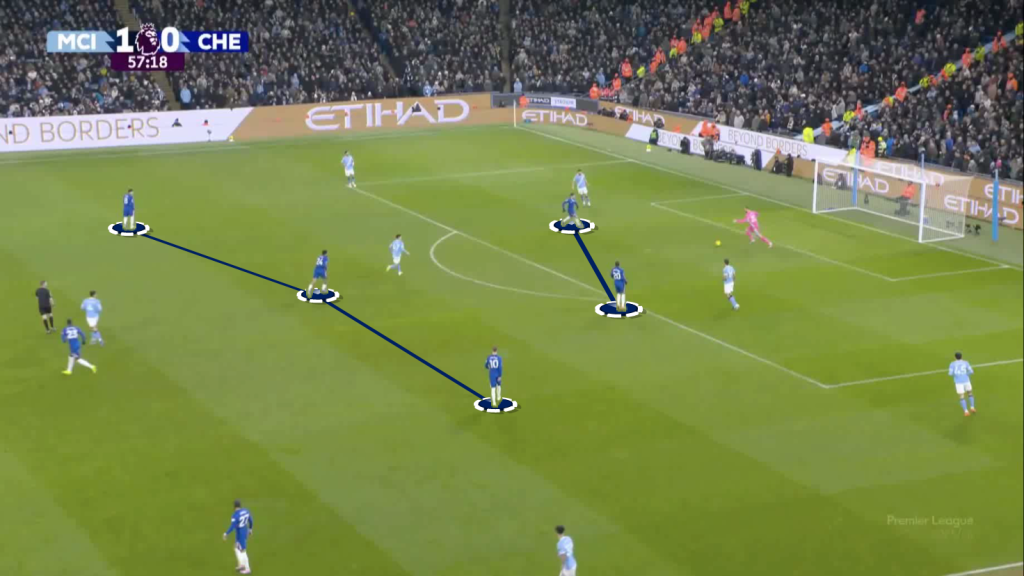
Chelsea’s attacking transition moments caused Man City distress every once in a while.
![]()
Man City’s back three are the only ones that recover from their rest defence starting positions.
Chelsea capitalise and hit them with a 4-v-3 counterattack.
![]()
The move ends up in Man City’s penalty area, where Neto is on the receiving end of a cutback.
The Portuguese misses the target on this occasion.
Another situation of Chelsea exploiting space in front of Man City’s back line with a low cross.
When in the attacking third, Chelsea looked for opportunities to get their strikers involved.
This remained the case when Delap came on.
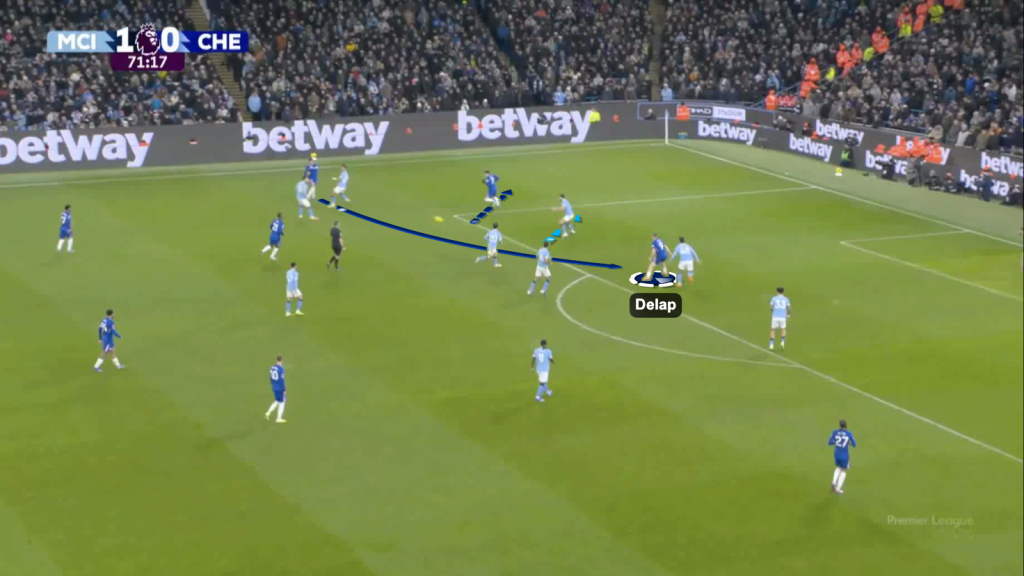
Enzo Fernández gets on the ball in the wide area; Neto makes an underlapping run, which drags a Man City defender.
This opens the passing lane to Delap.
The Englishman stays pinning his direct opponent.
Once the pass is played into him, he takes a touch into space and executes a shot from a narrow angle.
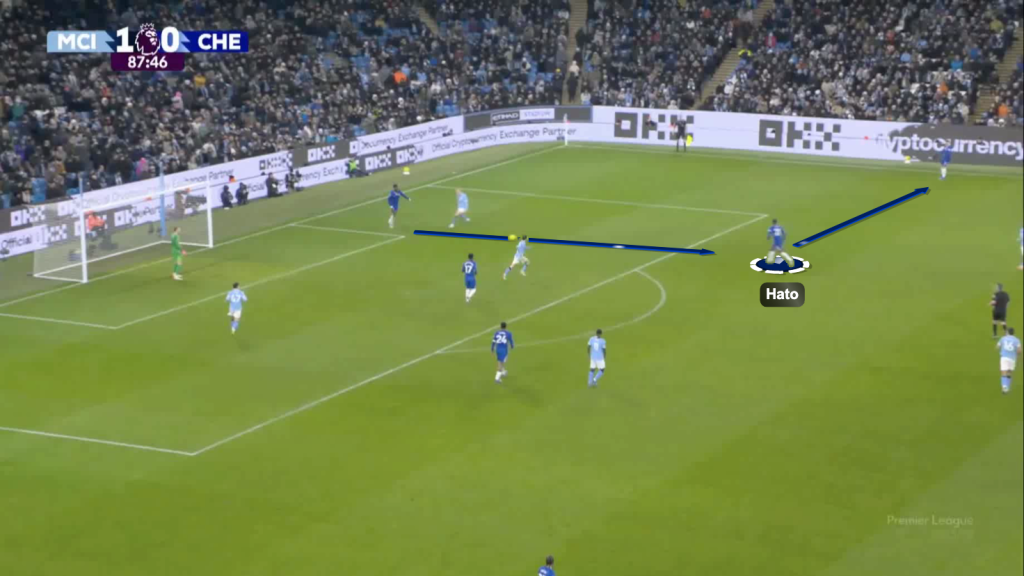
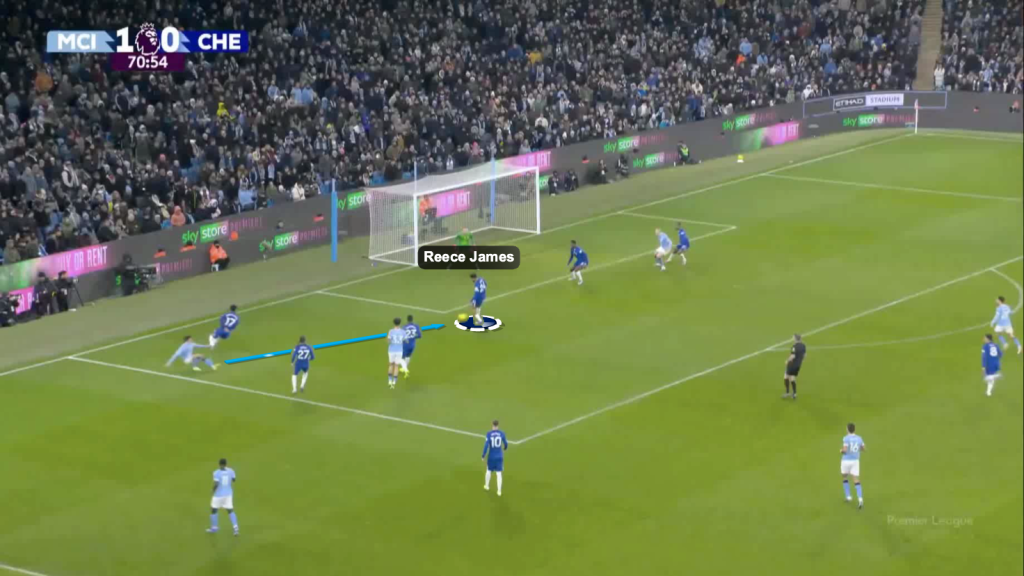
The equaliser from Chelsea was a testament to Man City leaving spaces unattended in the dying stages of the game.
As Reece James shifts play out wide to Gusto, there is plenty of space behind O’Reilly, as there are no covering City teammates in the vicinity.
The Frenchman exploits this by taking a big touch past the City left-back and playing a low cross, which reaches Enzo Fernández for a tap-in.
Chelsea Defending Tactics
For the most part, Chelsea were seen defending in a mid-to-low block.
 This was especially the case in the first half: Chelsea defended in a 5-2-3 shape.
With Man City committing numbers upfront, Chelsea were forced to defend with a back five, which required one of the wingers to drop into the back line, according to the situation.
City bypassed their first line with ease.
This was due to a disconnect between the first two lines of pressure and a lack of second-pressing actions.
Chelsea made some crucial interceptions from Man City’s attack.
Badiashile showcased his intelligent defending prowess: he cut out a low cross aimed into Haaland’s path, which could have been a sure goal.
This was possible because he had a good starting position.
This interception kept Chelsea in the game.
Reece James made an interception from a cutback, which could have landed in a lot of space in front of the Chelsea backline.
Chelsea made it a point to press high in favourable situations in the second half.
This forced City to play long, and Chelsea won the first contact.
Chelsea pressed with a front two and a second line of three.
The front two pressed the centre-backs; out of the three in the second line, the player in the centre stayed close to the City pivot, and the other two were ready to press in the wide area.
Conclusion
Manchester City dominated possession, especially during the first half.
They created danger through movements into the attacking third.
However, they were only able to manage one goal.
Defensively, they lacked effectiveness in negative transition, but executed the high press well.
However, the intensity dropped towards the end.
Chelsea started the game on the back foot, struggling to keep possession.
They defended deep and attempted to maintain a compact shape by dropping one of the wingers into the backline.
The second half showed an improvement in possession statistics and chance creation.
They played through City’s press, hit them on the transition, and had more frequent attempts.
The equaliser was a result of the attacking momentum built over a period of time.