Arsenal continued their winning streak by defeating Aston Villa in Gameweek 19 of the 2025/2026 Premier League season.
With this victory at the Emirates Stadium, the Gunners have held onto top spot in the table.
From Aston Villa’s perspective, this result brought their winning run to an end.
However, their third-place position in the league table remained secure, with a seven-point gap over Liverpool before this gameweek.
Aston Villa looked solid in the first half and showed that they were capable of competing in the match.
There were clear differences between the first and second halves, turning the contest into a tactical battle, particularly in Arsenal’s high press and build-up play.
This Arsenal vs Aston Villa tactical analysis will break down some of Mikel Arteta’s tactical ideas and the key differences between the two halves that secured this important win for Arsenal.
Arsenal Vs Aston Villa Lineups & Formations

Arsenal lined up with a 4-3-3 formation.
David Raya started in goal.
Arsenal’s back four was William Saliba and Gabriel Magalhães as right and left centre-backs, with Jurriën Timber and Piero Hincapié playing as right and left full-backs.
Martín Zubimendi started as the six, with Mikel Merino and Martin Ødegaard playing as eights.
Bukayo Saka was Arsenal’s right winger with Leandro Trossard on the left, and Viktor Gyökeres up front.
Mikel Arteta made five substitutions in the match.
Myles Lewis-Skelly and Gabriel Jesus for Gabriel and Gyökeres at the 77th minute.
Unai Emery set his team up in a 4-2-3-1 shape that could flatten into a 4-4-2 when required.
Emiliano Martínez started between the sticks.
Villa’s back four was Ezri Konsa and Victor Lindelöf at right and left centre-back, with Lamare Bogarde and Lucas Digne playing as right and left full-backs.
Their two midfielders were Youri Tielemans and Amadou Onana, while Morgan Rogers played just ahead as a second striker or a number ten, depending on the phase.
Jadon Sancho was Villa’s right winger with Emiliano Buendía on the left and Ollie Watkins up front.
Emery made five substitutions in the match.
John McGinn for Onana at the 45th minute.
Donyell Malen and Andrés García for Sancho and Buendía at the 61st
Arsenal High Press Vs Aston Villa Build-Up
Arsenal received a major boost with Gabriel’s return to the squad, restoring a crucial partnership in the defensive line alongside Saliba.
This reunion strengthened Arsenal’s defensive structure and provided added stability at the back.
However, Arsenal were without Declan Rice for the first time this season before the game.
His absence had a noticeable impact on Arsenal’s plans, both in possession and out of possession.
Let’s first set the scene and see both teams’ plans in this phase.
In their build-up, Aston Villa set up in a 4-2 shape.
There are four players in the first line, with Martínez acting as the fifth.
The two centre-backs position themselves inside the box, close to the edge of the six-yard box, while both full-backs stay wide, near the touchline, in deep positions.
Ahead of them, the second line consists of two sixes, who can be positioned at different heights and distances from each other.
On the other side, Arsenal uses two variations of their high press.
One scheme is mainly applied against Aston Villa’s goal-kicks, while the other is used in open play.
In both cases, Arsenal aim to apply very aggressive pressure on Villa’s build-up.
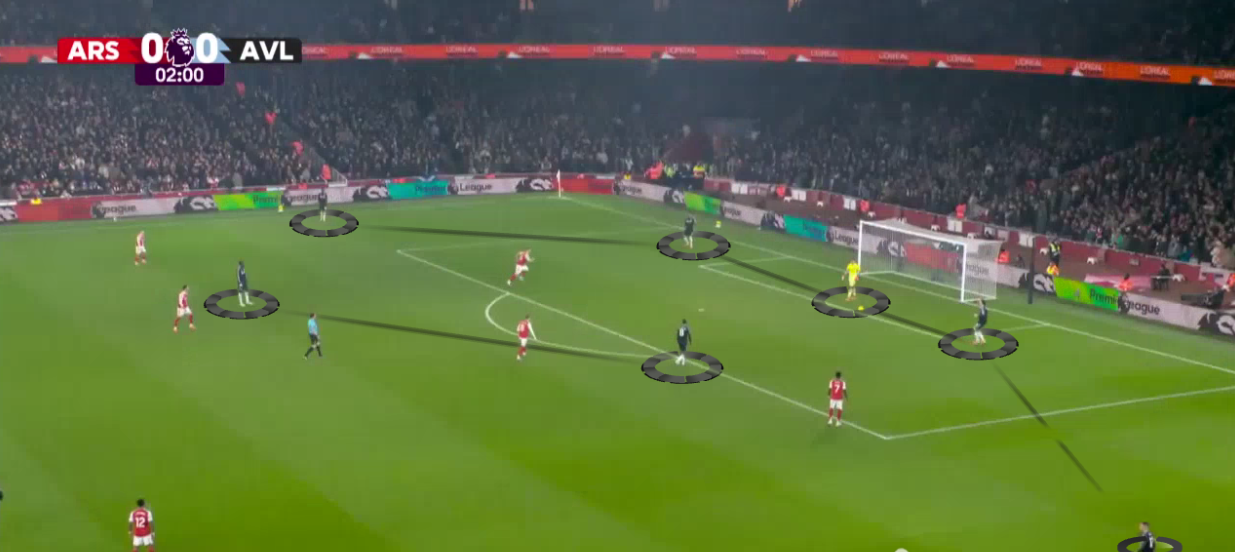
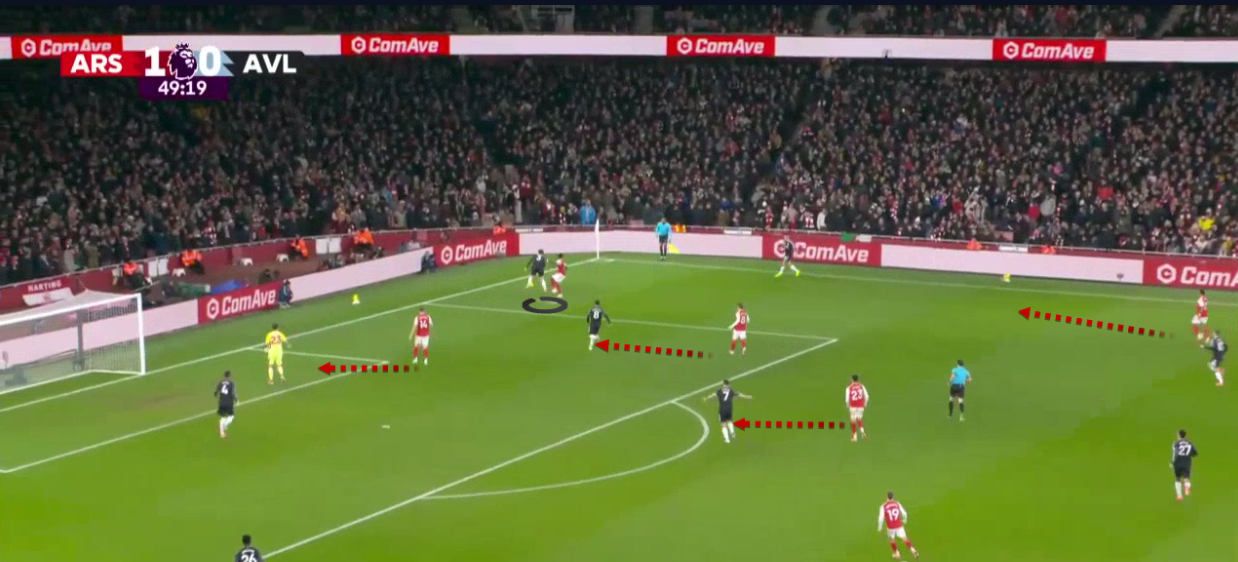
For example, from a goal-kick, Gyökeres starts at the edge of the box on the left side.
After Lindelöf plays the ball to Martínez, Gyökeres enters the box to press the goalkeeper while closing the passing lane to Konsa.
Ødegaard positions himself near the box with one of the sixes, Merino marks the other, and Trossard takes care of the right full-back, Bogarde.
Saka is ready to press the left centre-back, Lindelöf, while Timber prepares to step out and press the left full-back, Digne, if he receives the ball.
In open play, the ball is more dynamic, and roles can change depending on the situation.
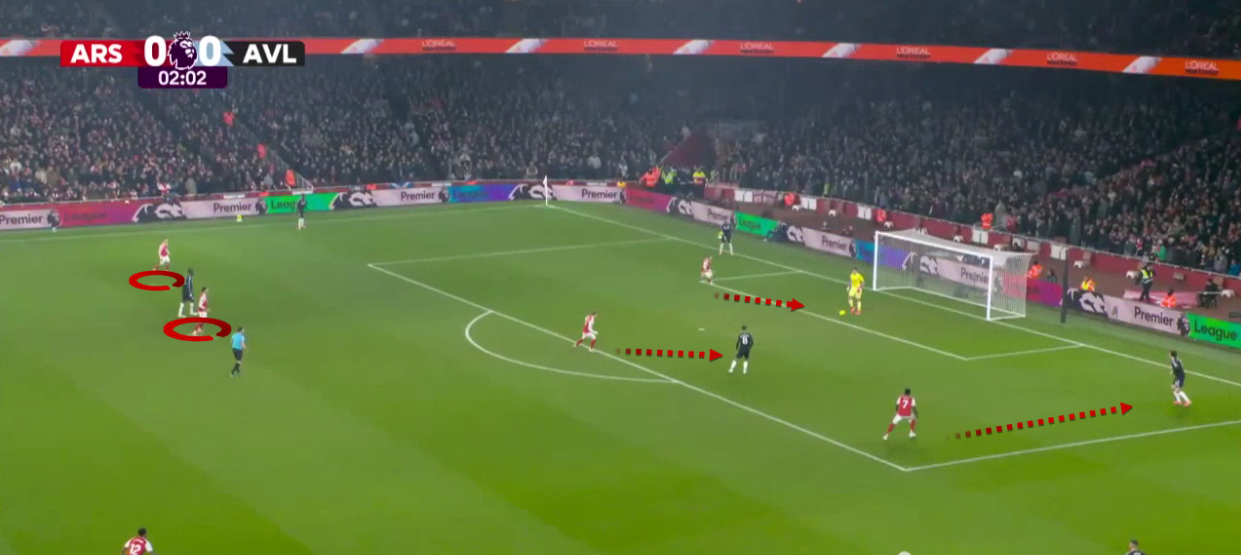
In this example, when Arsenal initiates their high press, Saka is not positioned to press his usual target, Lindelöf.
Because Arsenal wants to maintain aggressive pressure on all Aston Villa players, Ødegaard leaves the six behind him and steps out to press Lindelöf after Martínez’s pass.
As a result, Saka stays with Digne, while Merino positions himself between both Aston Villa sixes.
Lindelöf passes the ball to Digne, and Saka immediately presses him as Digne plays a pass into the near six, Tielemans.
Merino switches from marking Onana to pressing Tielemans and applies intense pressure, which results in Arsenal winning the ball.
Saka then receives the pass from Merino.
Arsenal Problems In Open Play Pressing Vs Aston Villa Usage Of Morgan Rogers
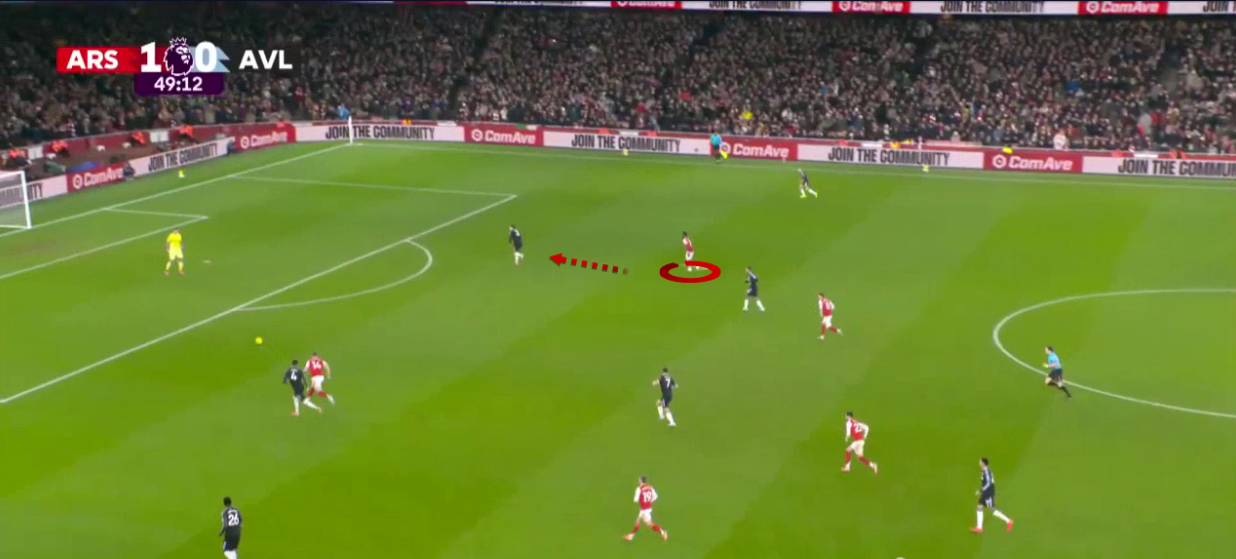
Although Arsenal often manages these dynamic situations well, switching roles and handing over markers can sometimes lead to a loss of control.
Aston Villa try to exploit this, particularly through Rogers.
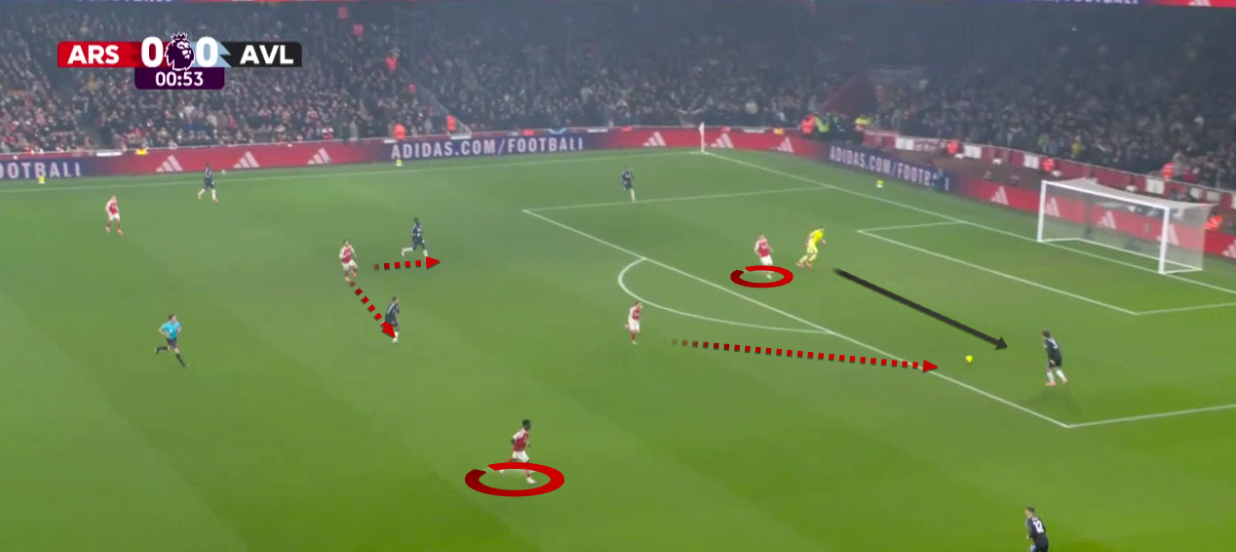
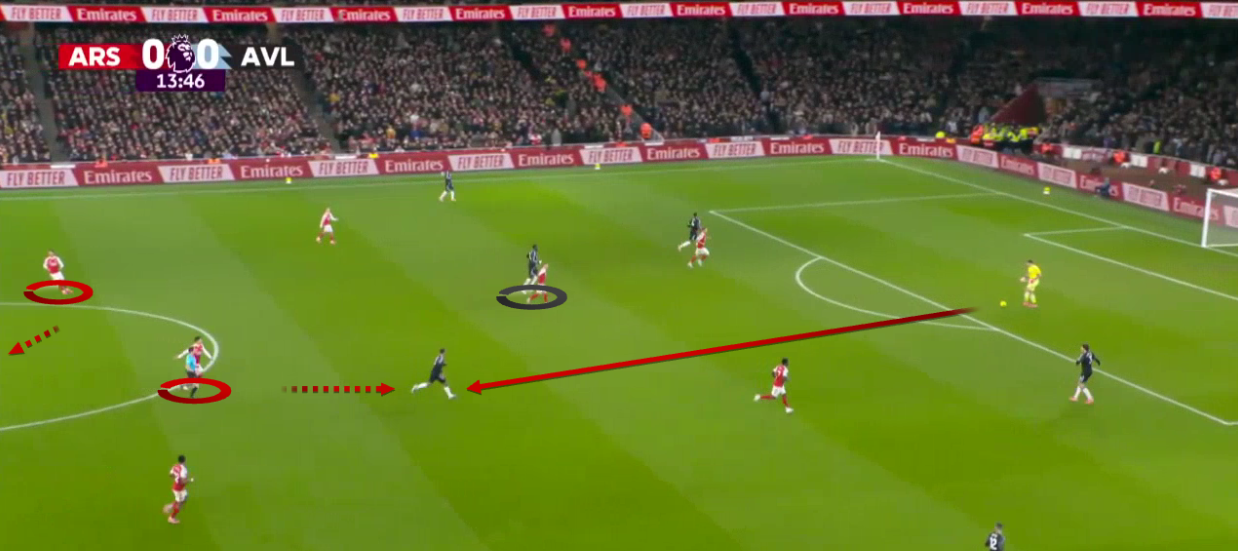
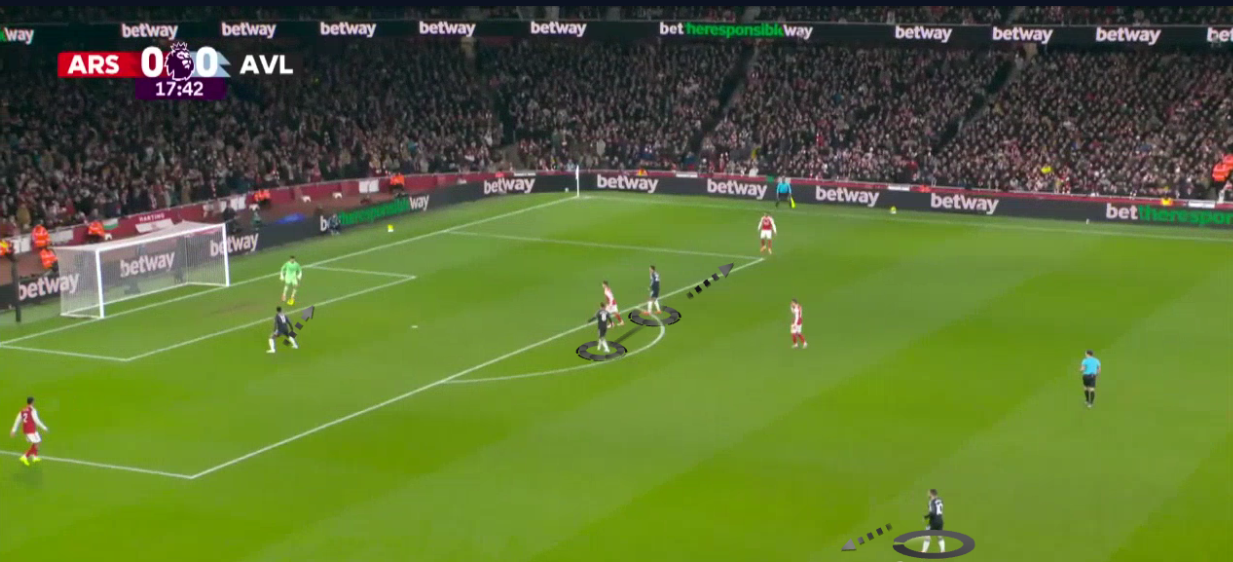
In this situation, Merino moves away and switches roles with Zubimendi.
This allows Tielemans to receive Martínez’s pass, especially as Onana drags Ødegaard away and opens the passing lane.
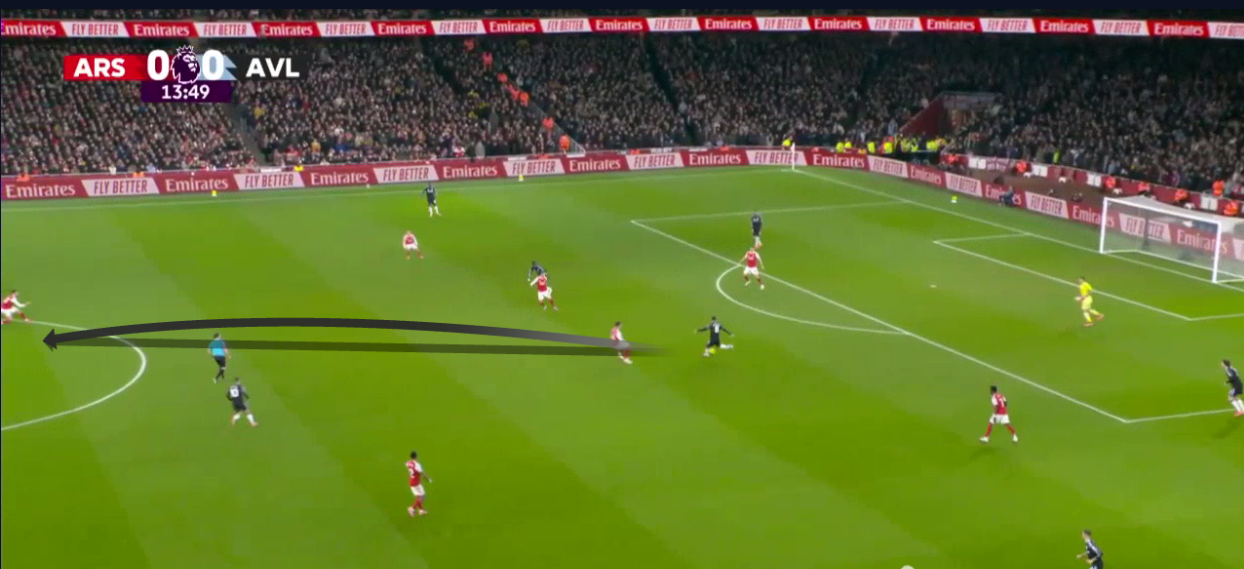
Tielemans uses the brief time and space given to him by Zubimendi to turn and play a long ball in behind for Rogers.
Zubimendi should initially mark Rogers, but after the switch, it becomes Merino’s responsibility.
Rogers not only escapes Merino’s attention but also manages to bypass Gabriel and run in behind Arsenal’s defensive line.
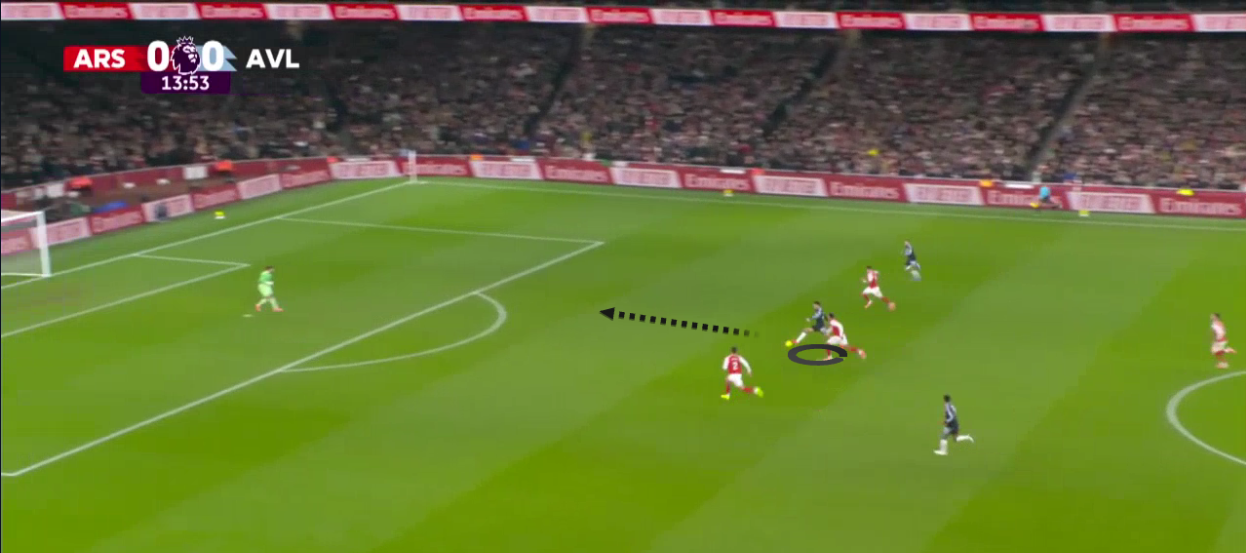
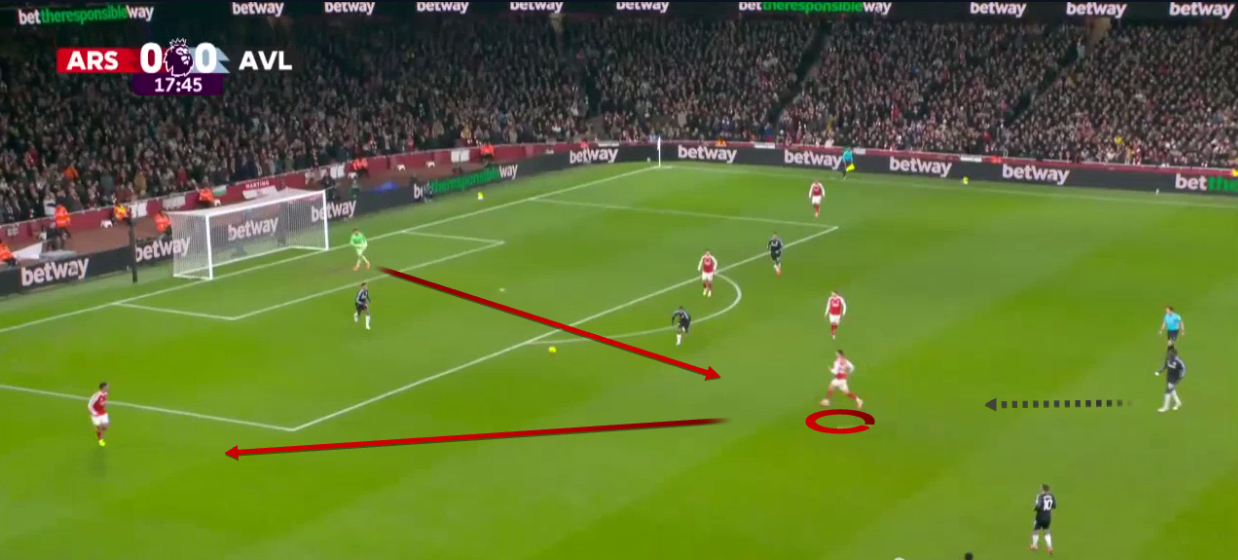
Another method Aston Villa uses to escape Arsenal’s high press is to build through the right side rather than the left.
Rogers again plays a key role in this approach.
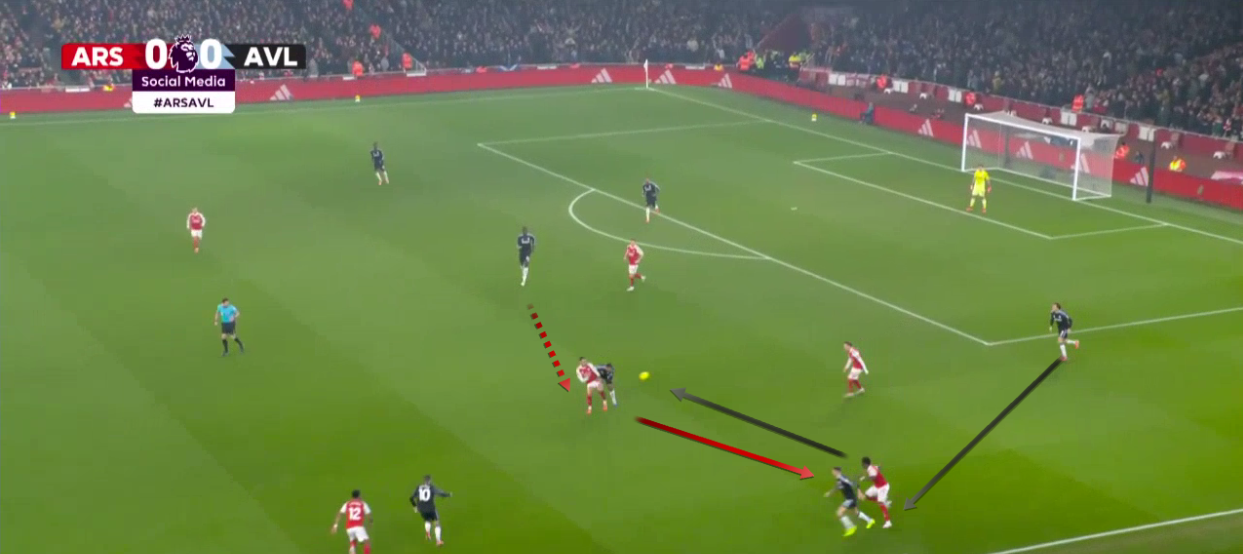
In this example, he tries to lose Zubimendi, who stays central, by moving into Arsenal’s left half-space.
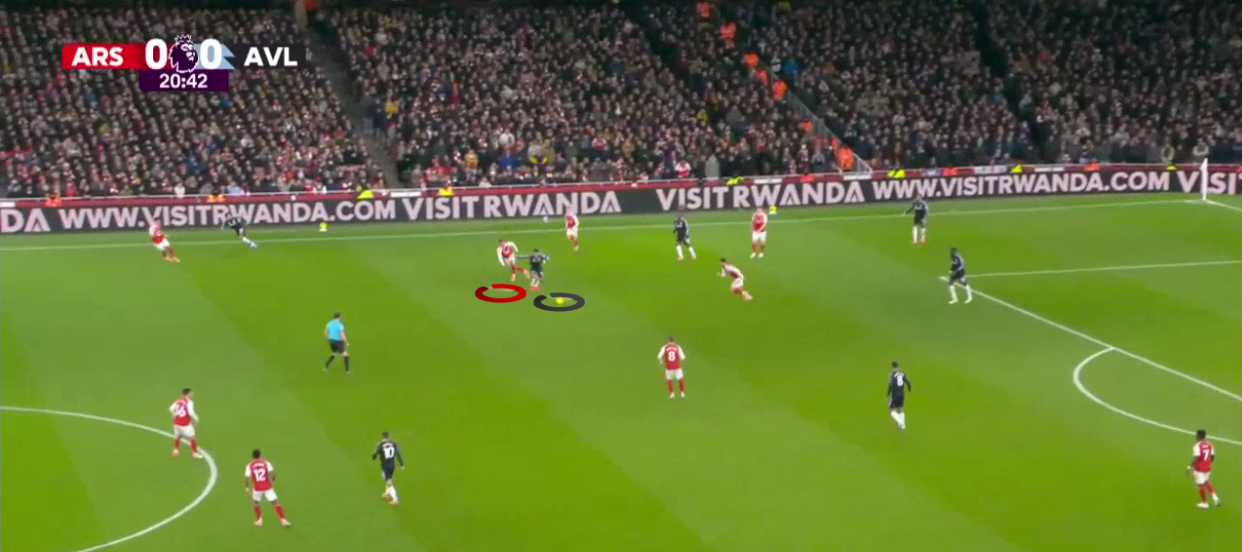
Receiving the ball in this area forces Gabriel to step out and press Rogers.
This movement creates a large space behind the defensive line, as Gabriel leaves his position to defend on the front foot and prevent Rogers from receiving and turning.
However, Gabriel fails to stop him, and Rogers can turn and face forward.
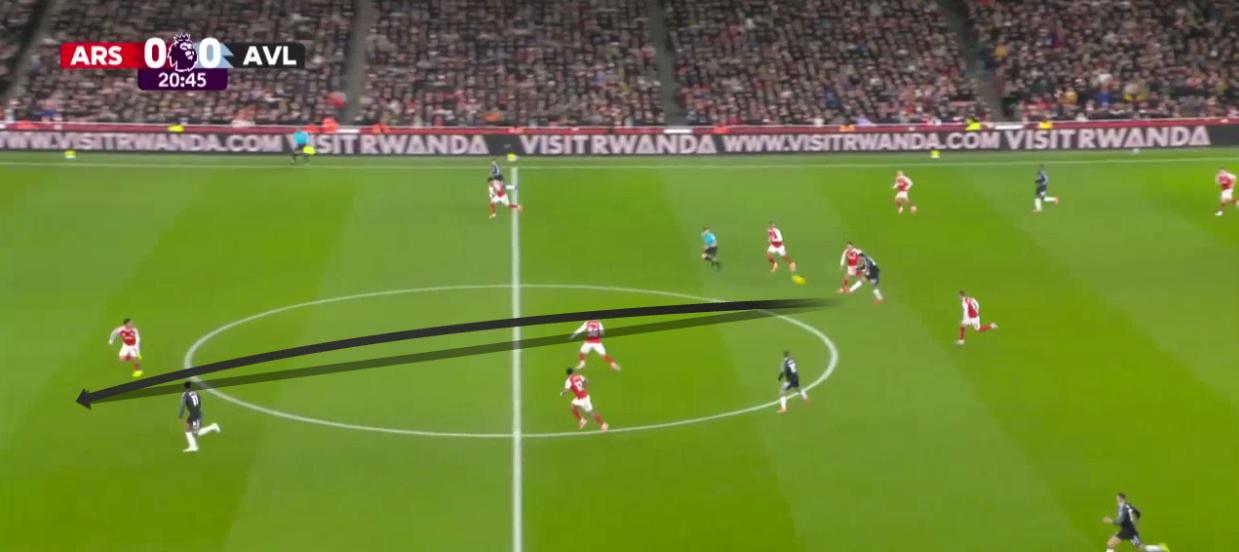
Rogers then attempts to find Watkins with a long ball in behind, allowing Aston Villa to escape Arsenal’s pressure and allowing Watkins to face the goal.
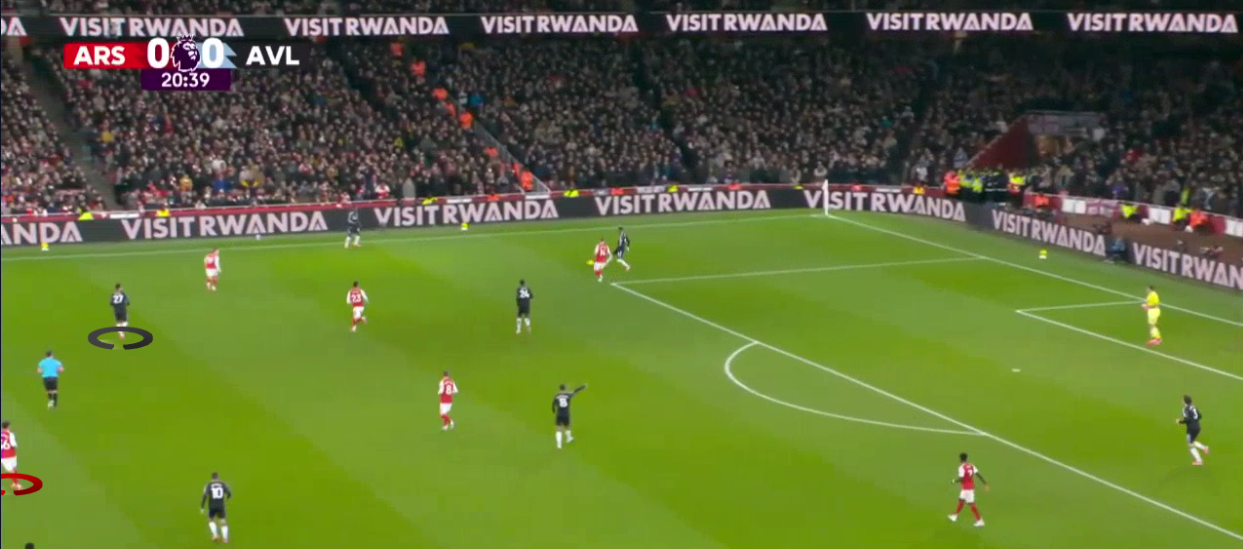
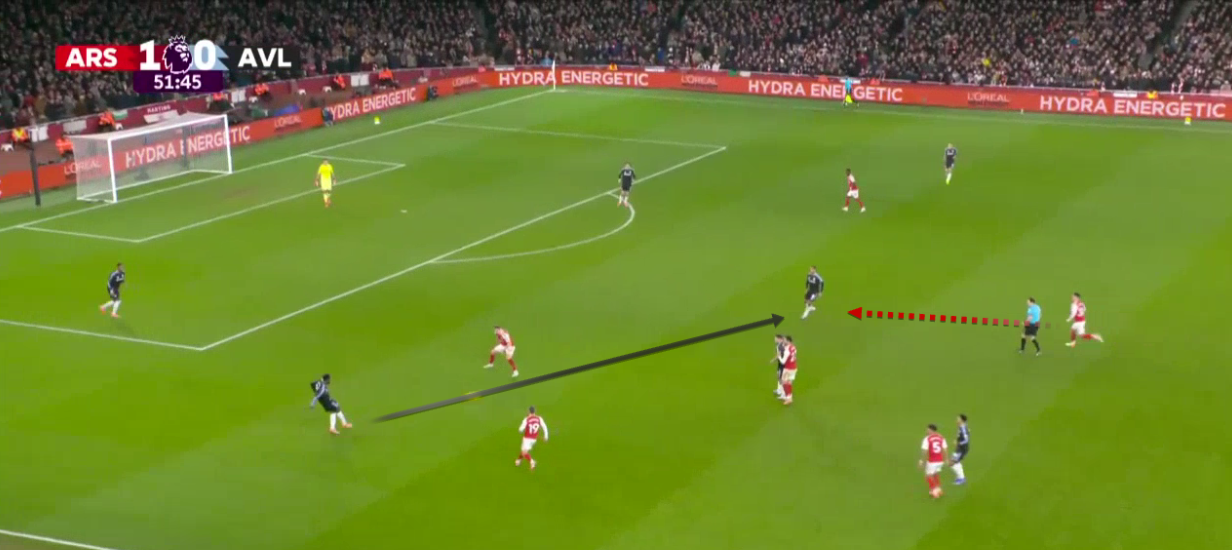
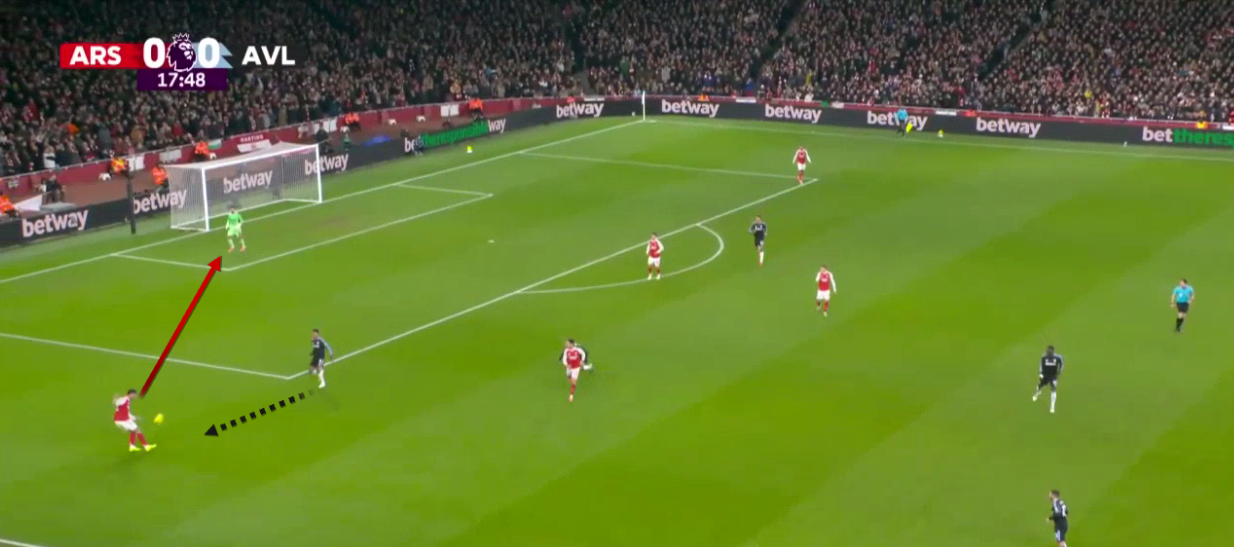
Arsenal Optimal Pressing Shape Forces Villa To Play Long
The optimal solution for Arsenal is to apply the same pressing scheme they use against goal-kicks to Aston Villa’s open-play build-up.
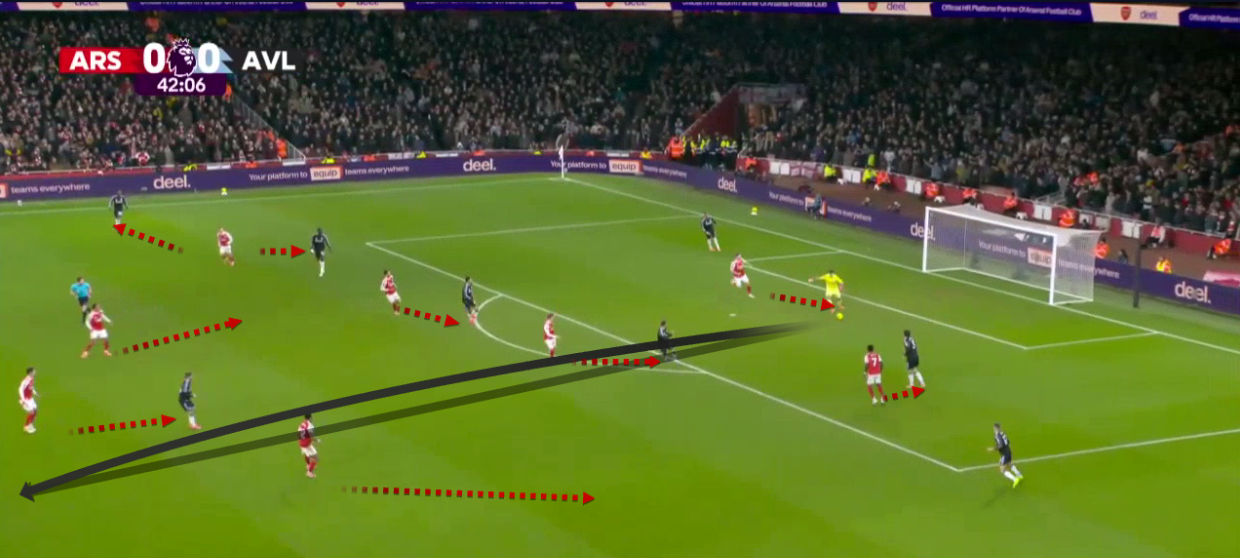
When Arsenal manages to replicate this goal-kick structure, as seen here, it sometimes pushes Aston Villa towards their third option to escape pressure: playing a long ball towards Watkins.
 Watkins is sometimes able to win these long balls and lay them off to one of his teammates, who is facing forward and able to compete for the second ball.
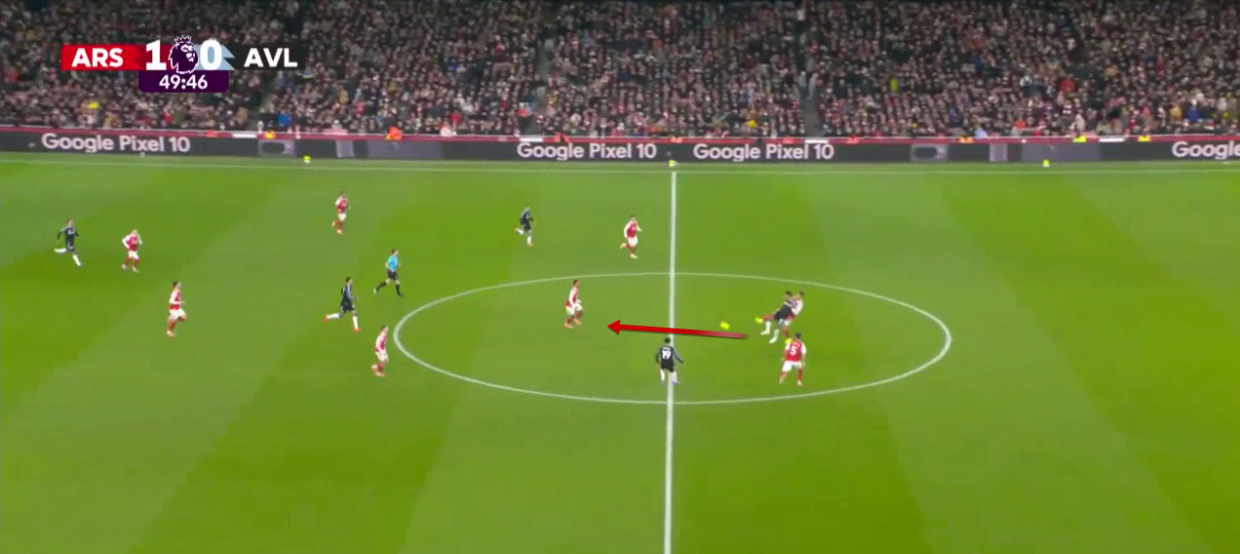
However, due to the nature of these long balls and the quality of Arsenal’s defenders, Aston Villa lost several of them.
Saliba, in particular, gives Watkins a difficult time and wins multiple aerial duels, which helps Arsenal create better conditions for their turnovers to start.
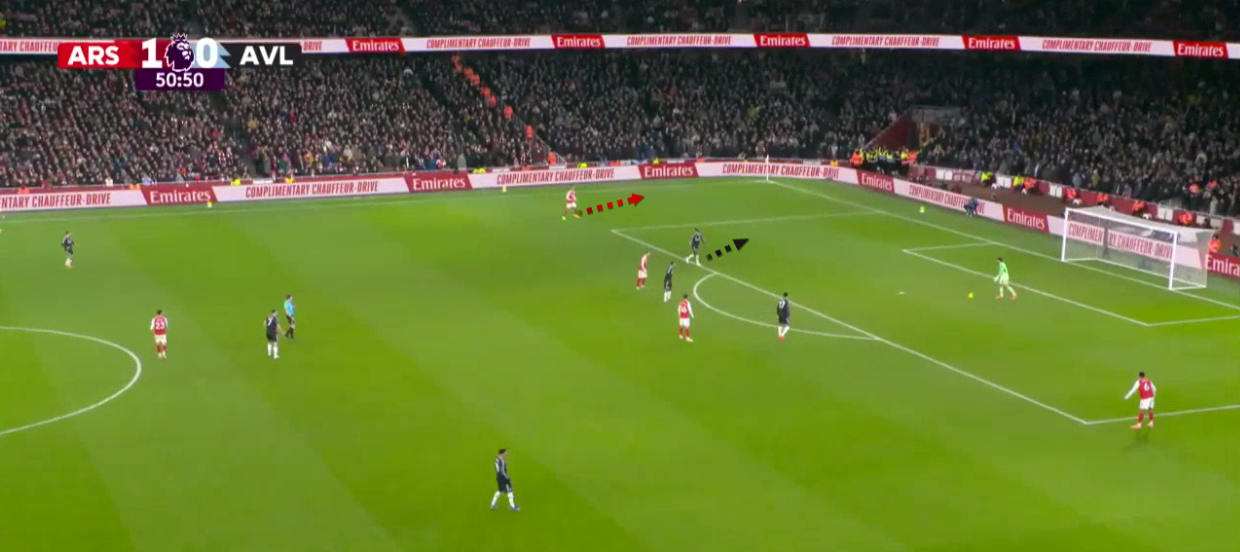
These situations occur more frequently in the second half, such as here, where Saliba controls Watkins, regains possession, and allows Arsenal to initiate a turnover.
Arsenal Defensive Second Half Adjustments
Although Arsenal scored their first goal from a corner, they made some adjustments to their pressing scheme that helped them be more aggressive and score the second goal.
Another adjustment Arsenal made in the second half to better apply their preferred pressing scheme was positioning Saka higher in the press, closer to Lindelöf, particularly when Aston Villa plays back passes, so he could be ready to press immediately.
With this adjustment, Arsenal can trap Aston Villa and deny them access to nearby short-passing options to escape the pressure.
In this situation, not only is Saka positioned close to Lindelöf, but Zubimendi also covers Ødegaard’s position and steps out aggressively to press Tielemans as he receives Bogarde’s pass in the centre.
This aggressive, high-pressure style from Zubimendi forces Tielemans to play under much more pressure than in the first half.
As a result, he is unable to make an accurate pass to Sancho; Arsenal intercepts the ball, creating a high turnover.
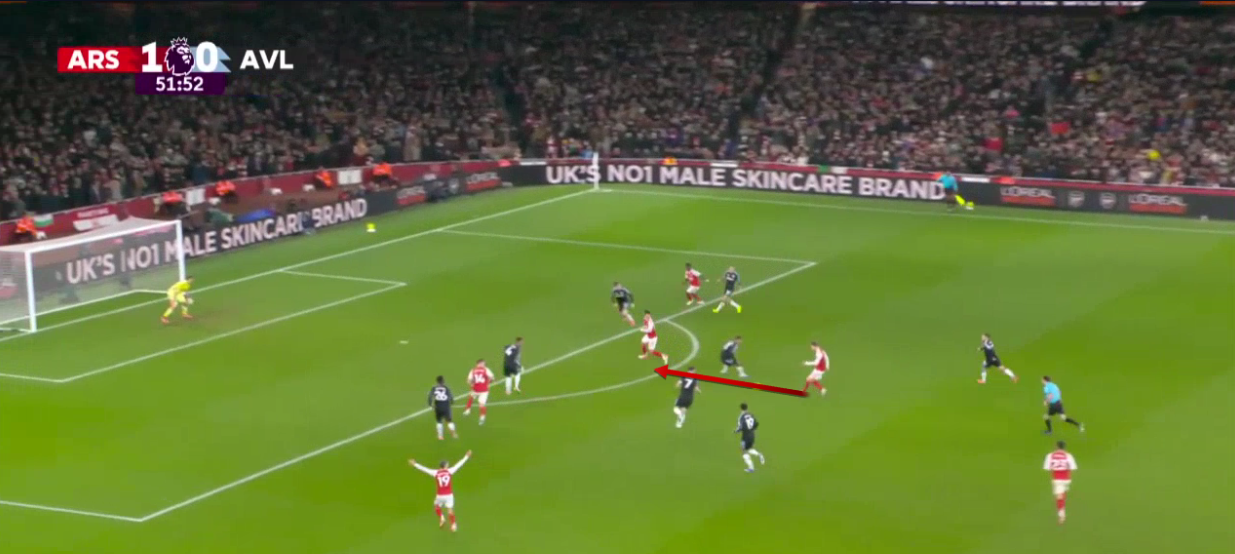
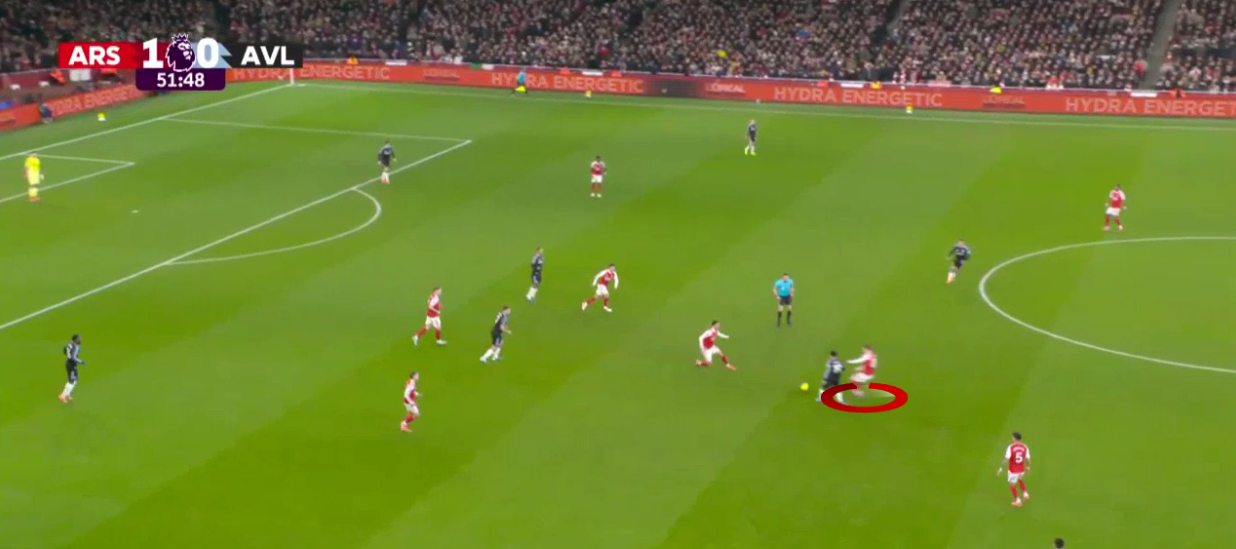
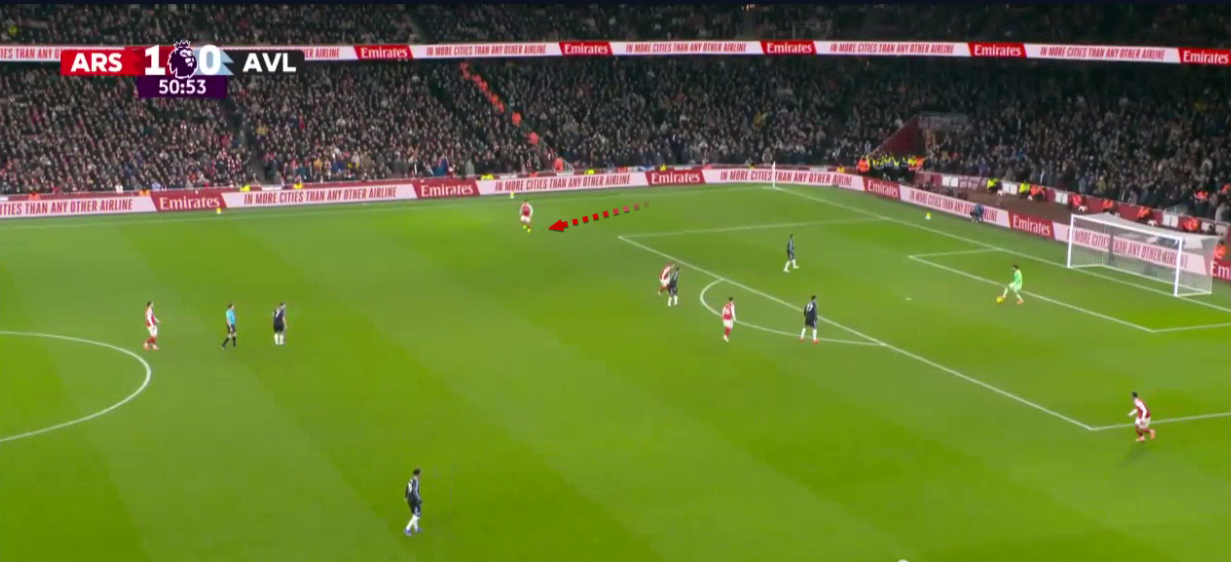
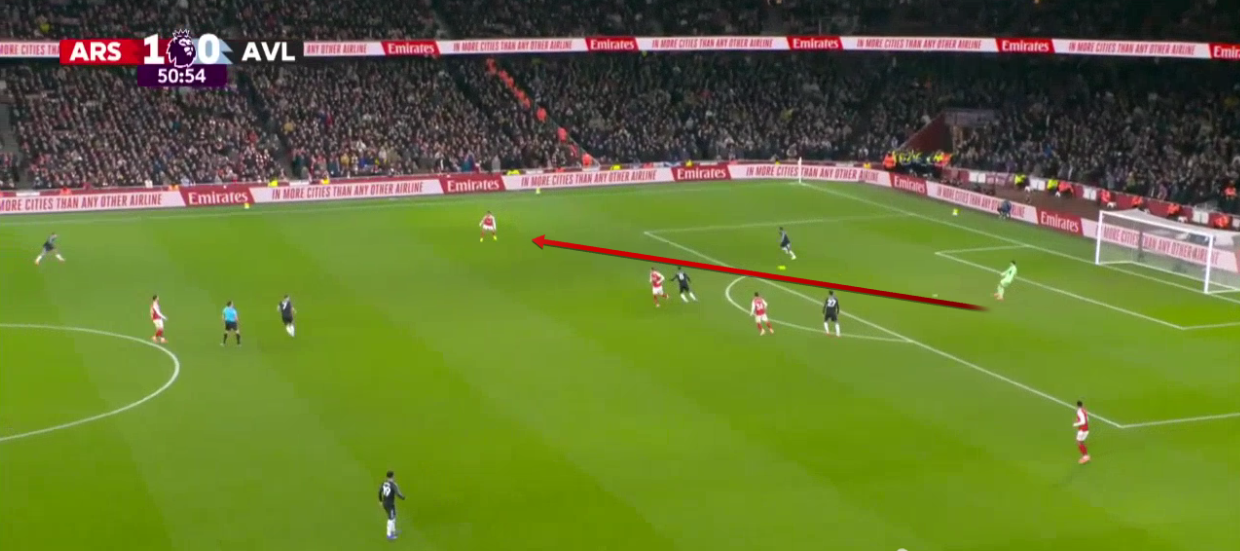
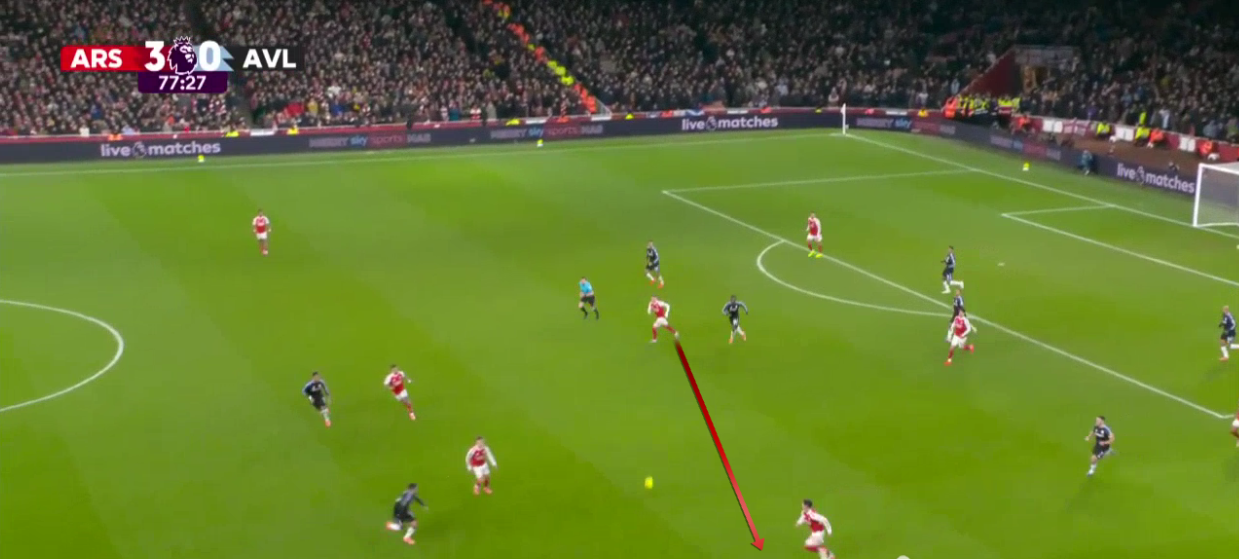
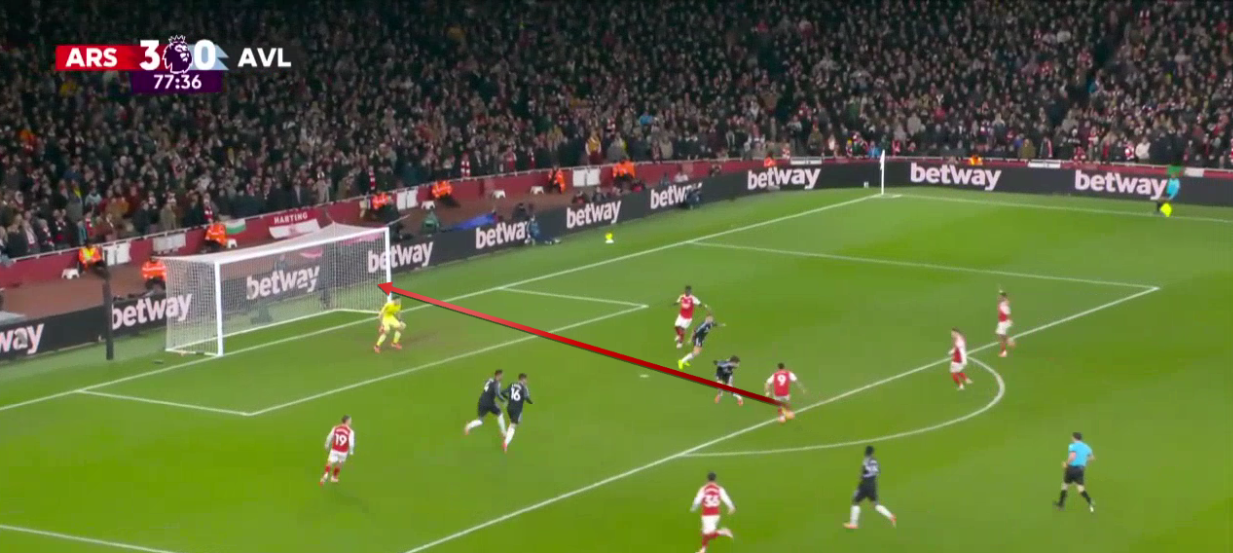
In this sequence, Ødegaard plays a pass to Zubimendi, who continues his run forward to receive the ball in behind.
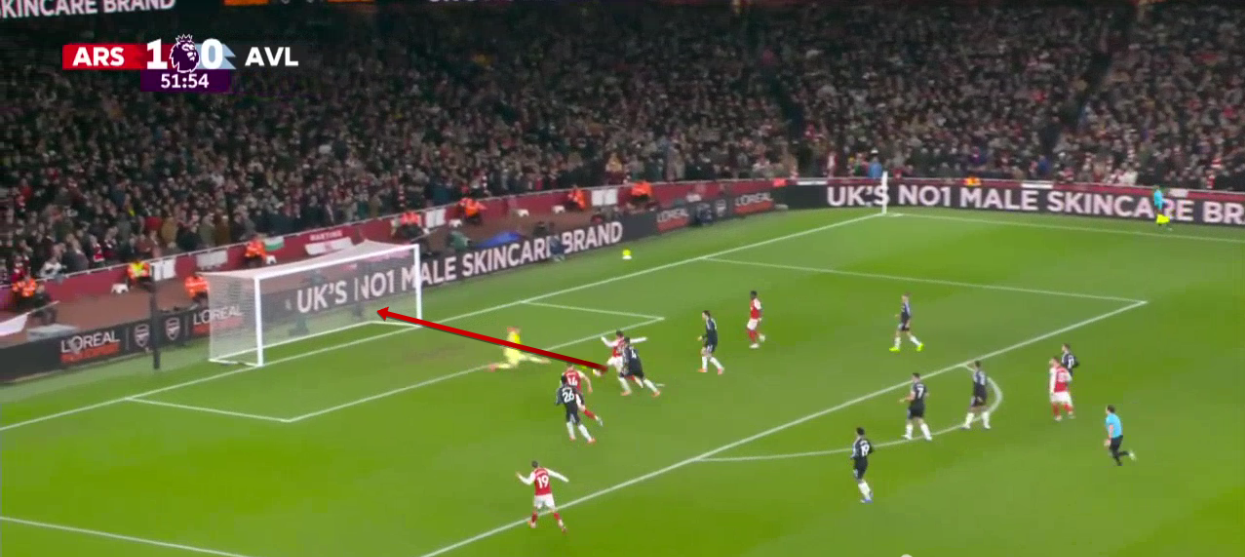
From this sequence, Zubimendi finishes the move and scores Arsenal’s second goal of the game.
Arsenal Build-Up Vs Aston Villa High Press
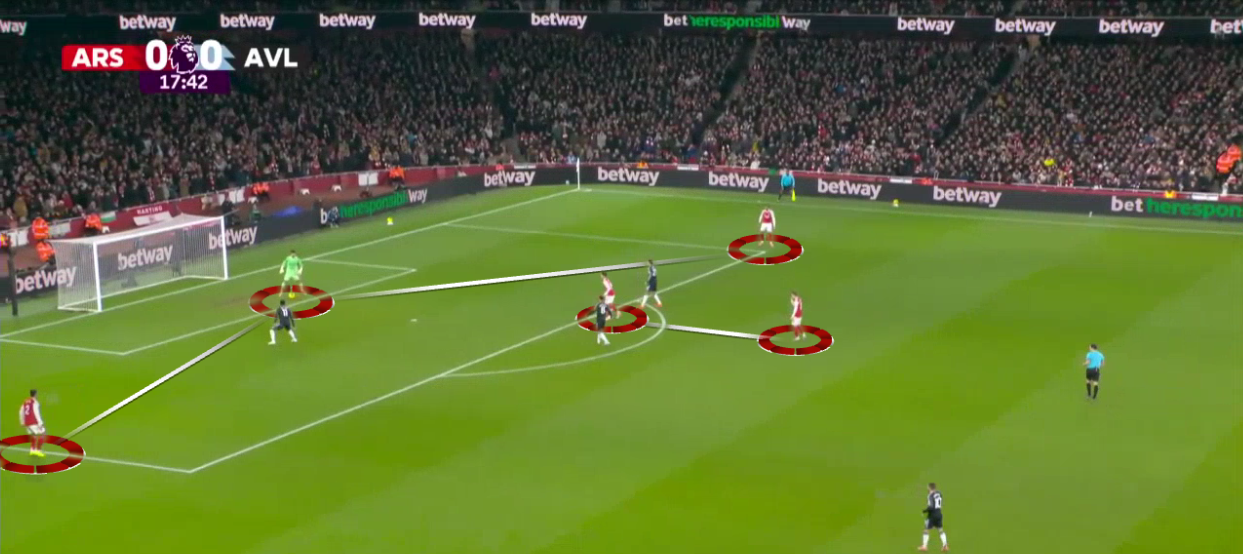
In their build-up, Arsenal start with a 3-2 shape.
The first line is formed with the goalkeeper involved, alongside two centre-backs positioned wide at the edge of the box.
The second line is mainly formed by the six, Zubimendi, with one of the eights, either Ødegaard or Merino, joining him.
This supporting player can position himself behind or alongside Zubimendi, as Ødegaard does here.
Two high full-backs support all of this.
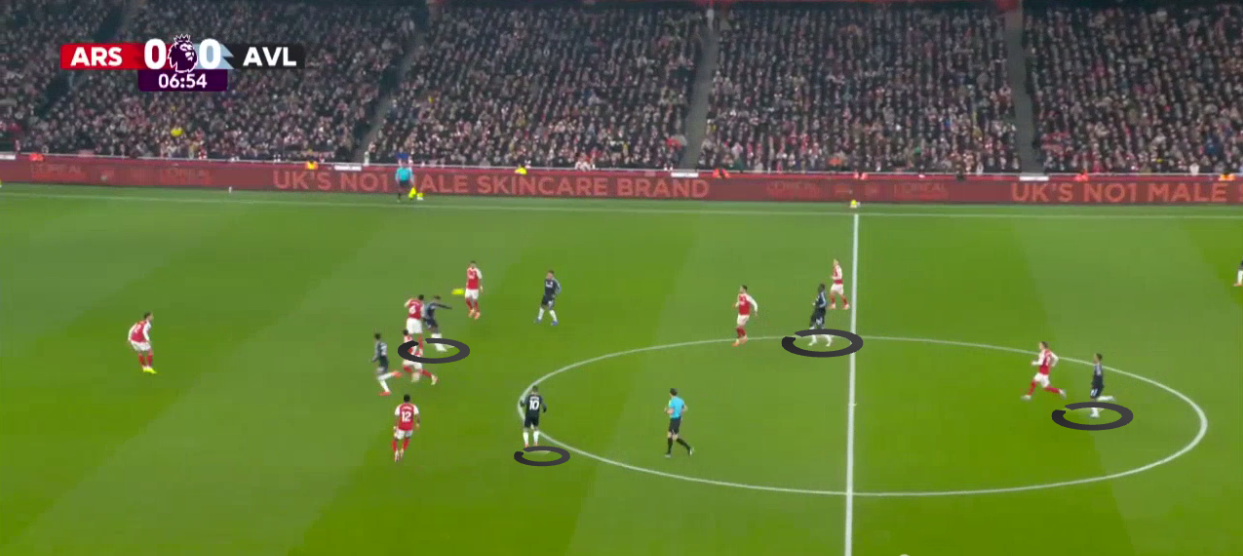
For Aston Villa, Watkins presses Raya with a curved run to block the passing lane from Raya to Saliba.
Tielemans steps up from the six position to join Rogers, with both staying centrally close to Arsenal’s six and the supporting eight.
The exact roles of Tielemans and Rogers depend on Raya’s decision in possession.
In the first half, Arsenal tries to deal with this by finding Saliba free to receive and progress the ball.
To create this option, Merino initially positions himself high, then escapes Onana and drops to receive Raya’s pass before playing it to Saliba.
However, the distance between these passes is long, allowing Watkins to recover and press Saliba, preventing him from carrying the ball forward freely.
Arsenal Second-Half Attacking Adjustments
In the second half, Arsenal adjusts to help Raya find Saliba more directly.
This is done by having Saliba escape Watkins’ cover shadow by moving diagonally towards the centre.
Here, Watkins initially checks Saliba’s position before stepping out to press Raya.
Raya now stays on the ball, using the sole of his boot to draw Watkins towards him, which allows Saliba to move unnoticed and prevents Watkins from blocking the passing lane again.
Saliba then completes his movement, receives Raya’s pass, and breaks through Aston Villa’s pressure.
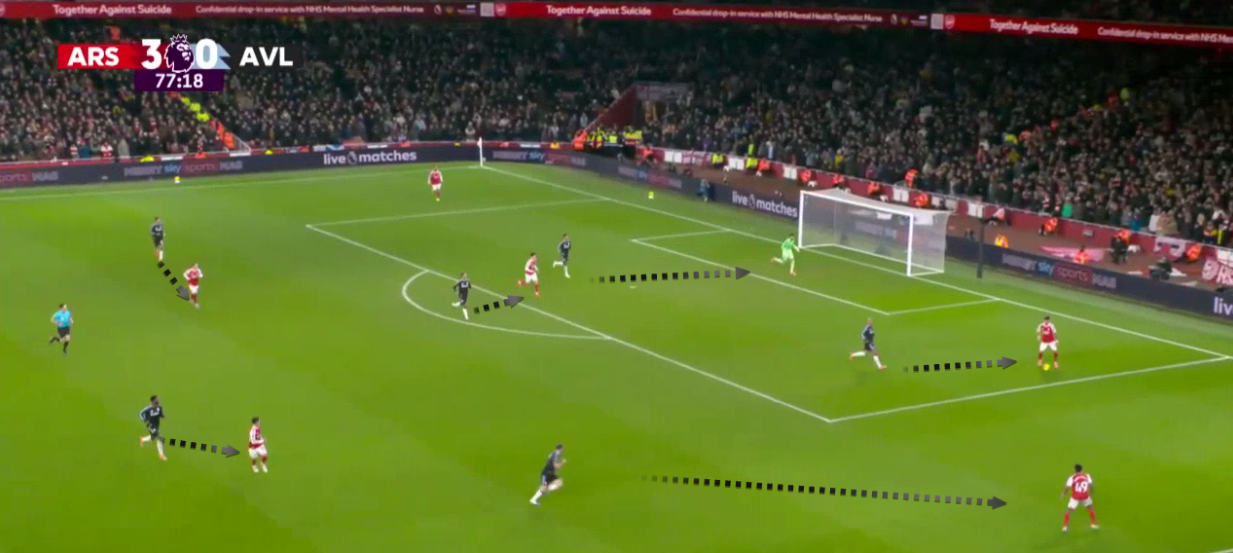
Another approach Arsenal uses in possession is building from the left side.
In this case, the left full-back, Lewis-Skelly, drops deep to receive Hincapié’s pass.
Aston Villa respond with the same pressing scheme, with the left winger tucking inside to track Arsenal’s far-side eight, Ødegaard.
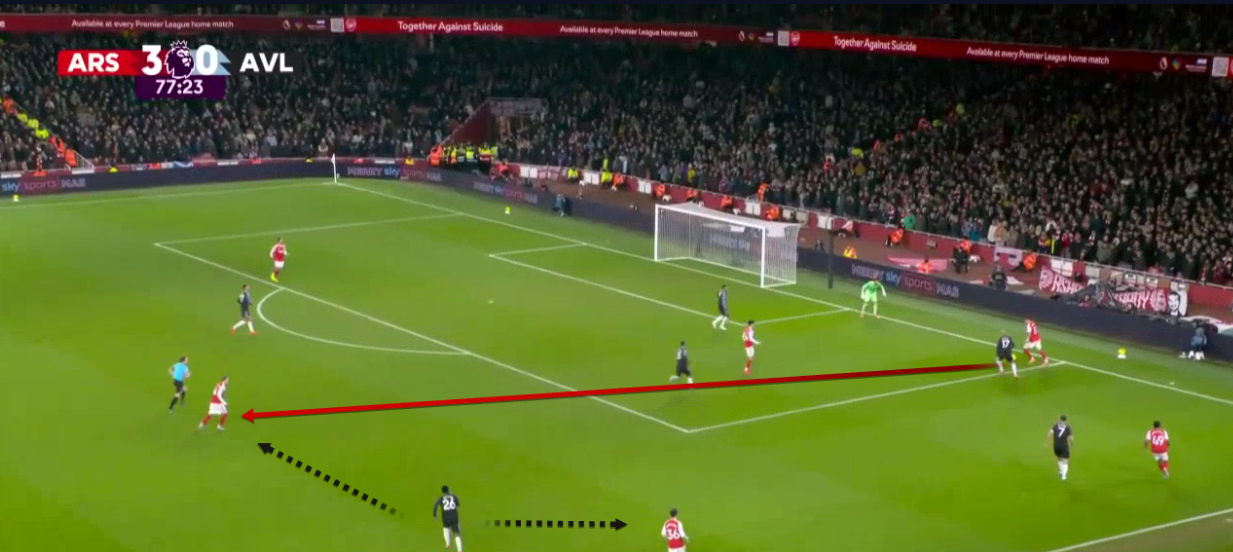
Ødegaard then moves aggressively towards the ball, placing Zubimendi’s marker between two players.
Hincapié attempts to find Ødegaard with a line-breaking pass.
In this situation, Zubimendi, now acting as the free eight, is unmarked, allowing Arsenal to break through Aston Villa’s pressure.
Arsenal finish this sequence with Gabriel Jesus scoring their fourth goal of the game.
Conclusion
Arsenal finished the calendar year at the top of the Premier League for the seventh time.
Looking at how they won this game, several key points stand out.
First is Gabriel’s goal from a corner, which marked the 17th corner goal the Gunners have scored in this calendar year.
The second is the way they scored their second goal, which came from adjusting small but crucial details that allowed them to win the ball more frequently and generate more high turnovers, eventually scoring from one of those situations.
This approach aligns with what Arsenal did against Brighton in their previous game and highlights their increased focus on this aspect.