We were treated to another exciting period of midweek Premier League action, with the London Stadium playing host to the final match on Thursday night.
West Ham United welcomed Leicester City‘s visit in a match in which both sides were desperate to collect all three points.
Graham Potter’s Hammers have experienced mixed results thus far but would’ve felt as confident as ever off the back of a hard-fought victory against Arsenal.
With West Ham once again putting a dent into Mikel Arteta’s title aspirations, the focus for Ruud van Nistelrooy was unfortunately on the opposite end of the table, with the Foxes heading towards an almost inevitable relegation.
Unfortunately for Leicester, there were no surprises on the night.
West Ham controlled the match to earn a deserved 2-0 win—the first time West Ham have achieved back-to-back Premier League victories all season.
While Potter’s side will find optimism in their tactical principles evolving, once again, defensive mistakes allowed West Ham to breach Leicester’s defence in the first half.
Our tactical analysis will highlight how both sides set up to minimise each other’s attacking threat, with special consideration for how Potter’s 5-3-2 formation could adapt and shift in possession.
West Ham United Vs Leicester City Lineups & Formations
Graham Potter named an unchanged XI from his match-winning team, which defeated Arsenal.
Once again, they lined up in the 5-3-2 formation from the outset.
Alphonse Areola retained his place in goal for West Ham, protected by an immediate defensive trio of Aaron Cresswell, Max Kilman and Jean-Clair Todibo.
Oliver Scarles and Aaron Wan-Bissaka were then deployed as wing-backs in more advanced positions in possession, with a clear defensive focus to remain compact and combative when West Ham were without the ball.
Potter then lined up with a midfield comprised of Tomáš Souček, Edson Álvarez and James Ward-Prowse, who all performed varied roles which looked to add balance and creativity to West Ham’s efforts in the middle third.
This then left Mohammed Kudus and Jarrod Bowen, two natural wingers who could offer their talents in both the wider areas and through the centre of the pitch, as a strike partnership.
Leicester’s Van Nistelrooy was looking to bounce back from an embarrassing 4-0 defeat at the hands of Brentford, continuing with the 4-2-3-1 formation from previous matches.
Mads Hermansen started in goal for the Foxes, with a defensive line of Victor Kristiansen and James Justin as the two fullbacks and Jannik Vestergaard and Wout Faes as the central defensive partnership.
Boubakary Soumaré and Wilfried Ndidi formed Leicester’s double pivot, with Bilal El Khannouss deployed as more of an advanced midfielder to support their attacking efforts.
Bobby De Cordova-Reid and Facundo Buonanotte provided the width for Leicester in and out of possession, with Premier League legend Jamie Vardy leading the line.
In fact, Leicester looked to switch their tactical approach with different personnel in the second half, with Stephy Mavididi and Harry Winks coming off the bench to aid their ball progression and influence in the final third.
Leicester’s Mixed Defensive Fortunes
With Leicester facing an almost insurmountable task of staying in the Premier League this season, it was imperative that they arrived at the London Stadium ready to be organised and combative enough to nullify West Ham’s attacking threat under Graham Potter’s tactics.
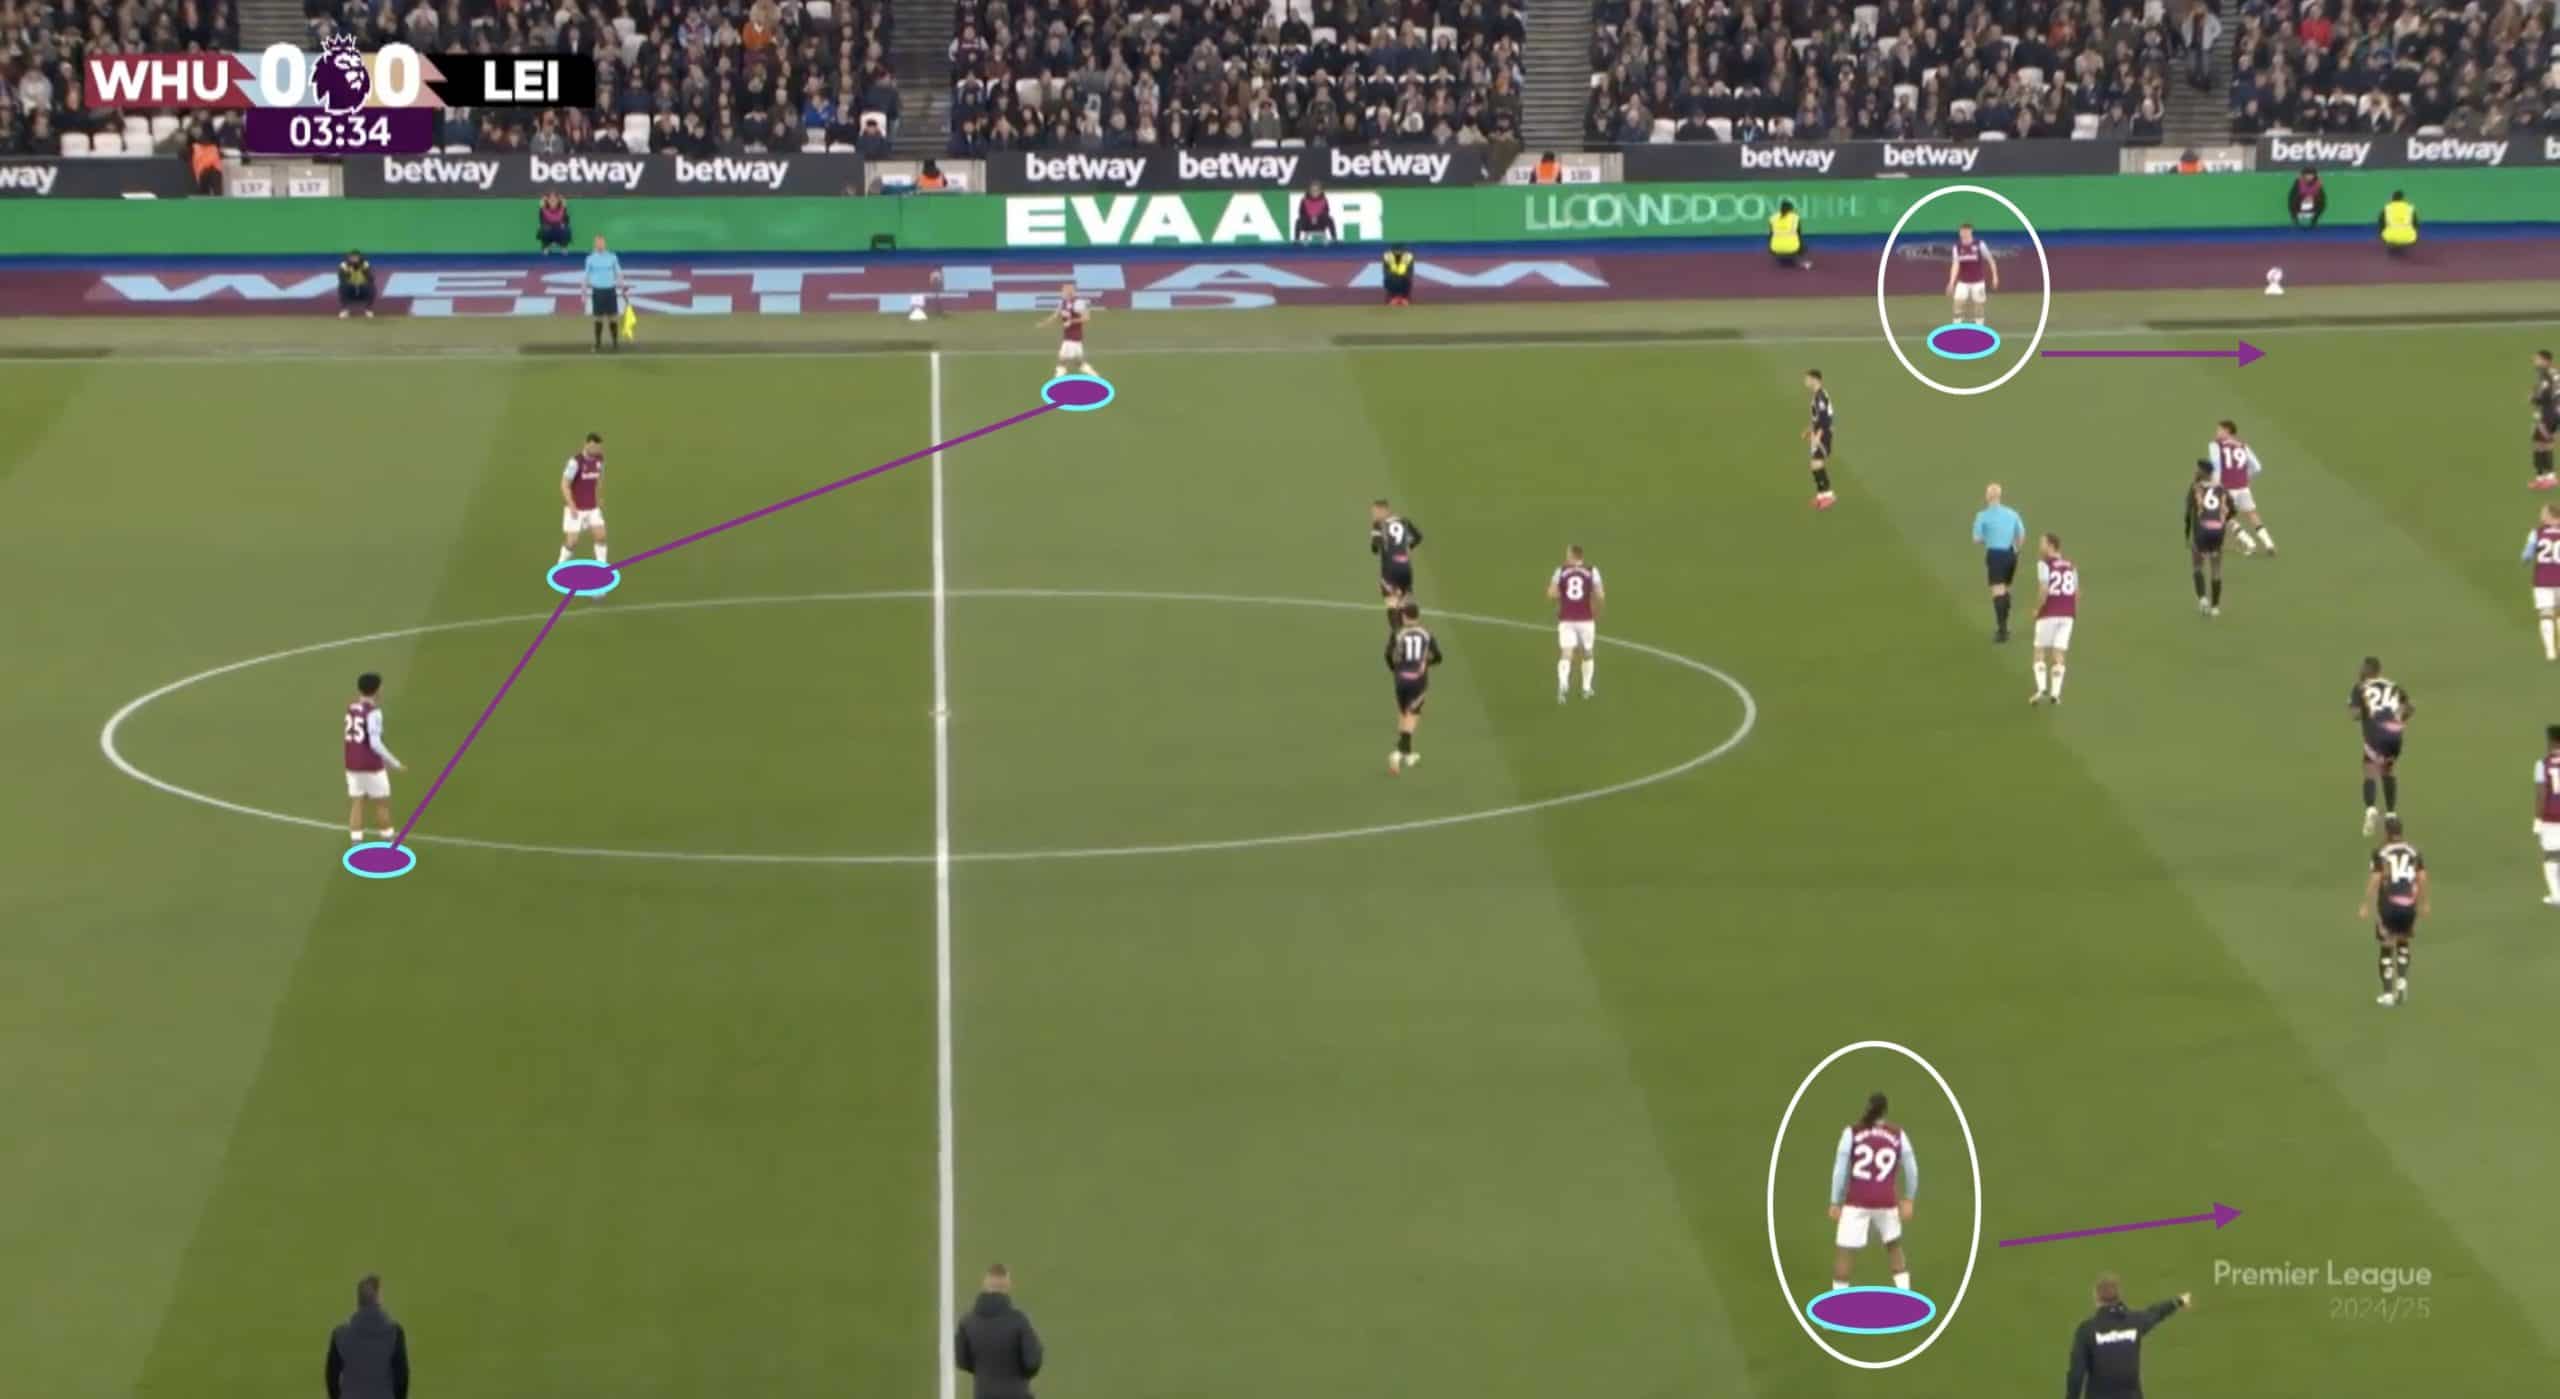
In the early stages, Leicester frustrated West Ham by setting them up off the ball, with the Foxes seemingly targeting the Hammers’ most progressive passer on the night.
Ruud van Nistelrooy’s side lined up in more of a 4-4-2 when they were pressing West Ham in the first half, with El Khannouss stepping up to support Vardy in the first line of pressure.
But instead of a traditional press, where the two ‘strikers’ would press the opposing centre-backs, Vardy and El Khannouss would consistently drop in slightly to double up on Ward-Prowse.

By negating the influence of West Ham’s deepest-lying midfielder in these early moments, the Hammers resorted to ball progression targeted towards the flanks, with direct passes into Scarles’s feet opening up in the middle third.
However, despite Leicester’s rigid block and the wide midfielders often unable to stretch wide enough to apply pressure to Scarles and the supporting Cresswell, West Ham’s final third options were often overwhelmed due to a lack of space through the centre.
To give Ruud van Nistelrooy tactics some credit on a disappointing night overall, they appeared to be effective and compact in their defensive style when dropping into a mid-to-low block.
They really minimised the space in which Bowen and Kudus could operate when dropping between the lines to collect the ball, further emphasising West Ham’s struggles to break down their opposition recently.
West Ham’s Attacking Breakthrough
How Leicester defended in the early stages meant that West Ham needed to be creative and progressive in their passing sequences.
This matched up nicely with some advantageous moments where the fluidity of the West Ham midfield allowed some positional rotations for James Ward-Prowse to dictate play from the deeper role.
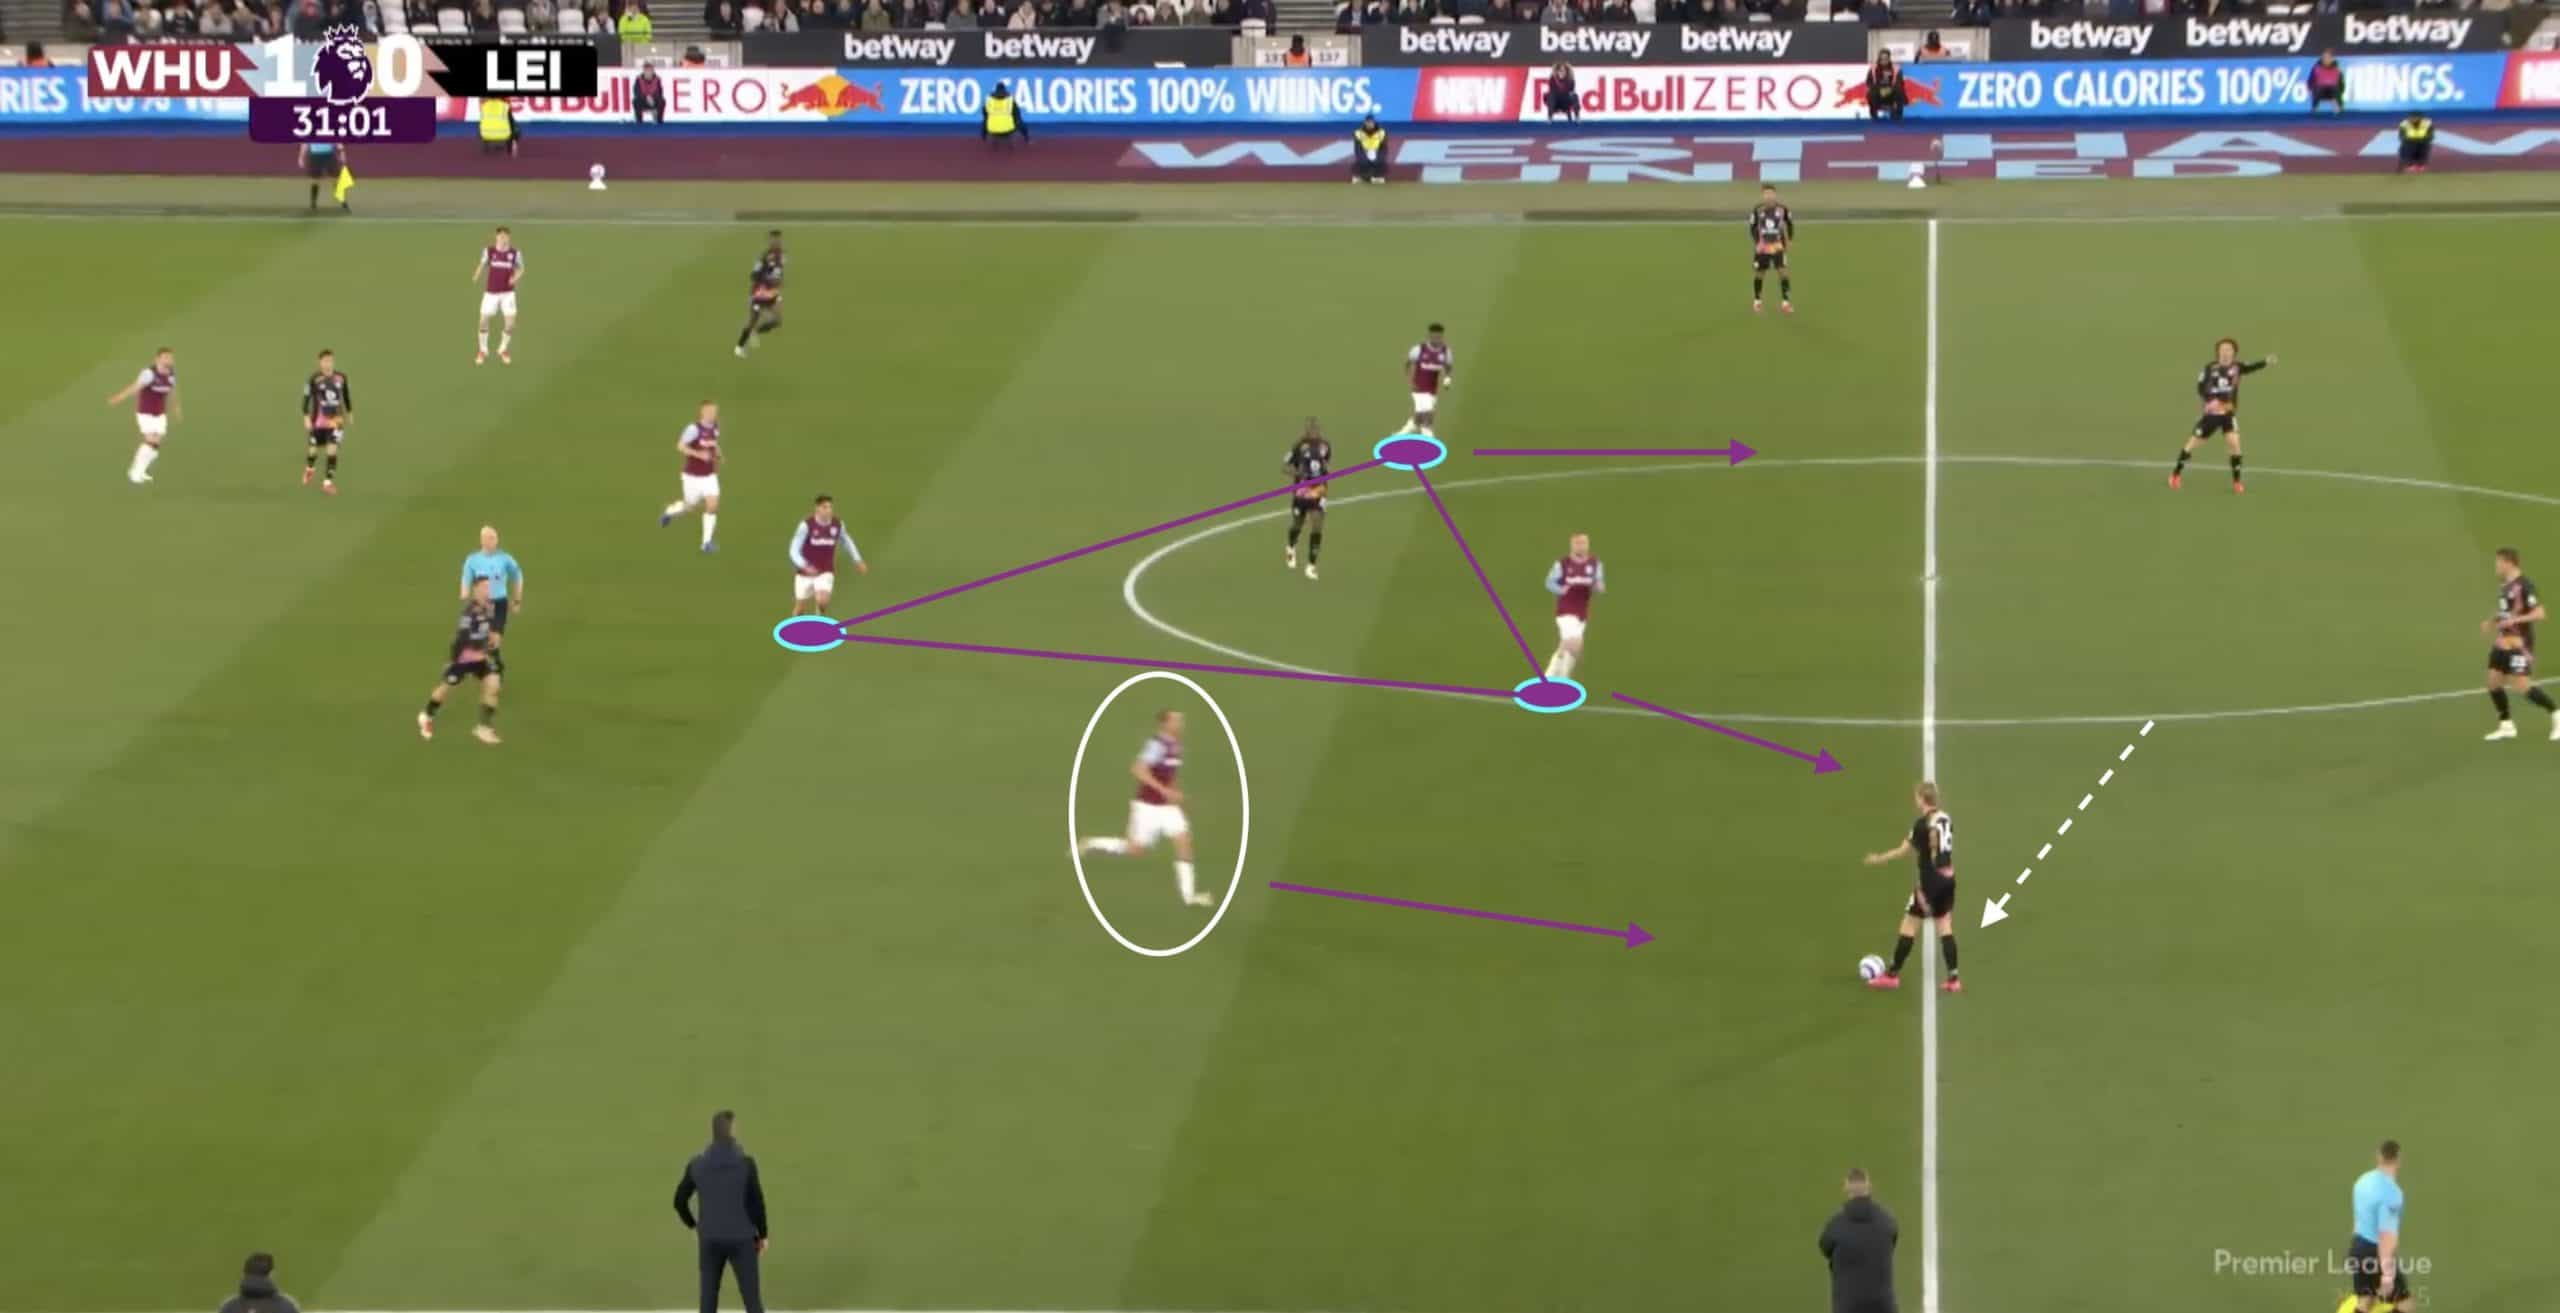
In the following example, we see one of the first moments in which West Ham utilised Ward-Prowse’s passing range to find Bowen’s movement through the half-space.
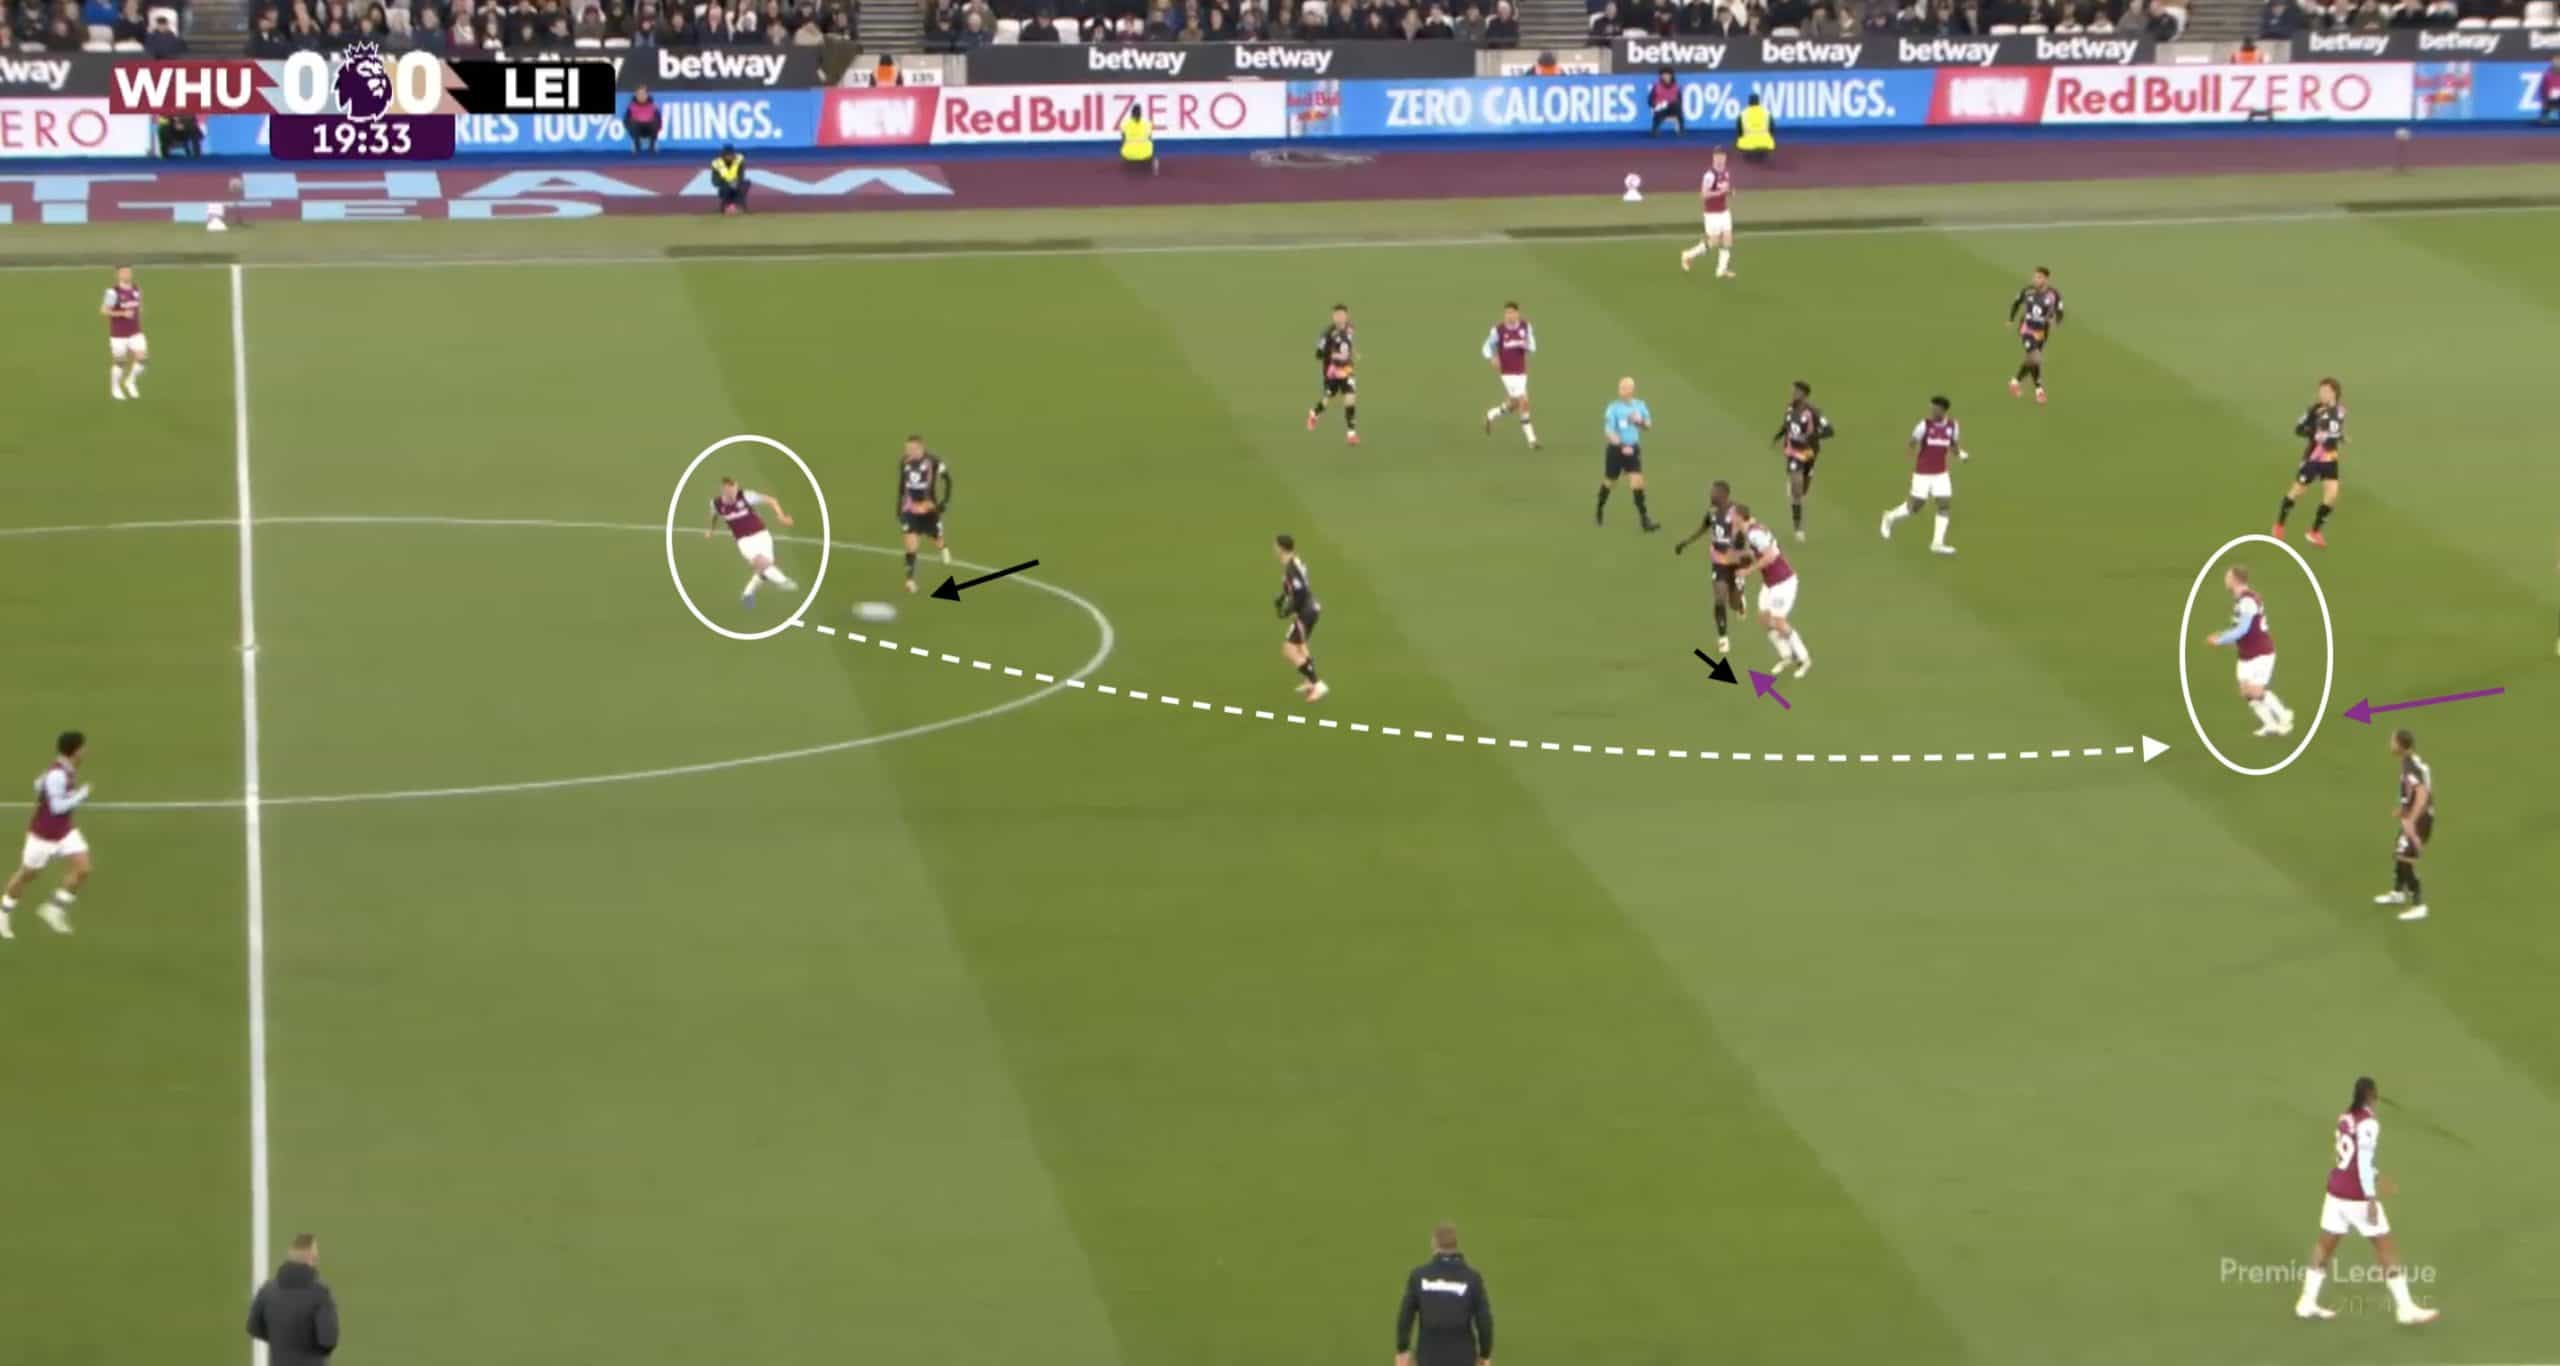
It was an effective strategy that incorporated multiple West Ham players.
We can also see how Souček used his physical dominance to screen the defensive movement from Soumaré and open up the passing lane into Bowen.
But crucially for Leicester, they maintained their defensive energy to halt Bowen in his tracks when the English forward could receive the ball in these more advanced areas, with Kristiansen quick to step up and guide Bowen into more Leicester bodies.
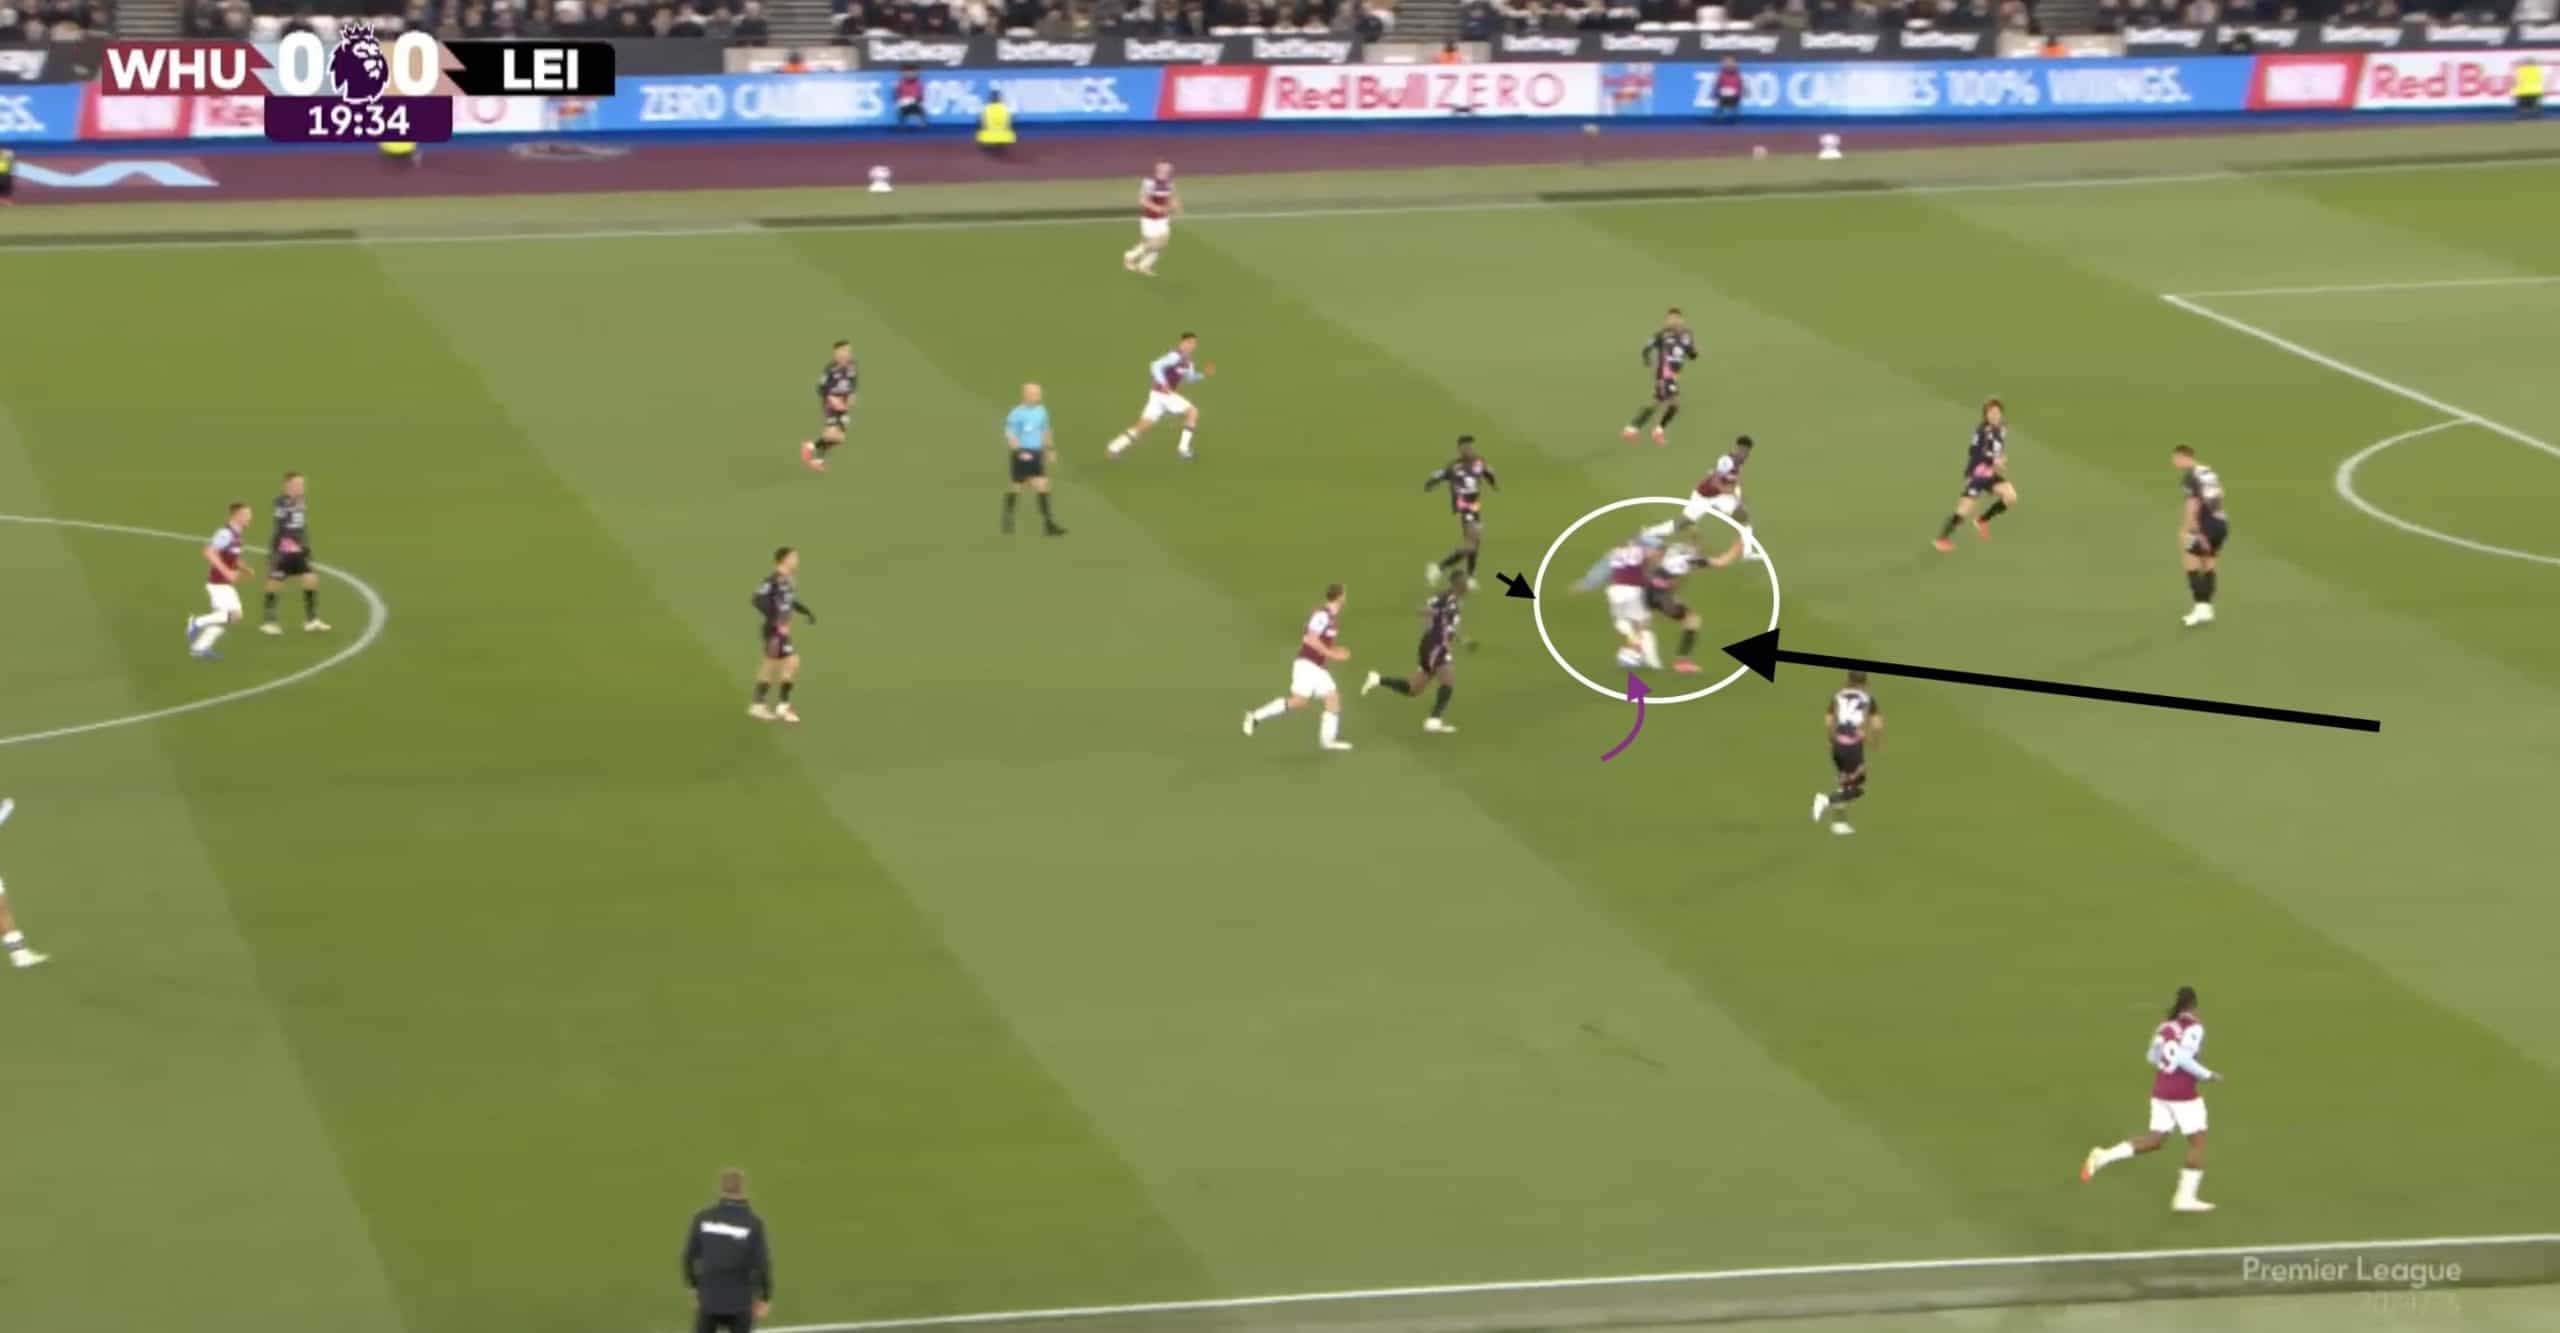
Even so, it may come as little surprise to learn that Bowen’s attacking influence was one of the main reasons for West Ham’s opening goal, particularly how he could create space with some wider movement.
Kristiansen’s touch-tight approach to marking Bowen was undone when West Ham could utilise Wan-Bissaka to create an overload on the right wing.
The following example showcases how Bowen could generate a huge gap for Souček to advance through the channel, allowing the Czech midfielder to become a vital box presence in the final third.

When looking at the underlying metrics from this Premier League season, Souček’s 3.83 attacking penalty area touches per 90 rank him within the 87th percentile of all midfielders.
Combined with his 3.59 successful aerial duels per 90, Potter would no doubt relish the opportunity to give Souček more influence inside the box.
Souček did, in fact, score West Ham’s opener with an inspired poacher’s finish after a smart Hermansen save.
A lapse in defensive concentration allowed West Ham’s key attacking threats to be unmarked inside the box.
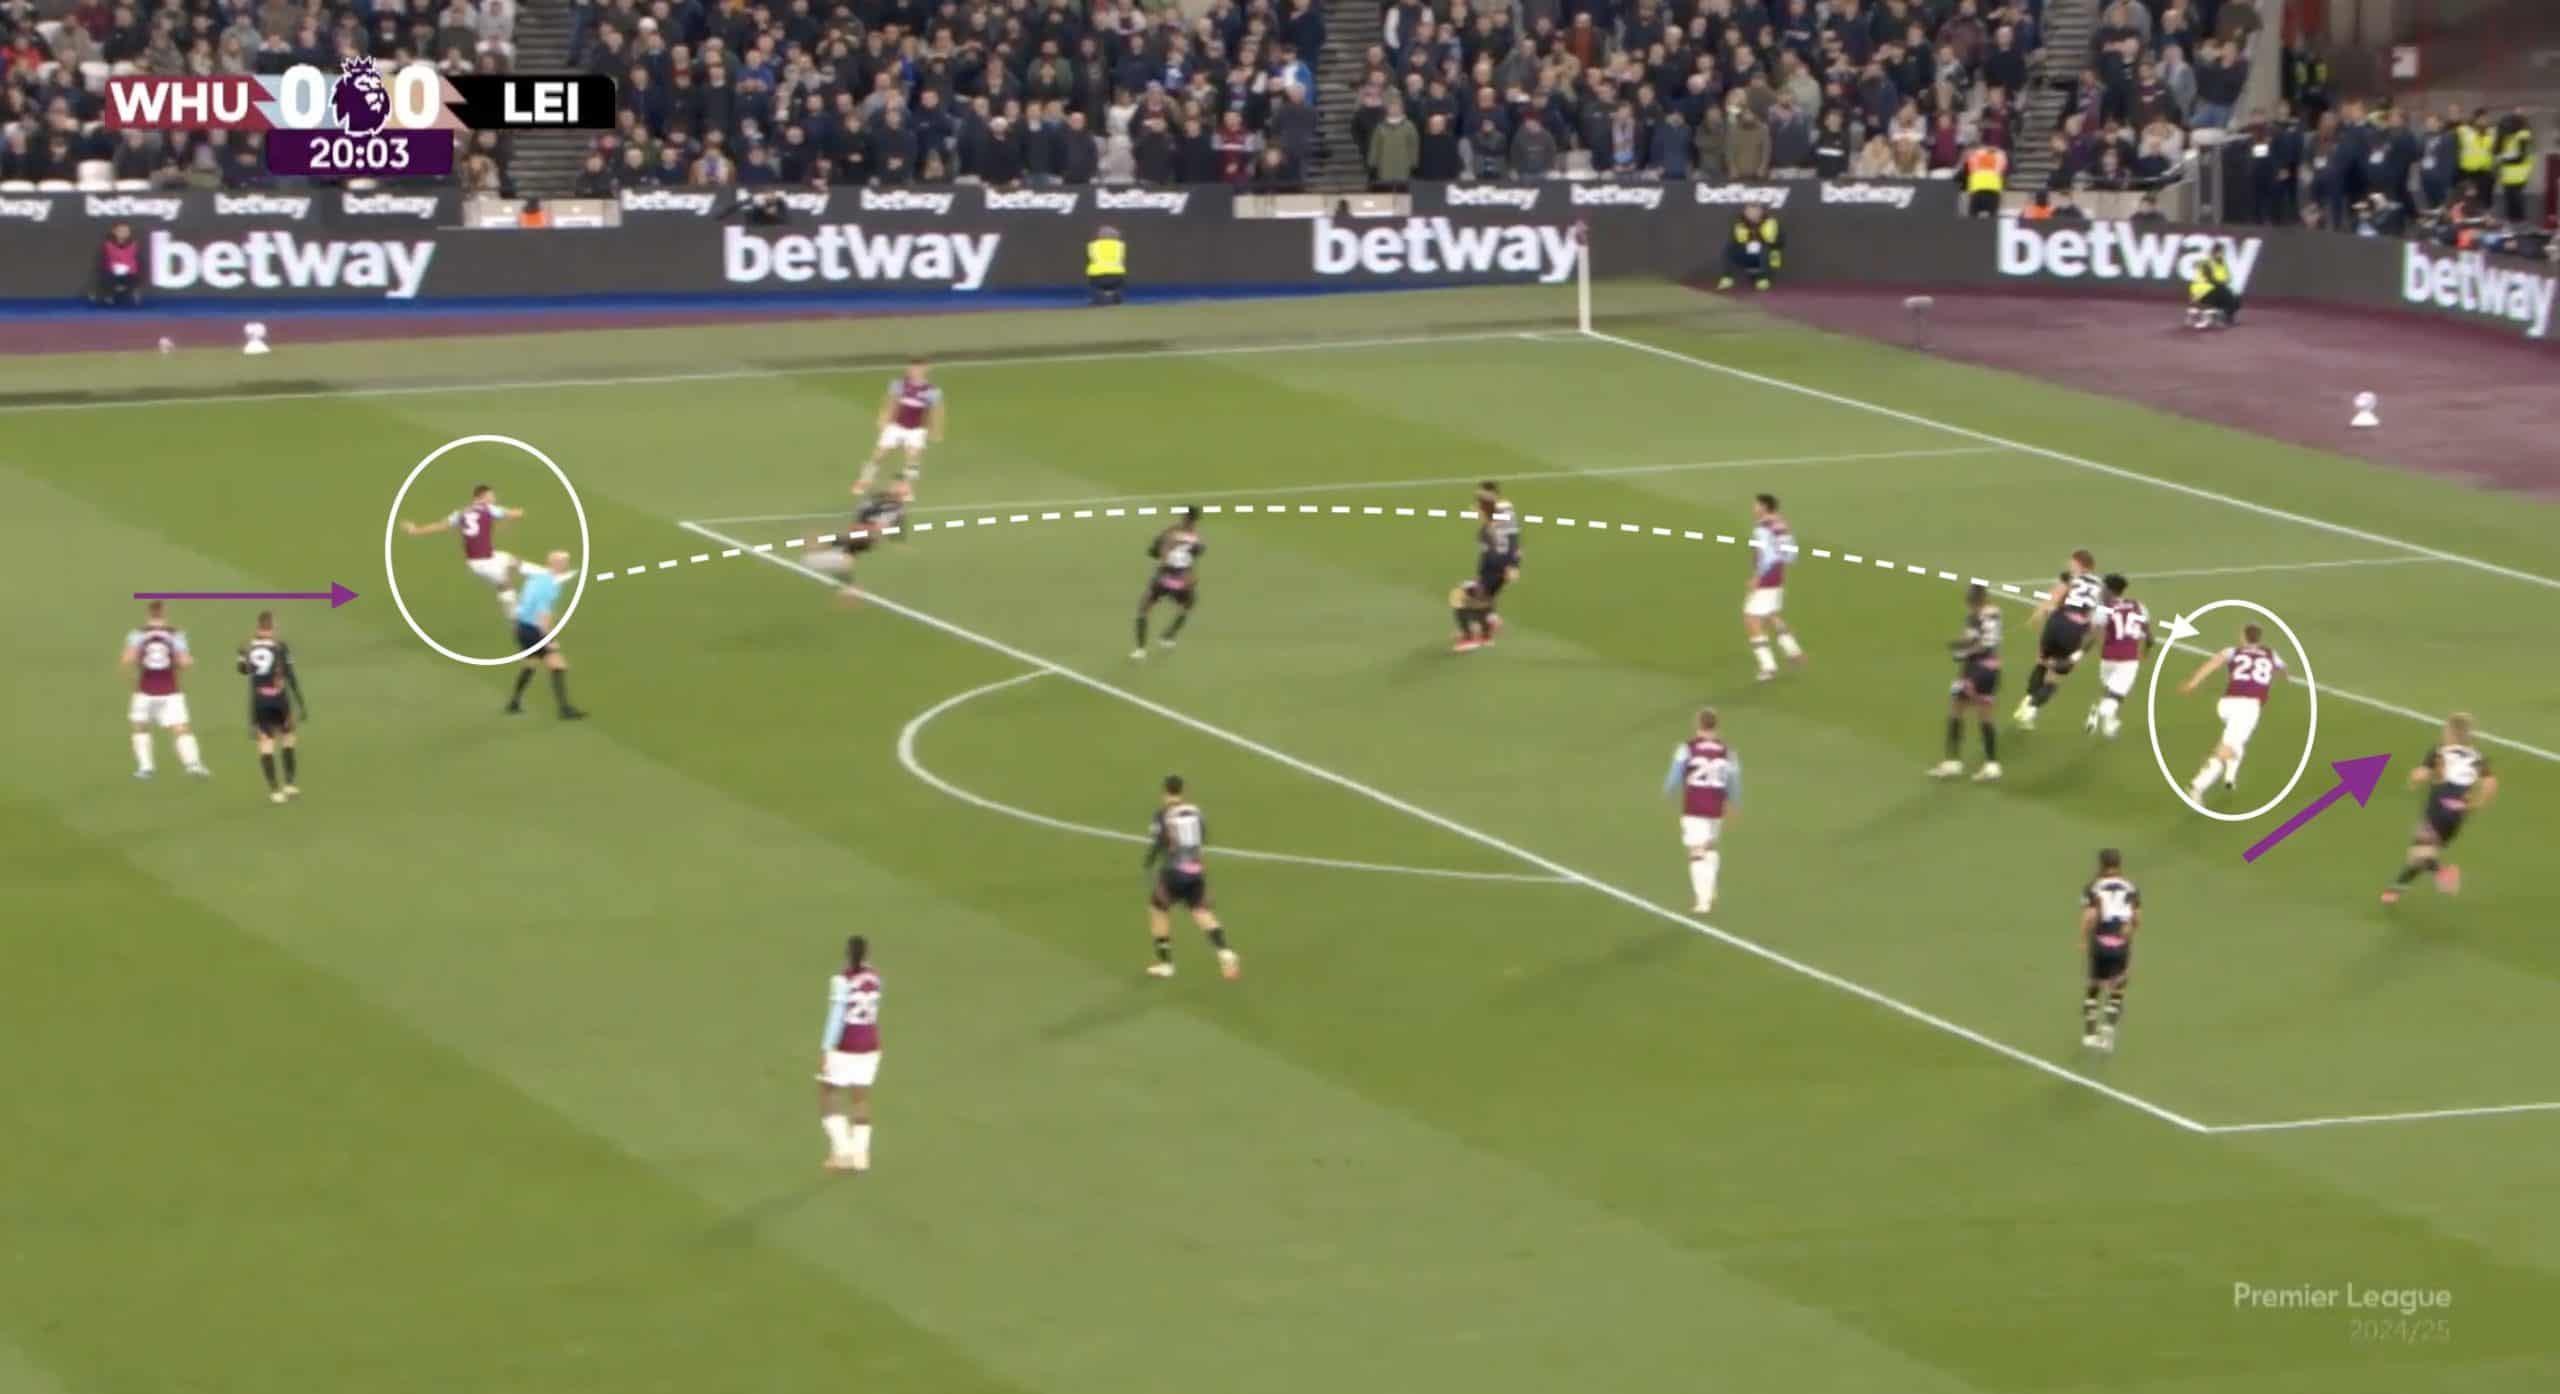
But probably the most important feature of the goal would be Cresswell‘s positioning as West Ham’s left centre-back—incredibly advanced to retain possession in the attacking third and recycle play with some devastating crosses.
West Ham’s Press & Intensity
Potter used his outside central defenders as key progressive outlets throughout the match, partially because Leicester had initially offered that crucial time and space in the initial build-up phase.
As play progressed, Todibo, in particular, had numerous opportunities to advance through the channel to combine with Wan-Bissaka and try to stretch the Leicester block.
Whilst deploying their right centre-back so high was perhaps a risky decision, Wan-Bissaka’s natural defensive tendencies meant that the English right-back could often shift centrally to bolster West Ham’s backline against a transition-heavy opponent.
But unlike Leicester, West Ham’s high-octane pressing effort allowed them to have even more possession by forcing multiple mistakes in the Leicester build-up.
Bowen and Kudus would consistently press high to cut off key passing outlets when Hermansen started out with possession, leading to the inevitable choice for the Leicester goalkeeper to launch his passes high and long into a packed middle third.
Even though he may have lost a step compared to previous seasons, Vardy was unable to really affect the game with his running in behind.
Leicester was never really given enough midfield freedom to regain control and play accurate, direct passes over the top of West Ham’s defence.
This was partly due to West Ham’s effective and coordinated counter-pressing strategy, which allowed them to quickly regain possession once they had an errant touch or misplaced pass deep in Leicester territory.

West Ham’s overall cooperation when out of possession saw their three-man midfield line often allow one player to jump to the Leicester holding midfielder, with the rest shifting across efficiently to apply pressure down the flank that Leicester opted to attack down.
Conclusion
It was a comfortable victory in the end for the hosts, who will be looking to expand upon their recent spell of positive results to finish the season on a high.
Things look much more dismal for Leicester fans, who needed to see their side snatch an unlikely win, especially considering the difficult run of fixtures on the horizon.
While Leicester mitigated West Ham’s attacking impact in a goalless second half, they could not weather the storm of claret and blue possession in the opening stages.
It was particularly impressive to witness West Ham’s energy and commitment without the ball, with the Hammers seemingly feeding off this boosted morale due to Potter’s appointment.
In what is now a ‘free hit’ of a season for the Irons, they will hope that the former Chelsea manager can further embed his tactical principles and help them reach the recent heights of European football.