A floated cross has a higher trajectory than a usual cross. The higher arc of the ball means that the ball travels across the air for a longer period, which provides both sides with plenty of time to react to the path of the cross. Due to the type of arc the cross requires, it is almost exclusively meant to target the back half of the 18-yard box.
Floated crosses haven’t been a common occurrence from set plays, primarily due to the lack of numerical advantages it may provide, as defending teams have the time to reorganise themselves should any screen/runs be made before the corner is taken. However, whilst the benefits aren’t clear from one perspective, there are numerous ways these kinds of corners can be used to a team’s advantage, particularly if a team has a player capable of winning most of his aerial duels.
In this tactical analysis, we will look into the tactics behind different methods of floated crosses, with an in-depth analysis of how each technique can be attempted and the positives/risks that come along with them. This set-piece analysis will examine why floated crosses are undervalued and the many potential benefits that come with them.
Making the Most of Aerial Specialists
As mentioned above, floated crosses are most beneficial when aimed towards players who are superior aerially. A floated cross into the box usually results in a 1v1 aerial duel between the two players the cross is about to land on, and so having a player who is likely to win most aerial duels can nearly guarantee your team making the first contact inside the box, the golden ticket to scoring from corners.
The most important aspect of the success rate of floated crosses is the receiver’s ability in the air. Being a dangerous aerial presence from corners involves many facets, with many components (timing, jumping reach, judgement, movement, physical strength, heading accuracy) differingly impacting the likelihood of a player winning their aerial duel.
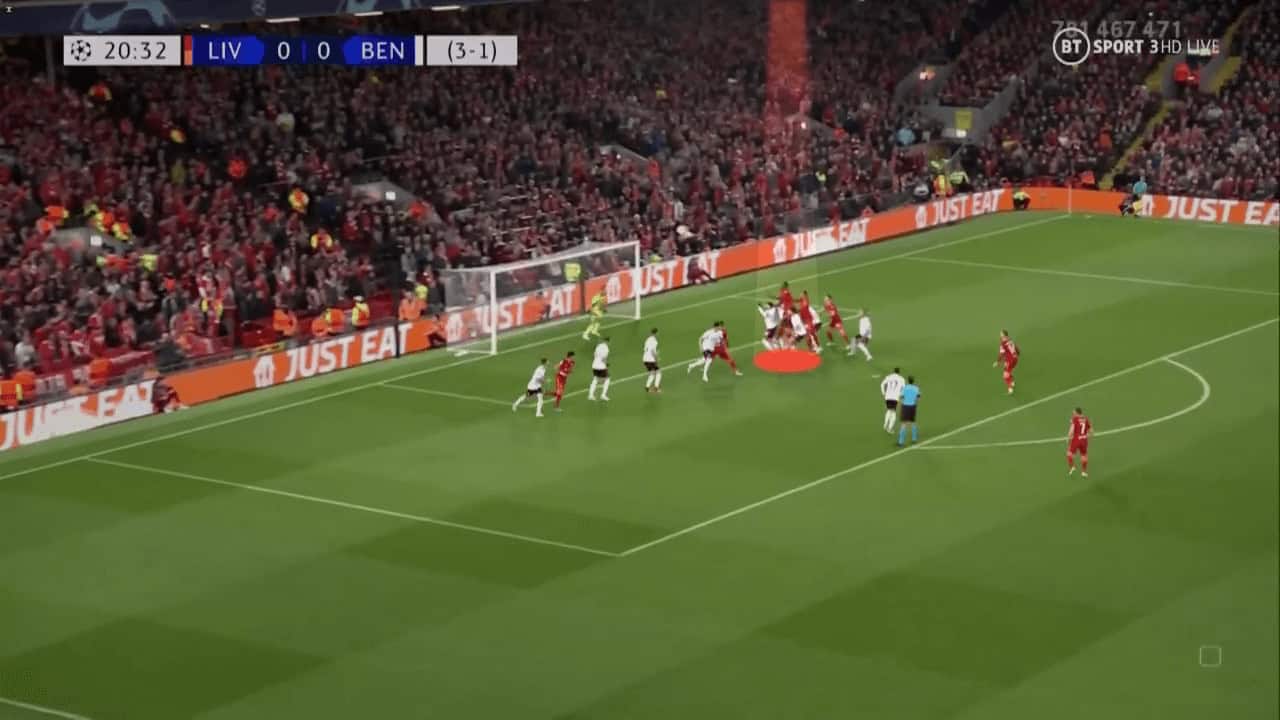
In the example below, Liverpool‘s Ibrahima Konate displays his excellent judgement and heading ability in the Champions League match against Benfica. Konate can jump early, while the ball is still floating towards the box, because of his ability to read the flight of the ball and predict where the ball will arrive earlier than anyone else.
As he has judged the cross well, Konate can be in the optimal position to attack the header. Konate then jumps early, perhaps too early, but his ability to jump higher than the average player allows him to be in the air first and use his arms to prevent his marker from being able to leave the floor by pinning his shoulder in place. After Konate is able to ground his marker, he then has a free attempt at the header, where his excellent placement of the effort makes it unstoppable for the goalkeeper.
The leap was slightly off the optimal timing, as Konate jumped early, meaning that he was on his way down as he headed the ball, so he lost potential extra power off the effort generated through his jump. However, the trade-off for an unopposed goal attempt was undoubtedly worth it. It will always be worth it for players who lack the jumping reach to outjump players or timing to win their aerial duels consistently.
Below is another example of a player consistently superior in aerial duels, no matter who the opponent is. Cristiano Ronaldo is one of the masters in attacking headers, as he has all the skills Konate possesses whilst jumping higher than anyone else and having the timing in his leaps to attack the ball at the highest point. Being able to attack the ball at the highest point allows Ronaldo to head the ball at points other players can’t even reach while also being able to attack the ball with maximal power simultaneously.
Another critical skill Ronaldo possesses is his ability to constantly move inside the box, making it difficult for defenders to track his runs. Ronaldo consistently creates space for himself in this fashion, and the added movement also helps him to attack the header with a run-up, which allows him to reach even higher points when leaping for the ball.
Another benefit of floated crosses, specifically aimed at the far side of the six-yard box, is the lack of zonal marking present usually in that area. Some teams leave the far side of the six-yard box unmarked, whilst others have one or two zonal markers protecting it. Whilst this is a result of most teams preferring to attack the near side of the goal, it does leave more space and opportunities for teams to perform floated crosses towards the back post.
As a result of the lesser defensive presence, it leaves attackers with more opportunities to attack the ball without interruption. Players can start from outside the box before arriving into the desired areas late on, and with no defenders attempting to disrupt the run. The ability for players to attack the ball from a deep run provides them with the advantage of attacking the ball unmarked, and even if there is a zonal defender present, the momentum gained in the run-up provides attackers with the opportunity to out jump the static defenders, like in the example of Sheffield United below.

The Problem Caused for Defenders
With crosses aimed towards the far side of the six-yard box, defenders start having problems tracking their marker and the ball. In order to be goalside of the attacker at the back post, defenders must be positioned slightly in front of them, causing them issues where they cannot see both the ball and player simultaneously. Defenders must regularly scan over their shoulders to see their marker or be extremely tight to feel where they are, at the risk of conceding a penalty if they get too hands-on. Defenders then have two options otherwise, once the corner taker crosses the ball:
1) Track the flight of the ball; lose sight of the assigned attackers
or
2) Track the attackers’ movements; lose sight of the ball
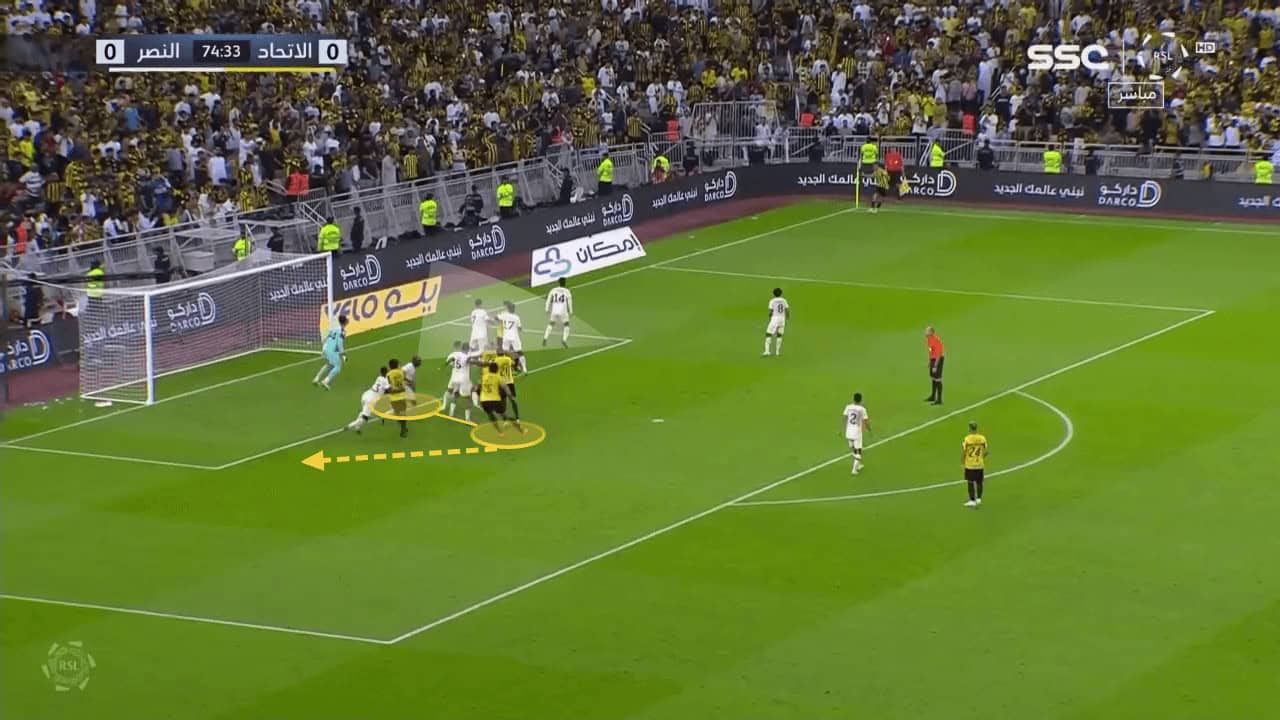
The first problem highlighted above can be seen in action below. The attacker has managed to get some separation from his marker as the corner is about to be taken, and so the defender chooses the first method to track the flight of the ball. As the defender takes his eyes off the attacker, Hegazy, he can quickly shift his feet and attack an open area inside the six-yard box, which the defender isn’t aware of.
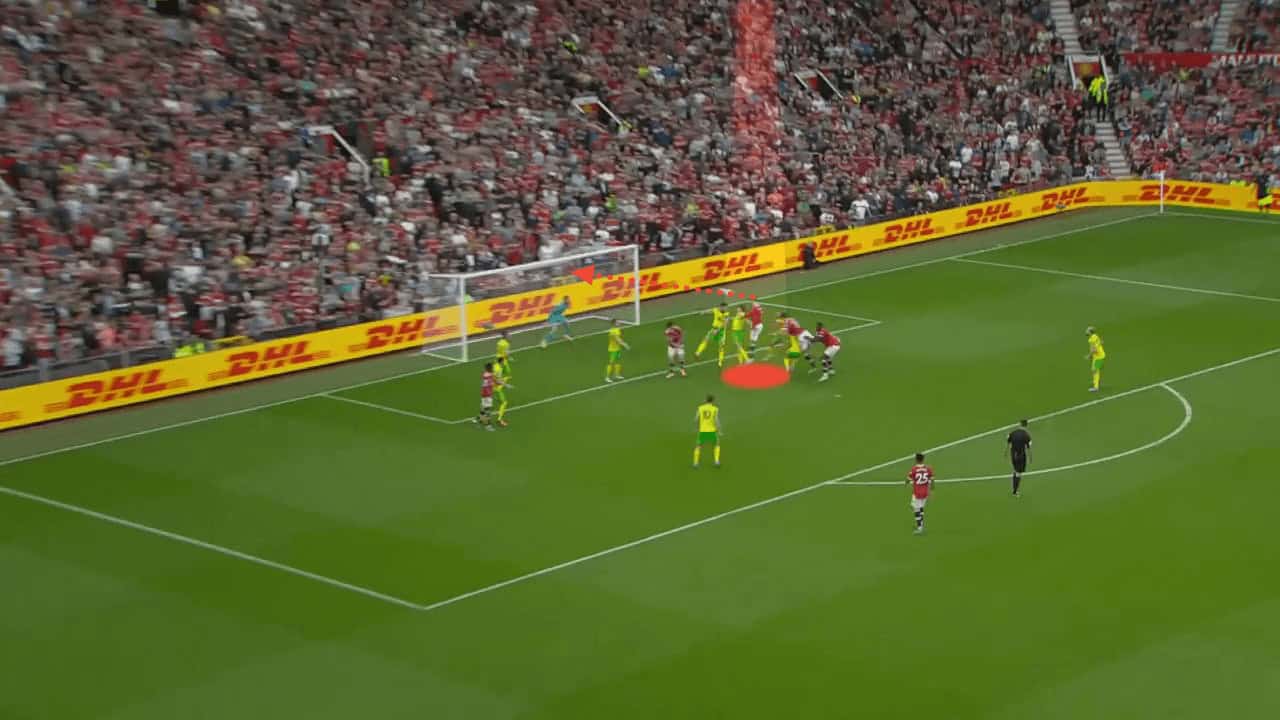
Pictured below is another example, and yet almost identical with the same principles followed. As the defender turns his head to focus on the ball, the attacker attacks the space which isn’t being defended and has a free shot on goal. Because the defender had only just turned their head, they may assume that their marker wouldn’t have moved too far away, so they are caught on their heels, unaware of the dangerous situation until it’s too late.
In this example between Everton and Arsenal, the second method is in use by Martin Ødegaard, although not exactly. Rather than worrying about the ball, Ødegaard focuses on preventing his assigned attacker from moving towards the goal. He tracks the attacker’s movement, but because he loses track of the ball, he is actually unable to get in the way between the ball and the attacker. He successfully prevent Tarkowski from swiftly moving to the goal but forgets about the most important and moving element, the ball, which Tarkowski can attack with minimal interference. The physical mismatch is apparent, and Tarkowski can quickly force Odegaard backwards and dictate his own position.
Furthermore, the physical mismatch allowing Tarkowski to force Ødegaard backwards causes him multiple issues. Whilst he is no longer controlling the attacker’s movements, he could attempt to clear the ball away. However, the diagram below illustrates Ødegaard moving backwards whilst his foot is planted on the floor. As a result of the backwards momentum and inability to jump with his weight balanced on his front half, Ødegaard’s attempt to attack the ball only ends up in him jumping backwards, towards his own goal and providing Tarkowski with even more space to header the ball in.
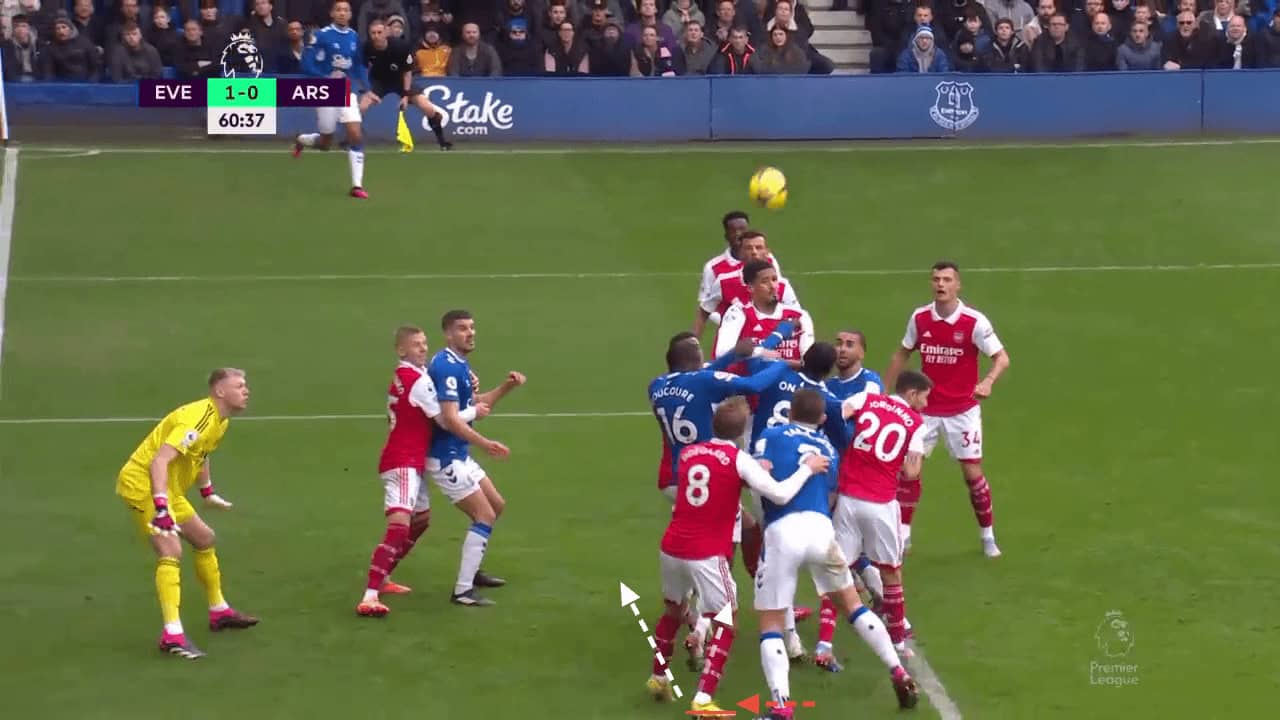
This illustration below shows Ødegaard’s positioning at the time of the aerial duel, with him failing to be goal side after failing to pick up on the positioning of the ball and Tarkowski being able to manipulate Ødegaard’s positioning as a result. Tarkowski can pretend the ball is going deeper into the box, luring Ødegaard to step away from the goal, providing him with more space to attack the ball.

Opportunity for Knockdowns
The final significant benefit of utilising floated crosses can be seen in the image below, with Brentford, one of the teams, preferring this method. Earlier in the article, we mentioned that making the first contact is the golden ticket to scoring from corner kicks. In some cases, where the attacker has a clear advantage in the aerial duel or when someone can attack the ball unopposed, it is easy for the attackers to attempt to score immediately. However, when the ball is at a tighter angle, or when the attacker is unable to attack the ball in the air cleanly, knockdowns can be preferred, where the ball is redirected into a different part of the pitch where someone else may have a higher chance of scoring a goal.
The example below shows Ivan Toney at a tight angle, battling for the header, and he understands the difficulty of the situation. Selflessly, he redirects the ball into a different yet still dangerous area around the six-yard box, where his team have a numerical overload, and so are likely to make the second contact, with it being from such a close position that it will almost definitely result in a goal should they make the next contact.

Summary
This tactical analysis has demonstrated the numerous different ways in which floated crosses can be and should be utilised more often than they have been in elite football in the recent past. Being threatening from corners in multiple ways and being a well-rounded set-play team can help any team gain crucial points. Set plays can be replicated on the training ground more accurately than many other parts of the game, so teams with towering presences in the box have nothing to lose and everything to gain by attempting to utilise those players who provide guaranteed advantages in the aerial duel.