The attack-minded and creative football had its time to shine on Tuesday evening with the UEFA Champions League meeting between Atalanta and Ajax. Two similar yet completely different sides that have been among the most entertaining teams to watch in the last couple of years.
With tactically intelligent coaches and players with strong technique, both teams have reached cohesive performances that promise dynamic and explosiveness.
Atalanta started the game with confidence after their 4-0 win over Midtjylland but also with an awareness of the similarities in their vision. Ajax were unlucky to go 0-1 down to Liverpool in their first game and were extremely motivated to compensate against La Dea.
Both teams’ attacking approach was evident from the first whistle and although Atalanta seemed more determined and organised throughout the game, the 2-2 final result wraps it up well.
This tactical analysis examines the tactics Atalanta and Ajax used in the second round of the CL Group stage and explains how the Serie A side managed to get back into the game.
Line-ups

Both coaches relied on their favoured formations. Gian Piero Gasperini opted for 3-4-1-2 and used his optimal starting XI. In Pierluigi Gollini’s absence, Marco Sportiello covered the goal, supported by a three-man defensive line of Berat Djimsiti, Cristian Romero and Rafael Tolói. The midfield line consisted of Robin Gosens, Remo Freuler, Mario Pašalić and Hans Hateboer while Papu Gómez played behind the front duo of Duván Zapata and Josip Iličić. This formation of course transformed many times throughout the game. Typically for Atalanta, there was a lot of movement and positional changes which allowed them to increase their efficiency.
Erik ten Hag set Ajax up in 4-2-3-1 with André Onana between the posts. The backline included Nicolás Tagliagico, Daley Blind, Perr Schuurs and Noussair Mazraoui. Ryan Gravenberch and Davy Klaassen formed the double pivot in midfield, while there were four players focused on the attacking actions. Antony and David Neres covered the wings while Dušan Tadić played behind Lassina Traoré. Ajax tried overloading the flanks and using off the ball runs to expose the opposition too which made the game very dynamic and full of chances.
Atalanta’s build-up strategy against Ajax’s press
Ajax started the game with quite an aggressive man-to-man marking strategy. Their press was successfully pinning Atalanta back and giving them a hard time building-up by blocking the passing lanes. While they did manage to slow down La Dea’s attacking efforts, they eventually allowed to be dragged out and would open spaces which the Atalanta players would immediately exploit to progress the ball.
Atalanta tried to bypass the press by their usual short pass combinations and constant movement off the ball. They tried providing passing options to the ball carrier and were moving between the lines quite efficiently.
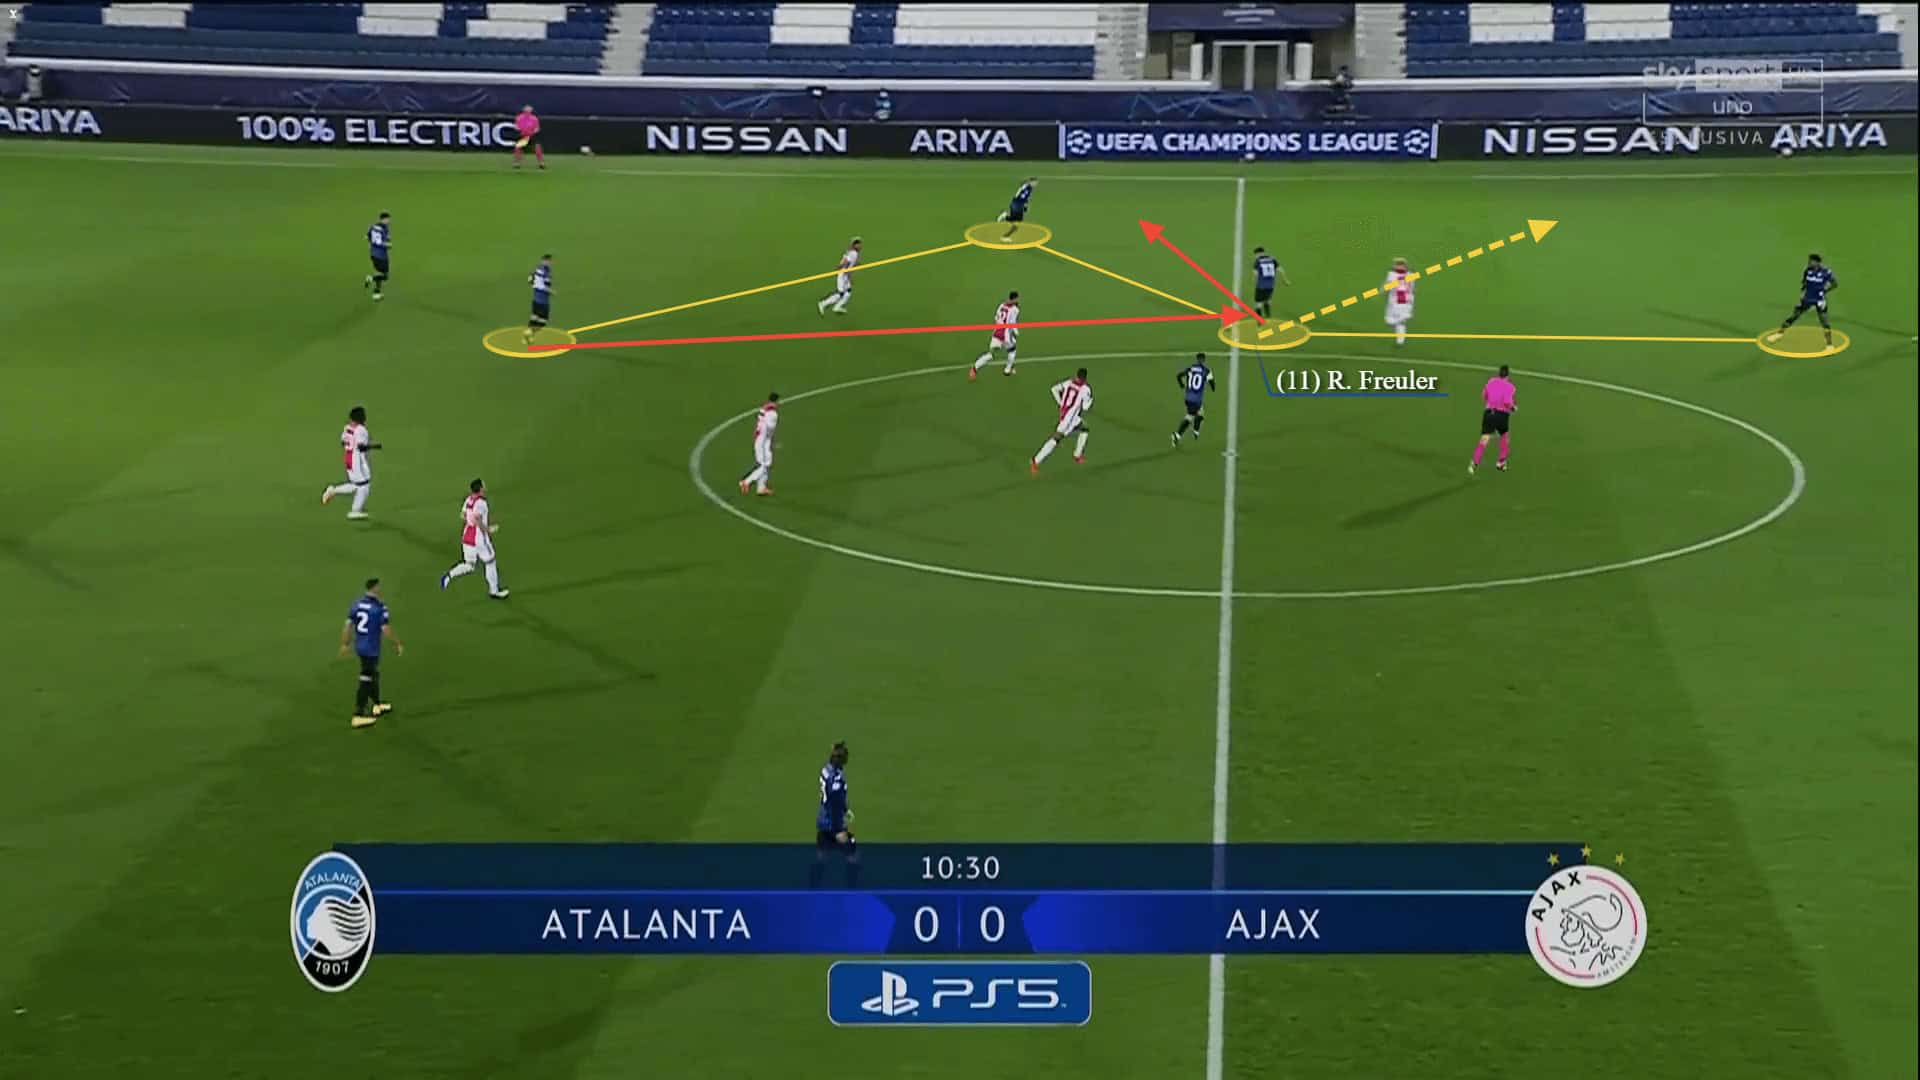
Ajax did create waves with applying pressure, pressing aggressively up high whenever they had the chance which pinned back the opposition on a few occasions and forced them to send the ball back to the goalkeeper Sportiello. Atalanta would turn this into their advantage though and instead of cracking under pressure, they used the keeper to spread out the ball directly to the opposition half, helping them in bypassing the press.
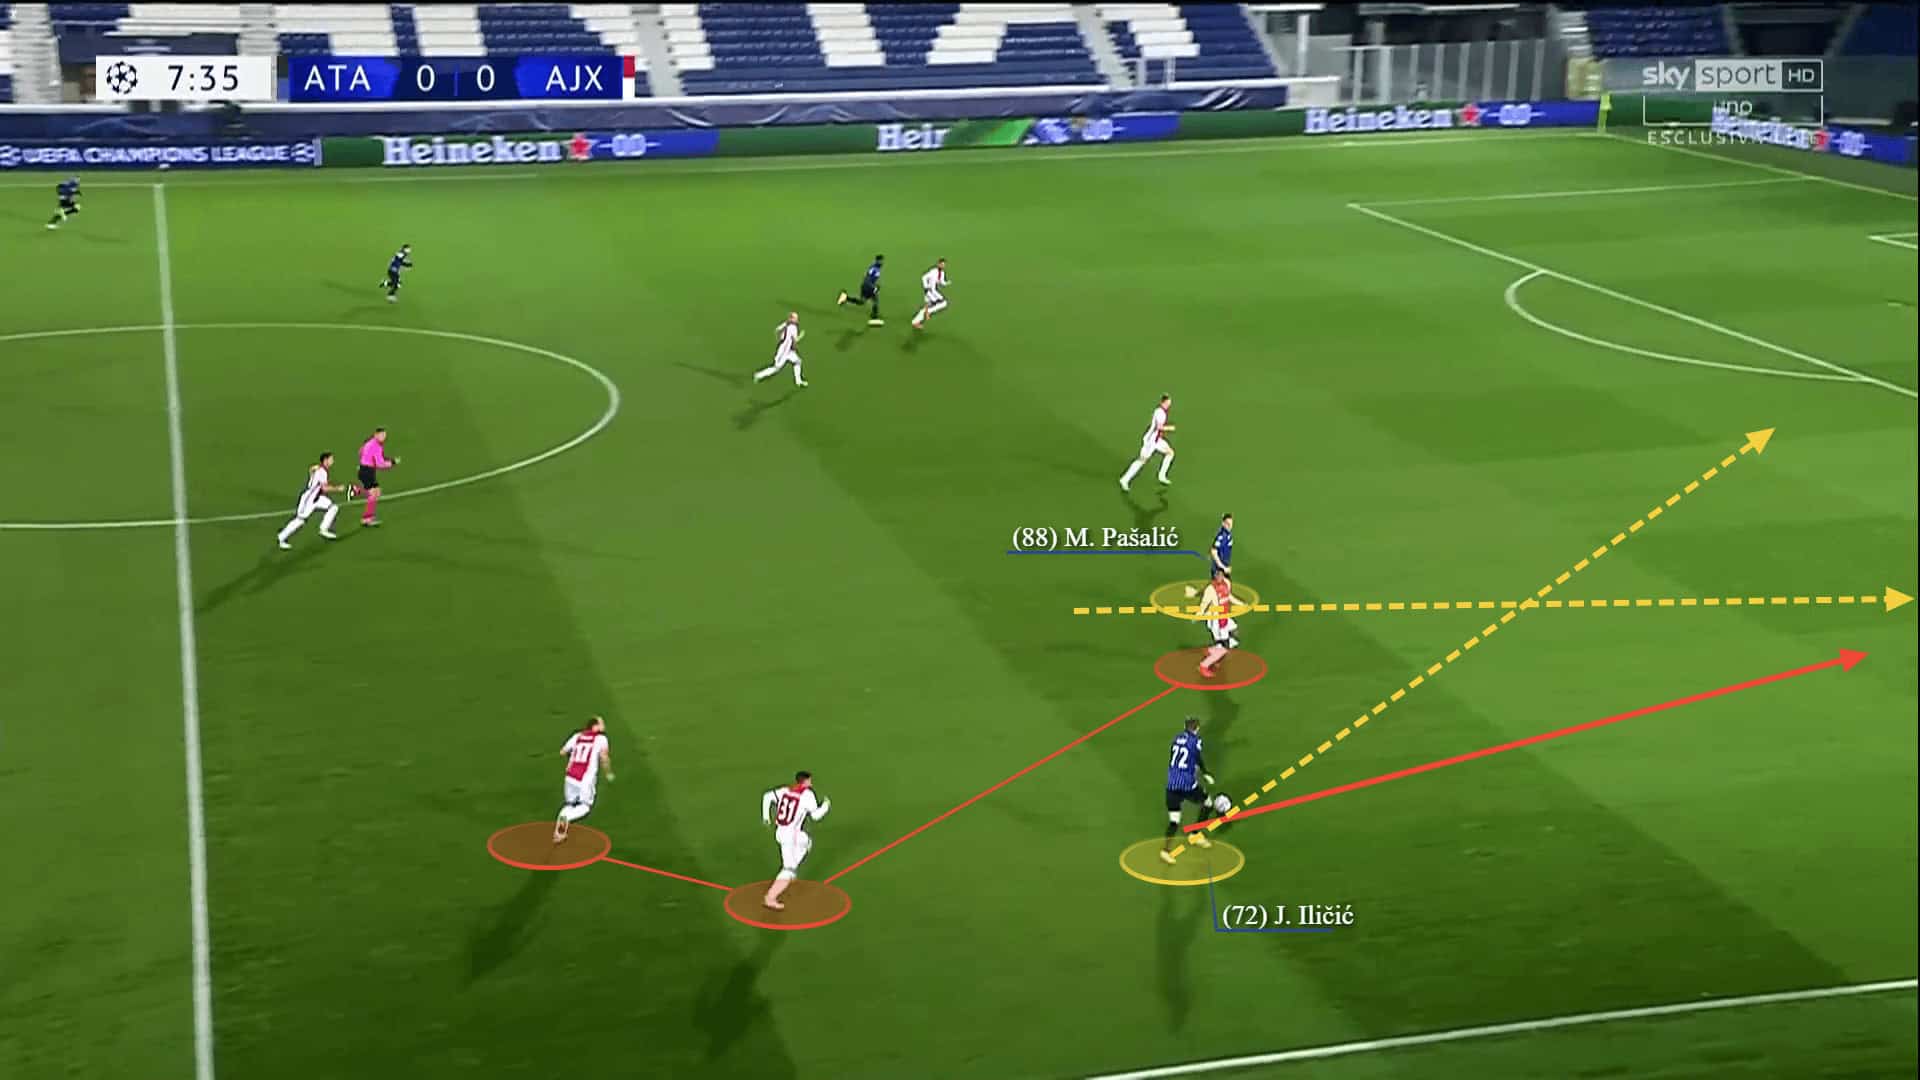
Ajax were mainly focused on the central areas at first, that’s why Atalanta tried to expose them on the wings. Mainly exploiting the left-side the movement of Gosens and Zapata was key for their success in passing through the Ajax players. Since the whole Atalanta team sat deeper than usual, Zapata would find himself closer to the central-line and would efficiently occupy both the half-spaces and the wide areas too. His link-up play with the wing-back and the rest of the team allowed them to quickly exploit the tiniest gaps left by the Ajax players and attack.
Whenever they did a short pass combination, Gosens would try to go deeper on the flank, while giving Zapata a chance to make a run to the box and vice-versa. They’d attempt a lot of crosses also with the support of their creative force Gomez.
But Ajax were prepared for that for the most part. They’d commit players on the flanks and press Atalanta back. La Dea weren’t able to switch play as they’d usually do in this cases and their only chance was sending the ball back to the defence and Sportiello who would go out of position in line with the defenders in order to help with ball progression.

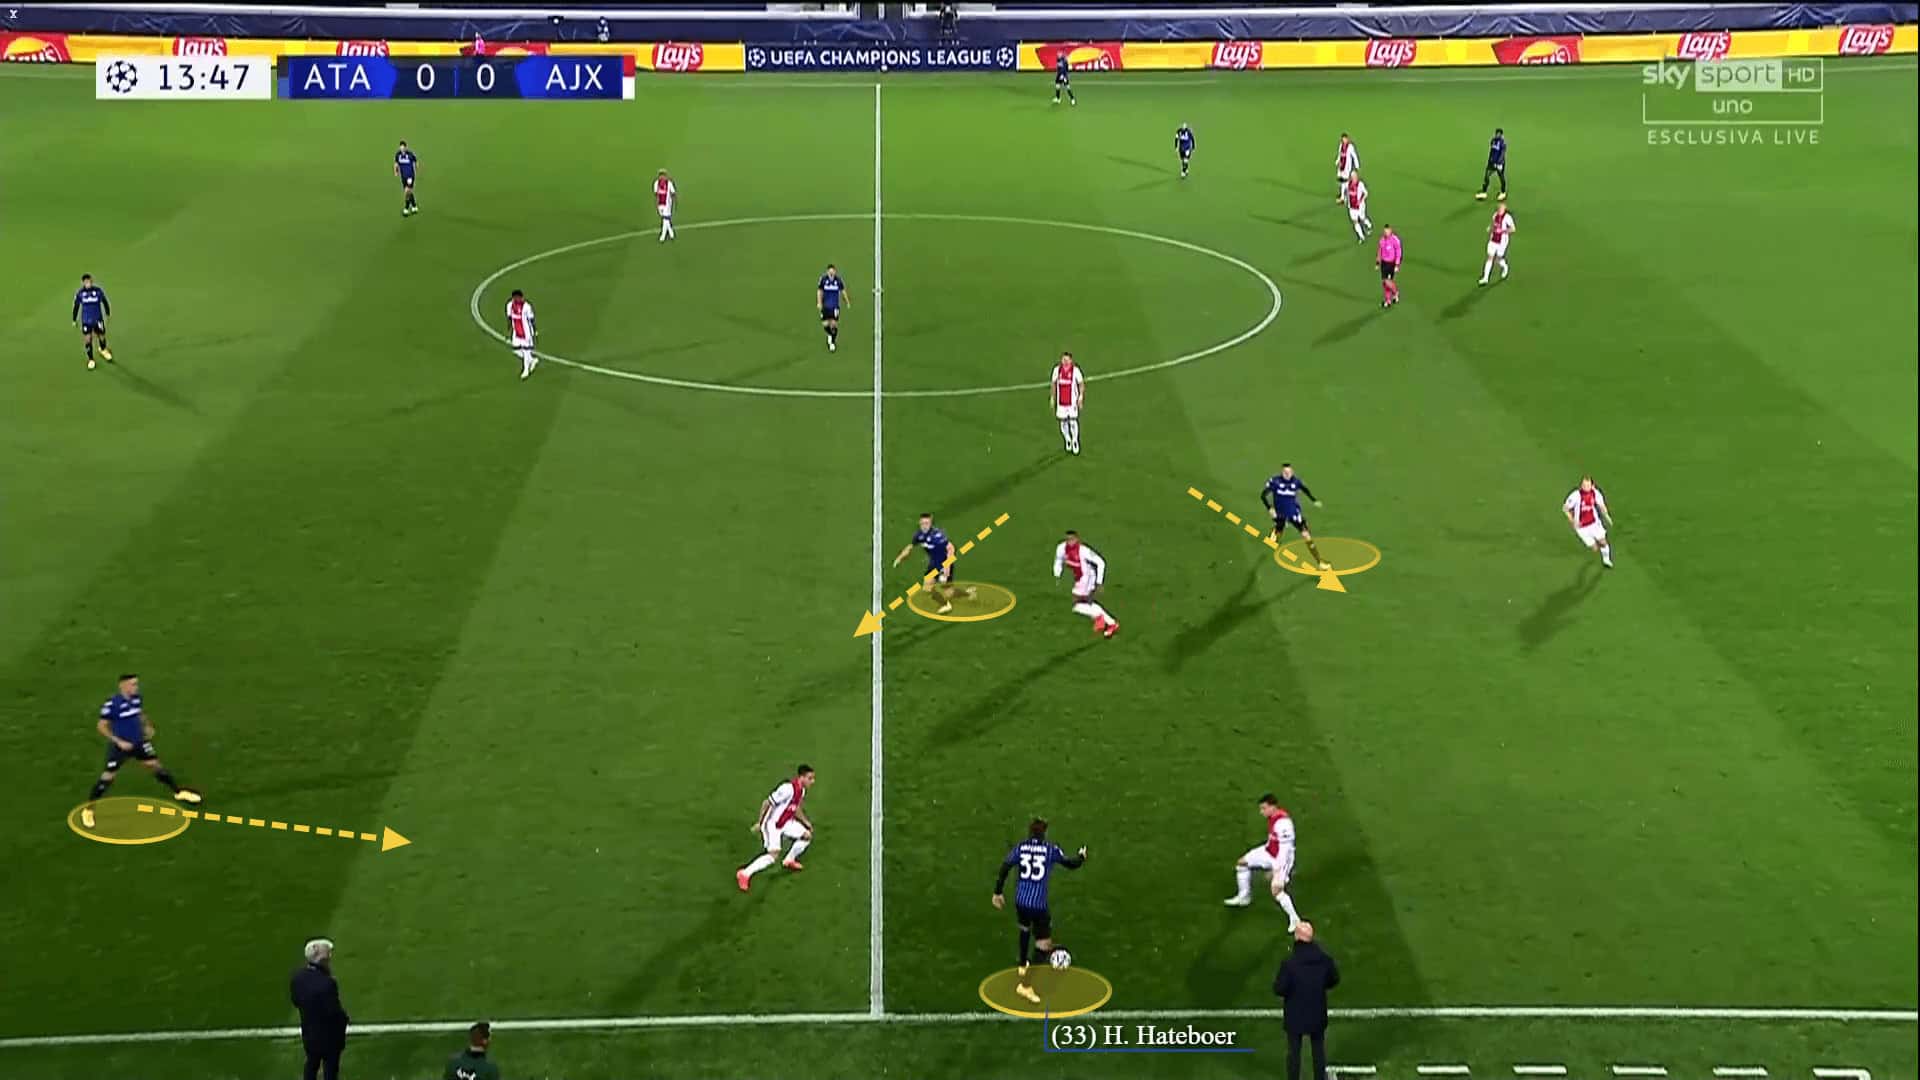
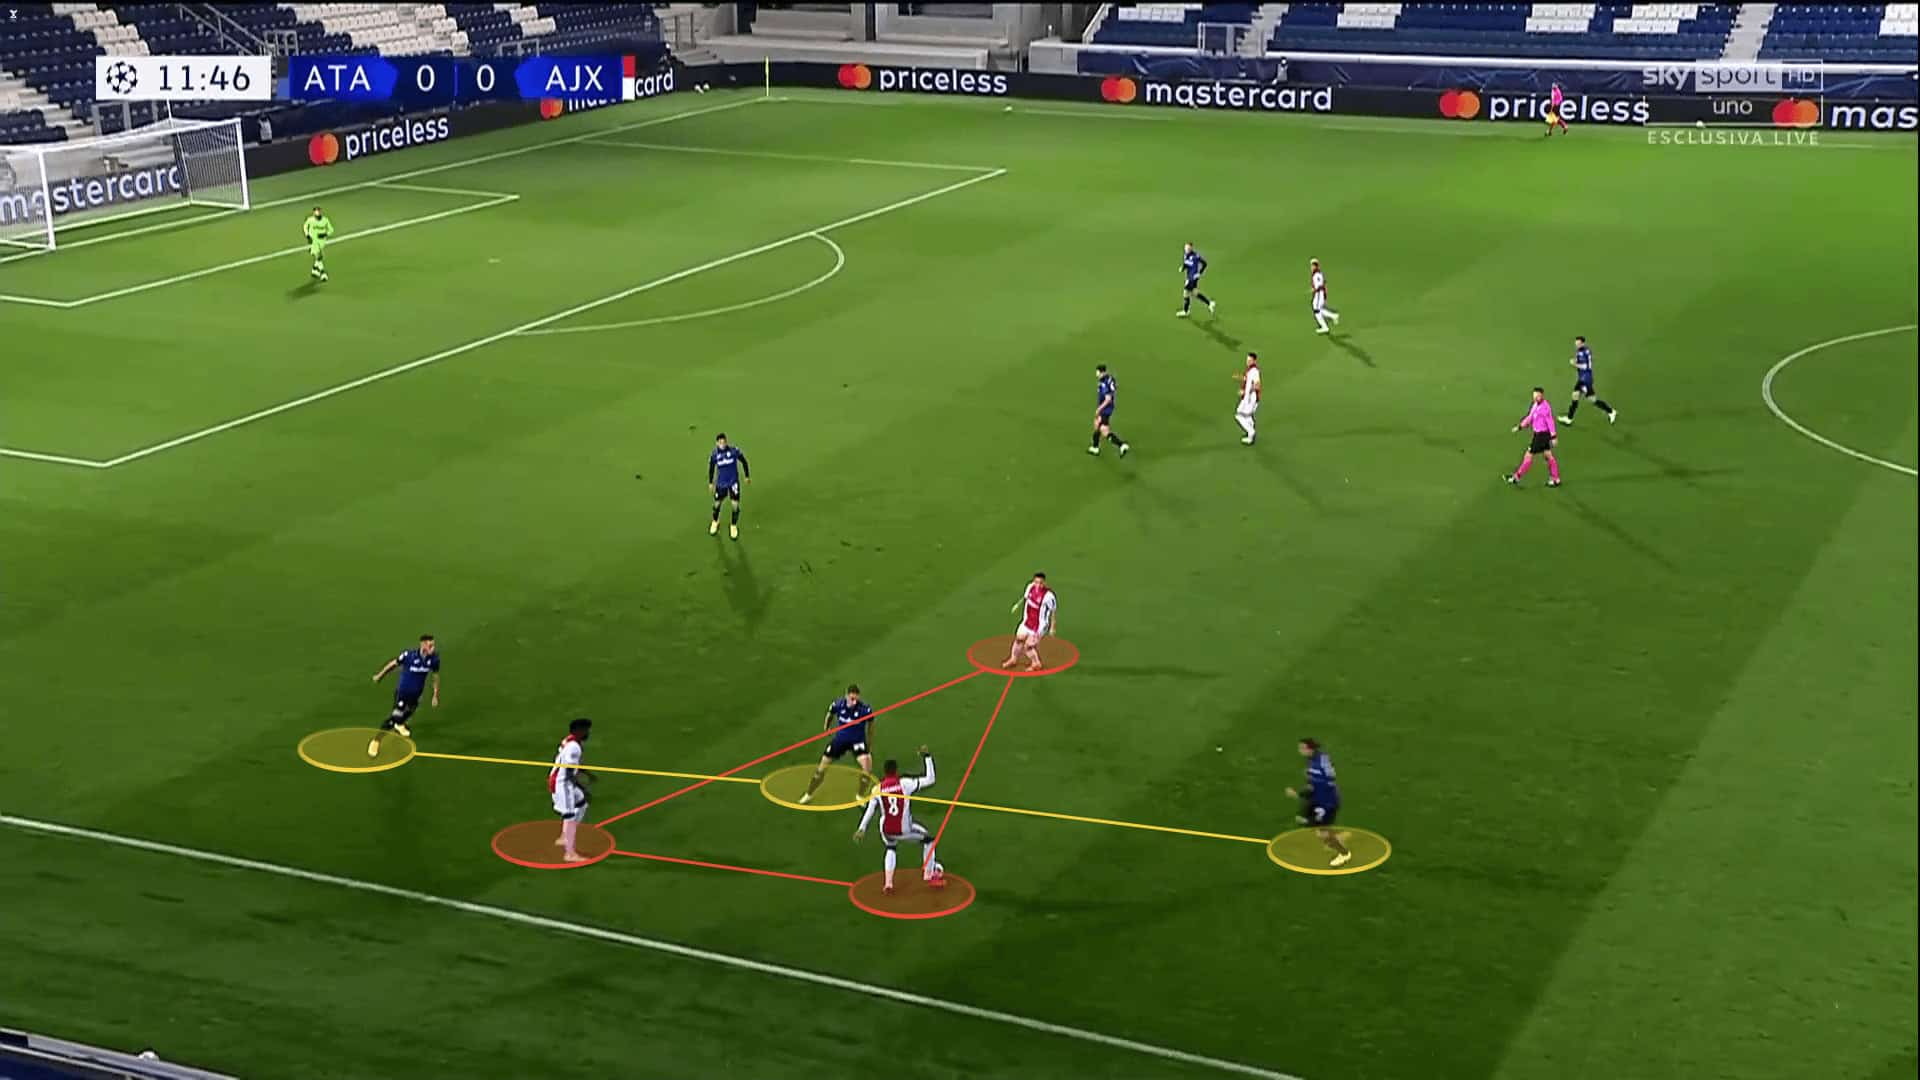
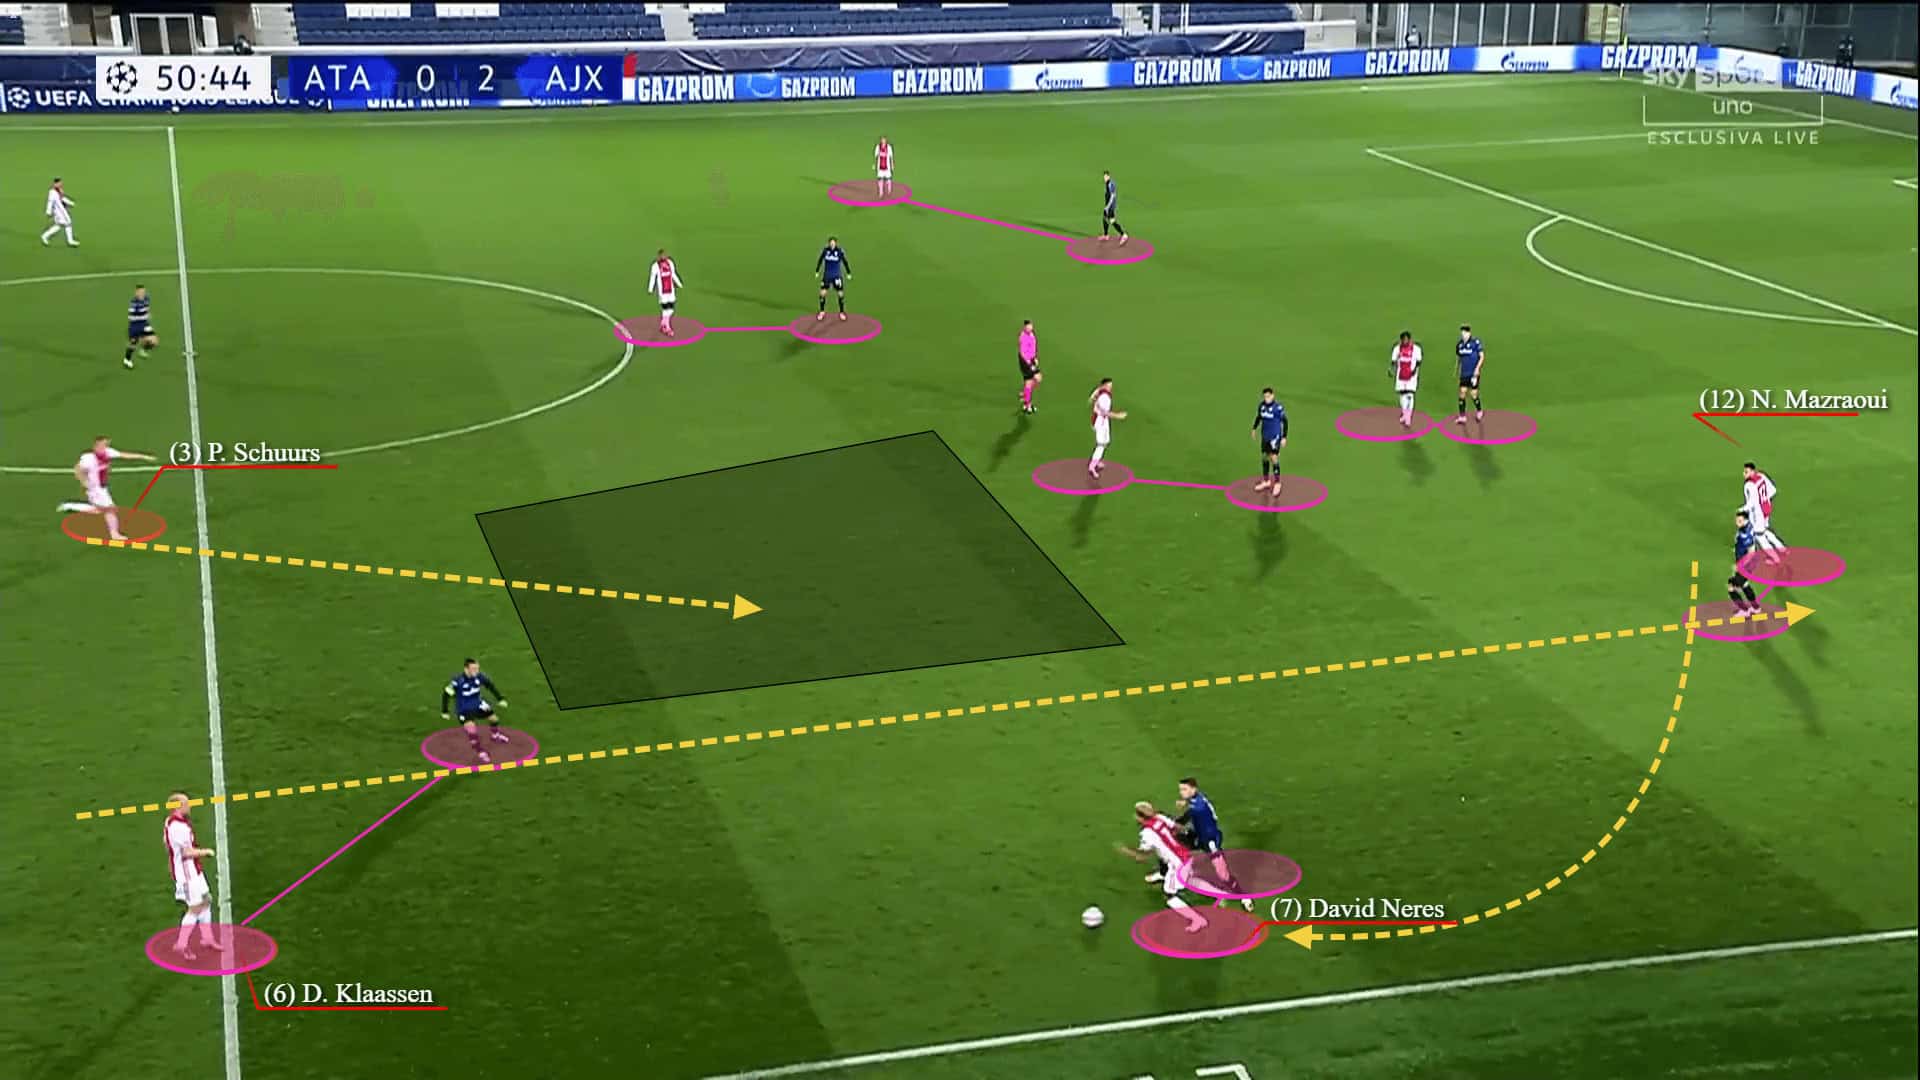
That doesn’t mean Ajax were always successful in their coverage of the wide areas. They would make 2vs1 situations in order to recover the ball but since they were so keen to press the player with the ball they would overcommit which allowed the Atalanta players to move off the ball and be creative, leading to creating opportunities.
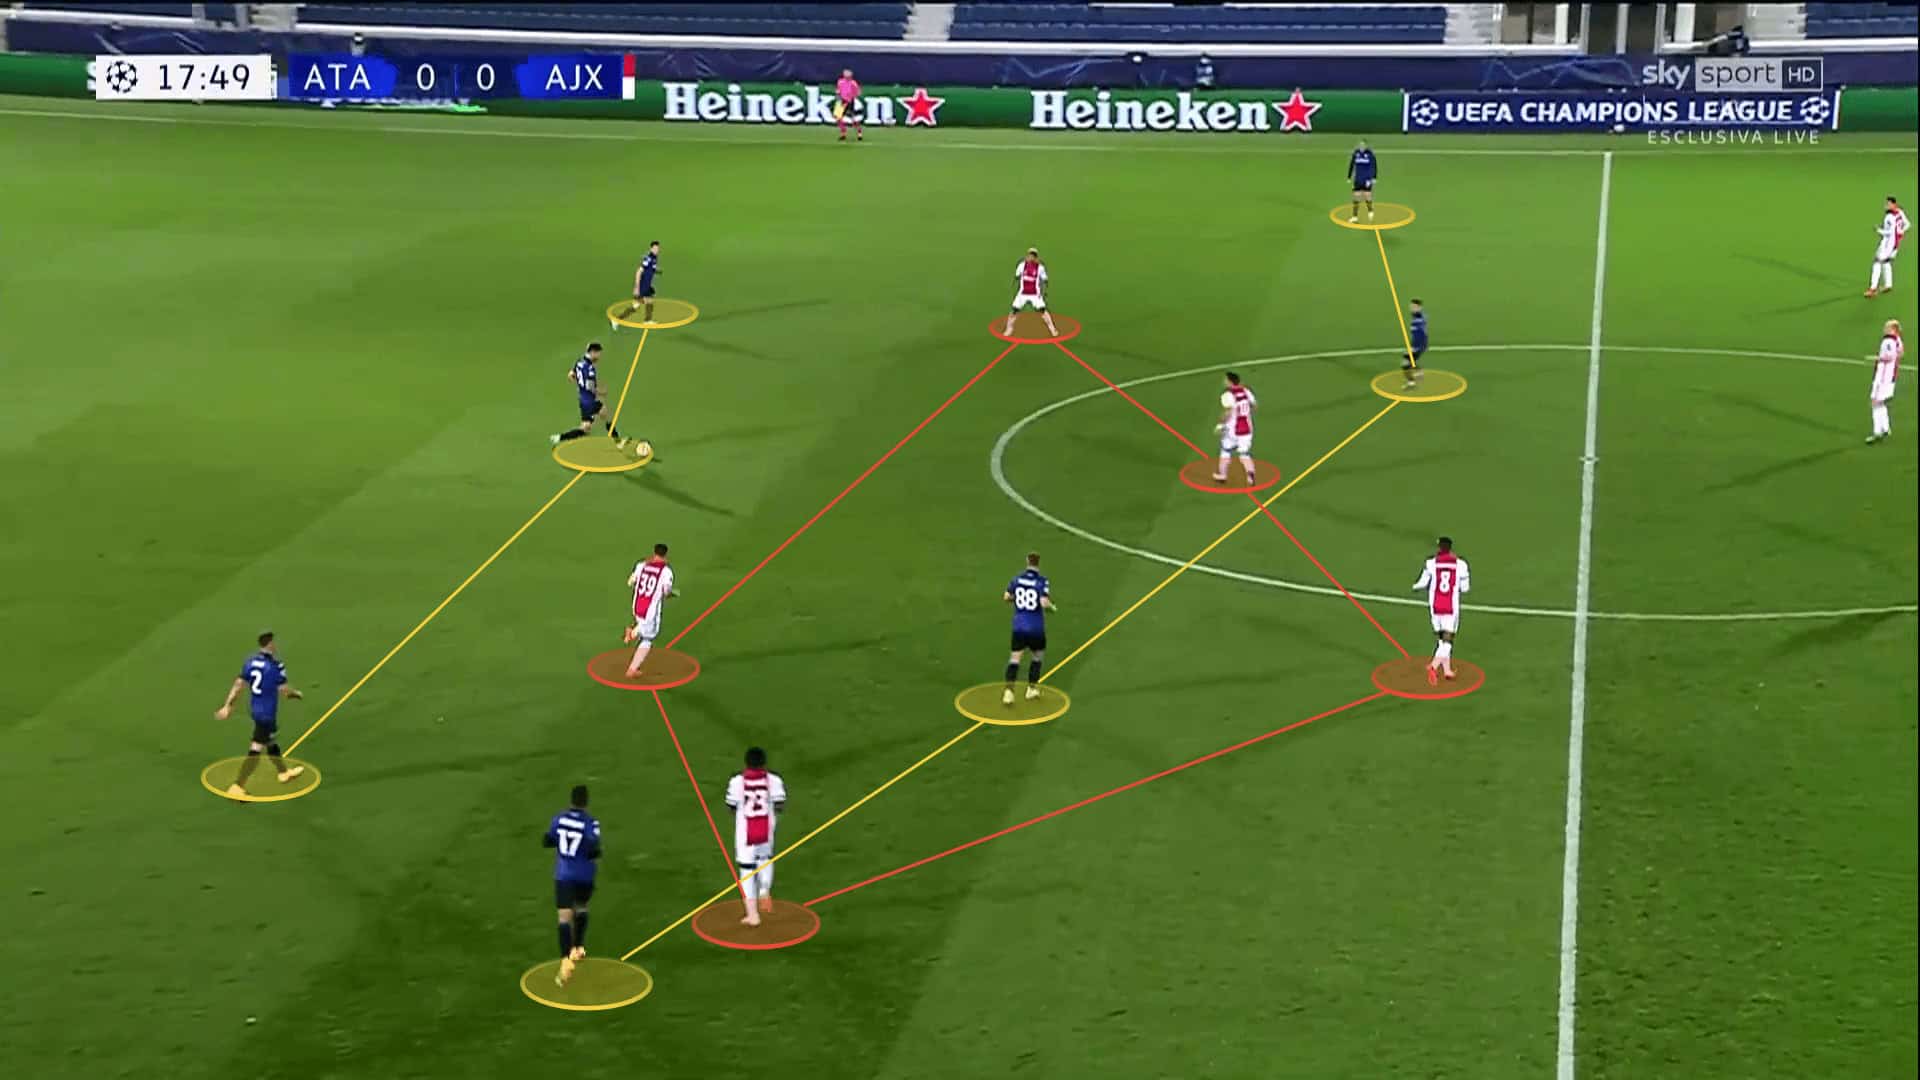
Atalanta’s players made everything possible to drag players out of position with their movement and open the passing lanes for each other. But what is equally as impressive is that in almost every attack they managed to have three players on the edge of the box or in the box as a direct threat. This is thanks to the whole team’s involvement in the attack. They would go forward with their centre-backs, with the wing-backs cutting inside and with their midfielders taking advanced positions. This allowed them a lot more options upfront.
Not only Zapata impressed with his movement back. Iličić would drop on the right flank to help with the ball progression once they gain back possession. His partnership with Hateboer and their overlapping and underlapping runs were key in the attacking phase.
They were confident on the ball and didn’t hesitate to send it back and then push up high again. They tried retaining possession even if that meant going all the way back from the final third to their own half. Their patience and trust in their approach were impressive.
Their defensive organisation and counter-attacking actions
Atalanta were very solid in their duels in the midfield and their own half. They didn’t hesitate to dive into challenges and recovered the ball in those areas quite often. Not only did they performed well in their ground duels but their aerial presence in their own half was impressive. This allowed them to re-organise and do a lot of positional changes in order to escape their markers. Even if they let Ajax pass through the midfield, they’d press intensely in their own half and steal the ball. The whole team were sitting a lot deeper than usual and they were waiting to take advantage of their opportunities.
After their multiple attempts to penetrate in the first half and being 0-2 down, Atalanta focused on their counter-attacking actions in aim to exploit the opposition.
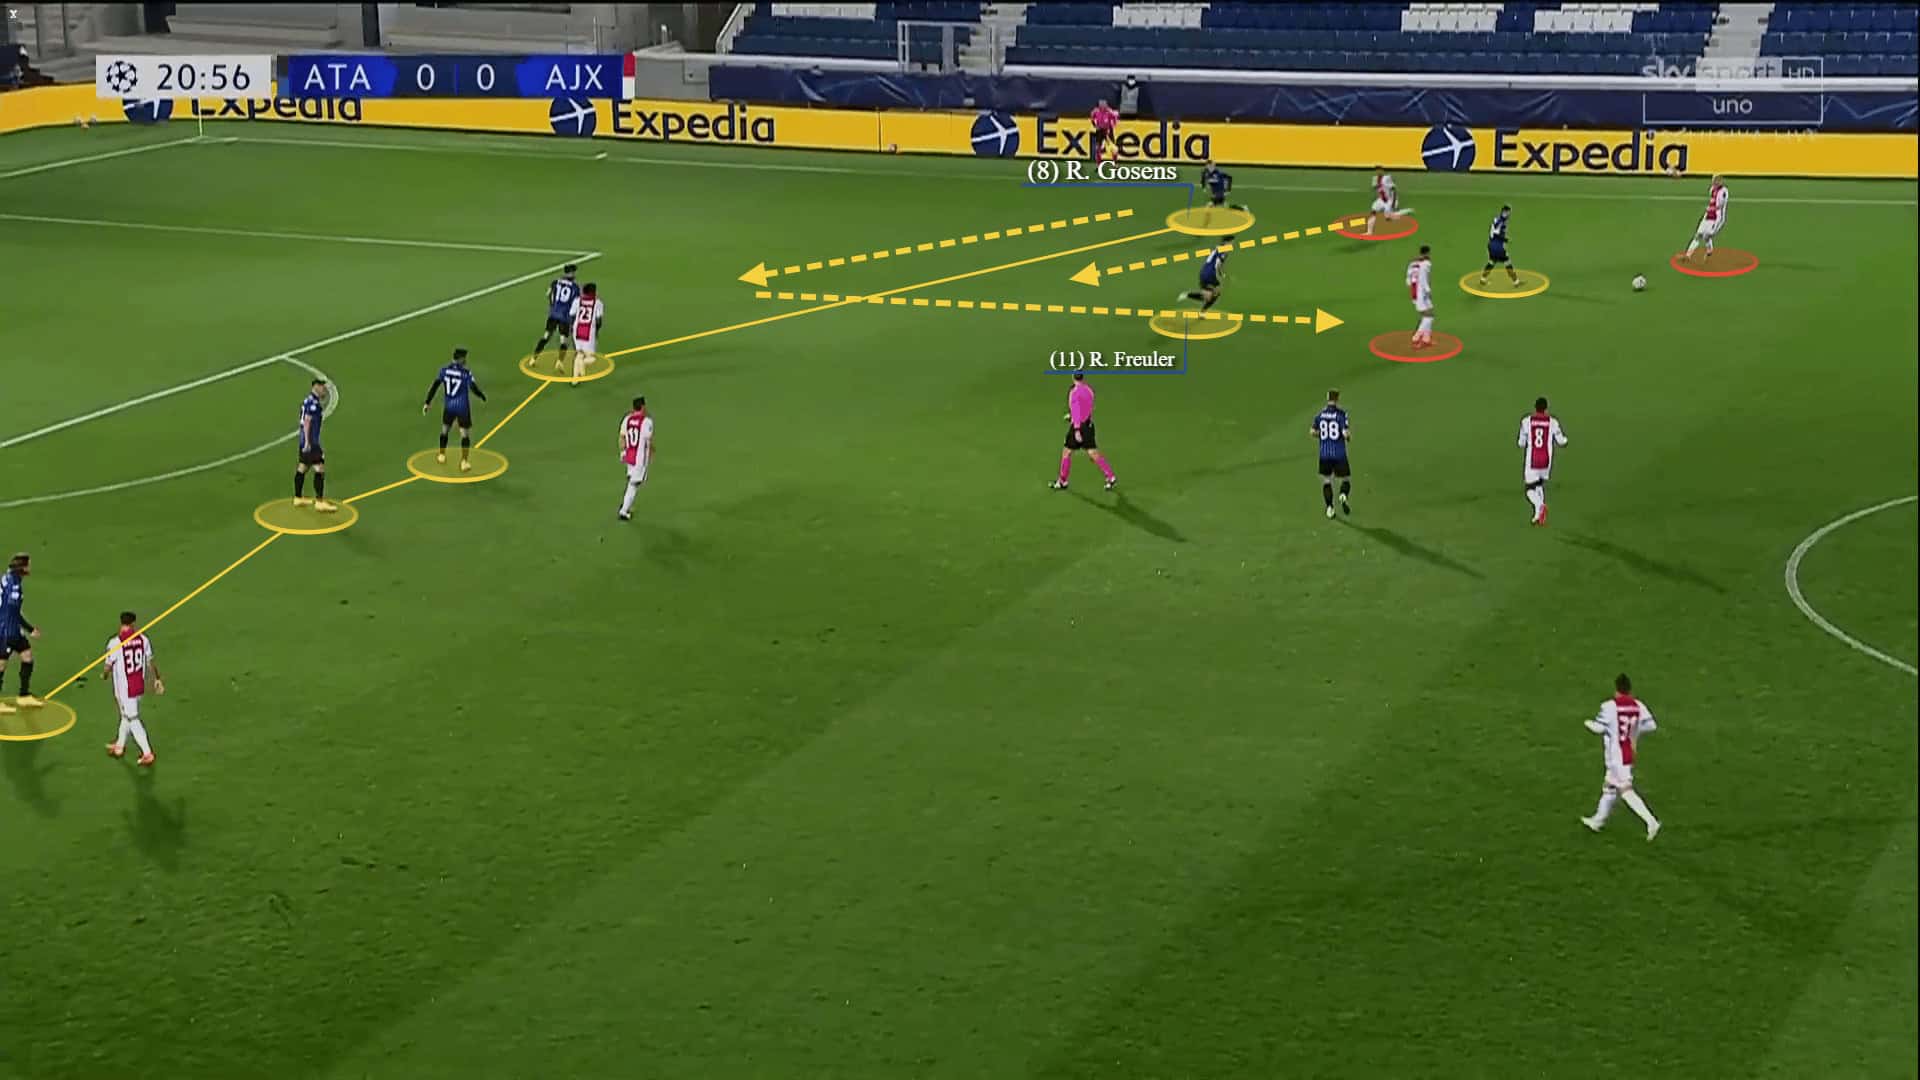
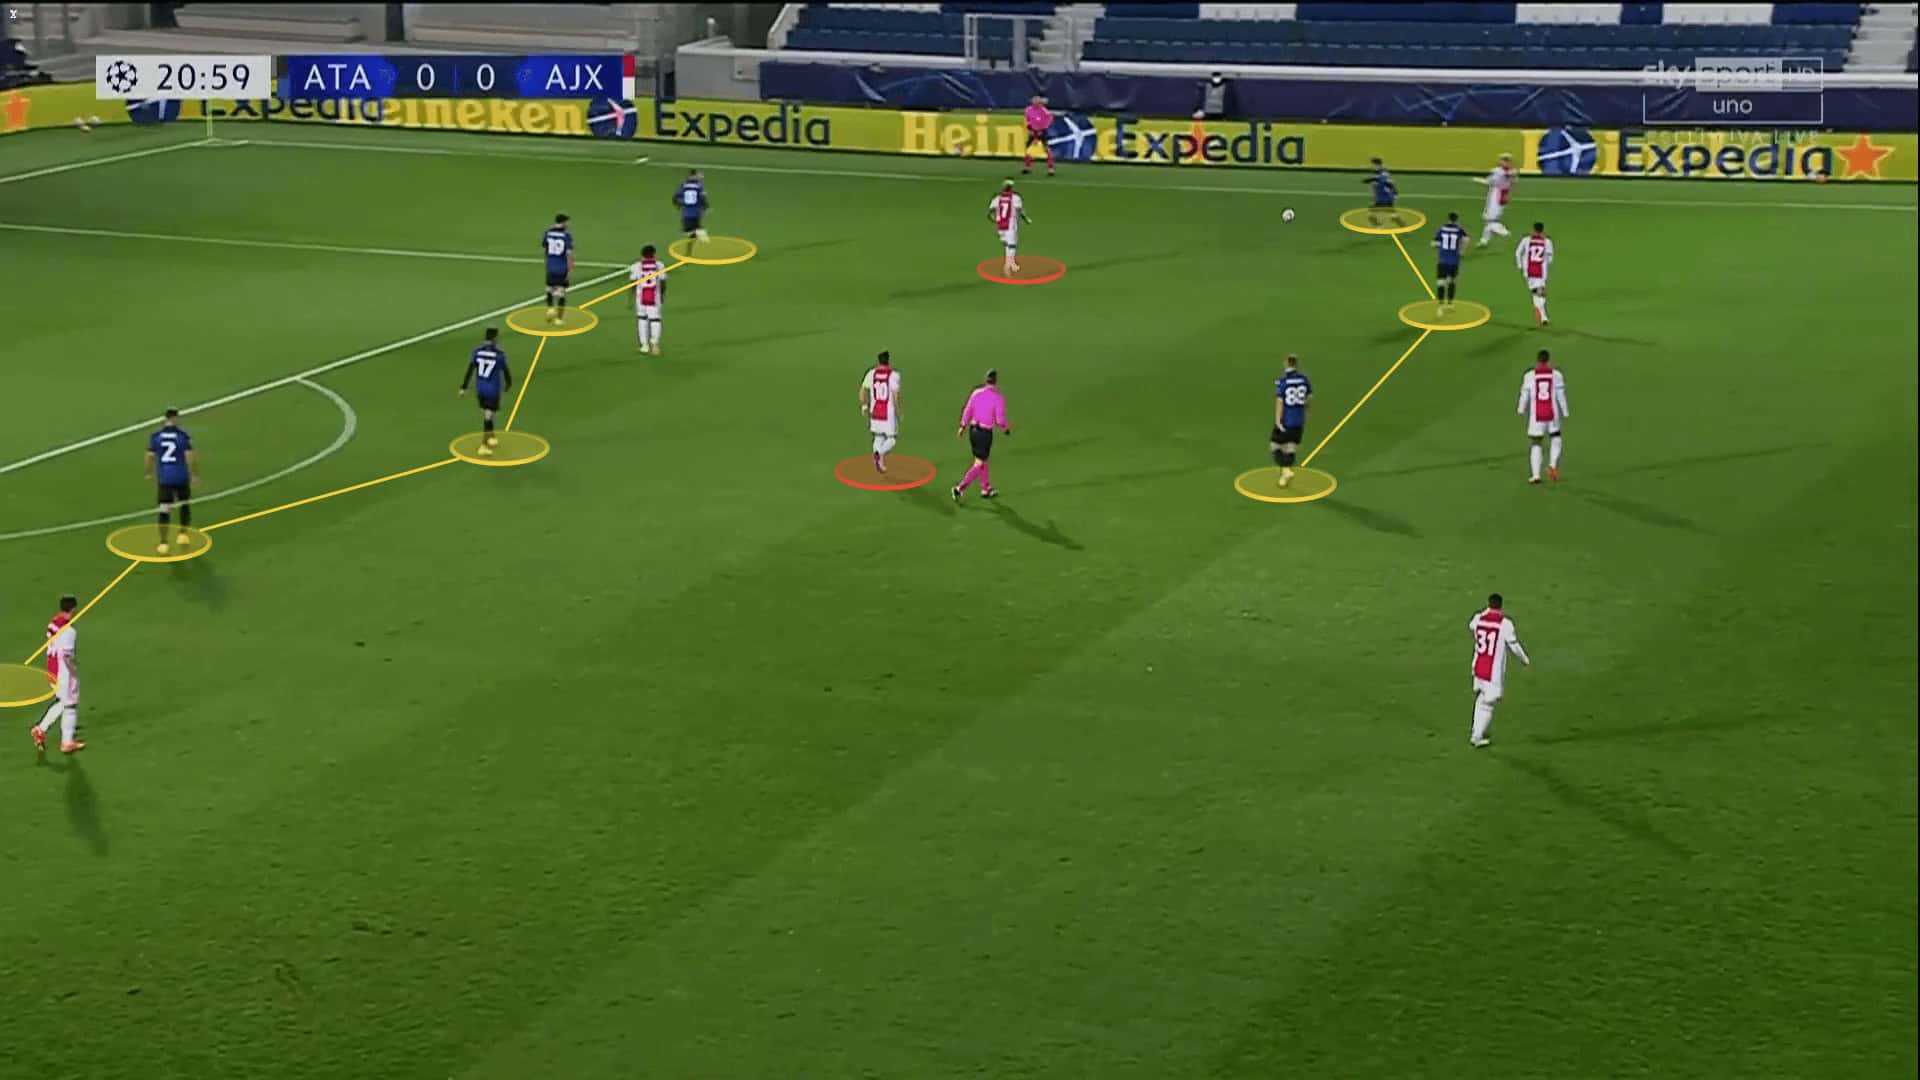
It almost seemed that they are intentionally inviting the play in their own half and then press intensely. When they did recover the ball in their defensive third they would stay very compact in order to nullify Ajax’s press by having a lot of bodies in order to open the passing lanes. Then they’ll rely on quick runs off the ball.
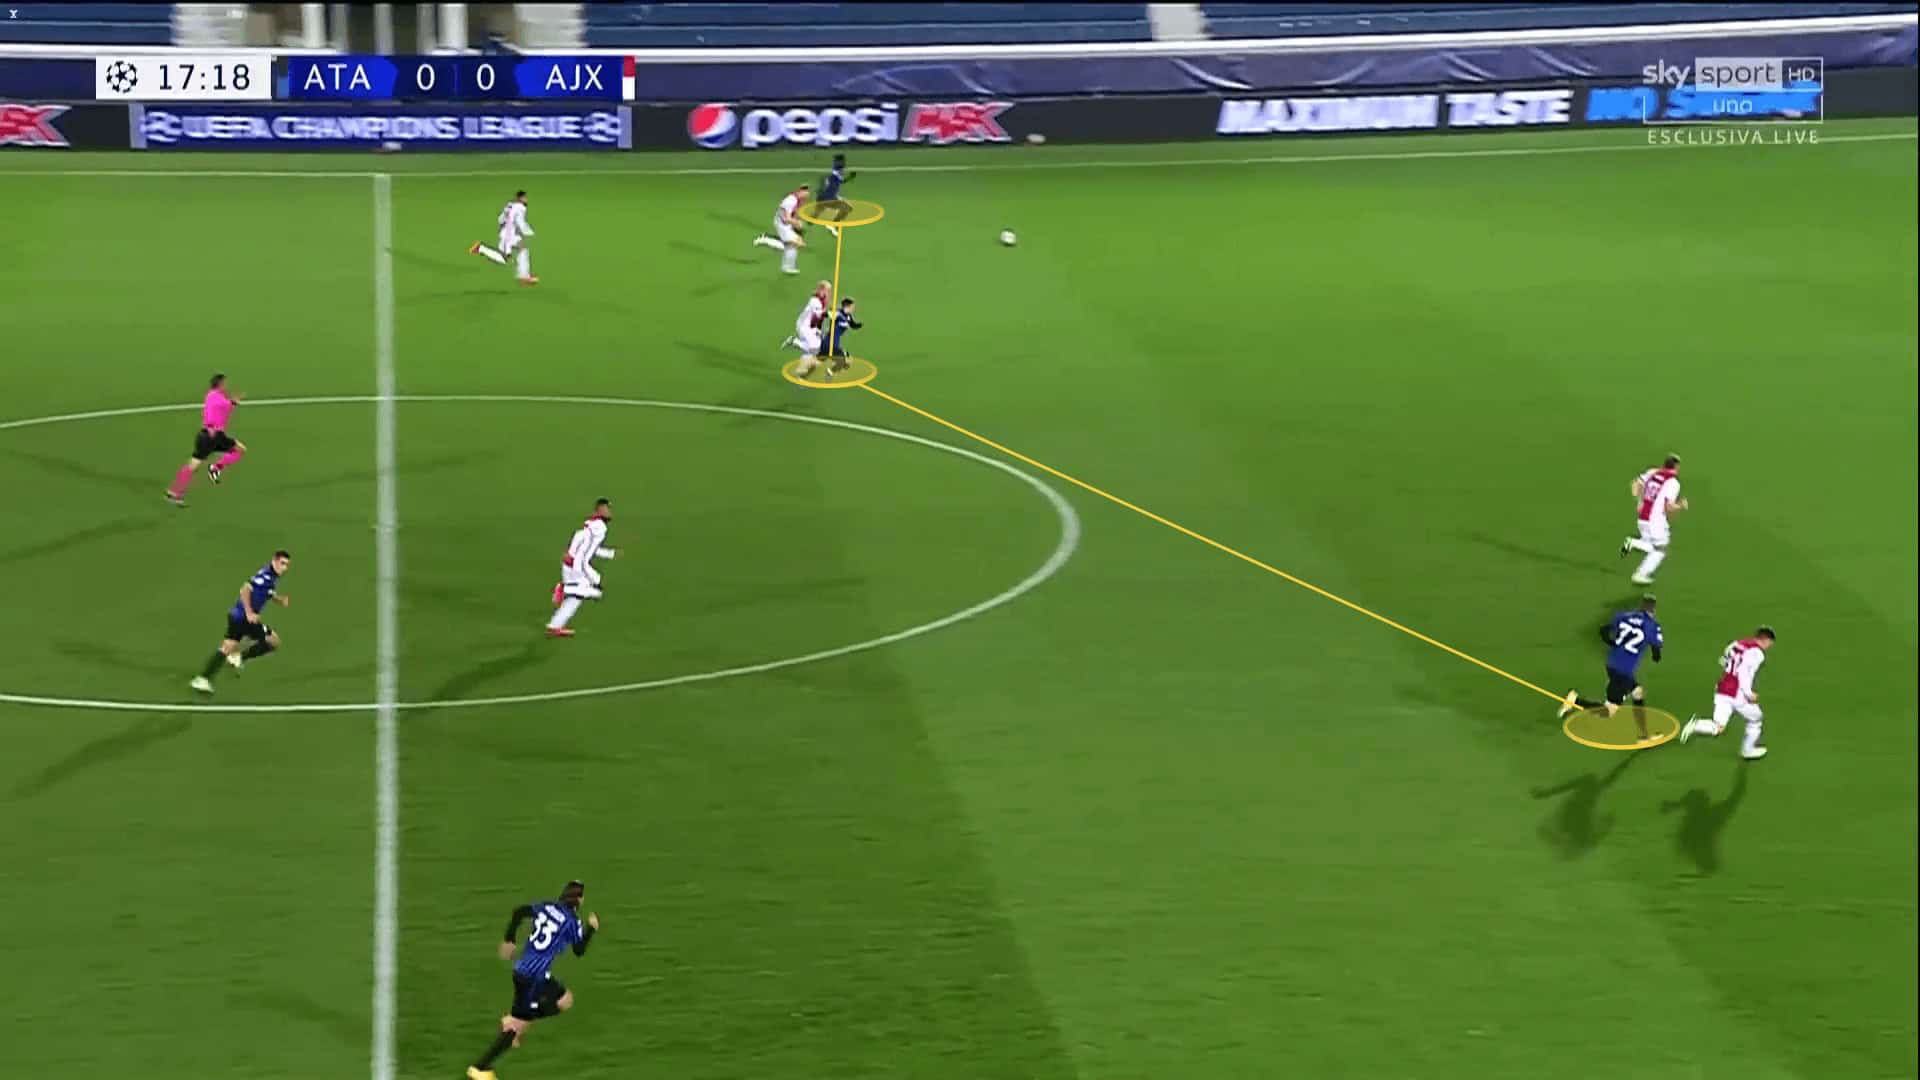
Their creativity and connection allowed them to create their best chances on a counter where they would catch Ajax unprepared with their link-up-play and by overloading the advanced areas with three or four players.
Due to Ajax overcommitting players to the attacking actions, they would occasionally fall-short form behind and allow being outrun and outnumbered. Even when they did go back on time, Atalanta’s quick passes and movement wouldn’t allow them to cover them properly.
Ajax’s attacking strategy and the goalkeeper’s contribution to it
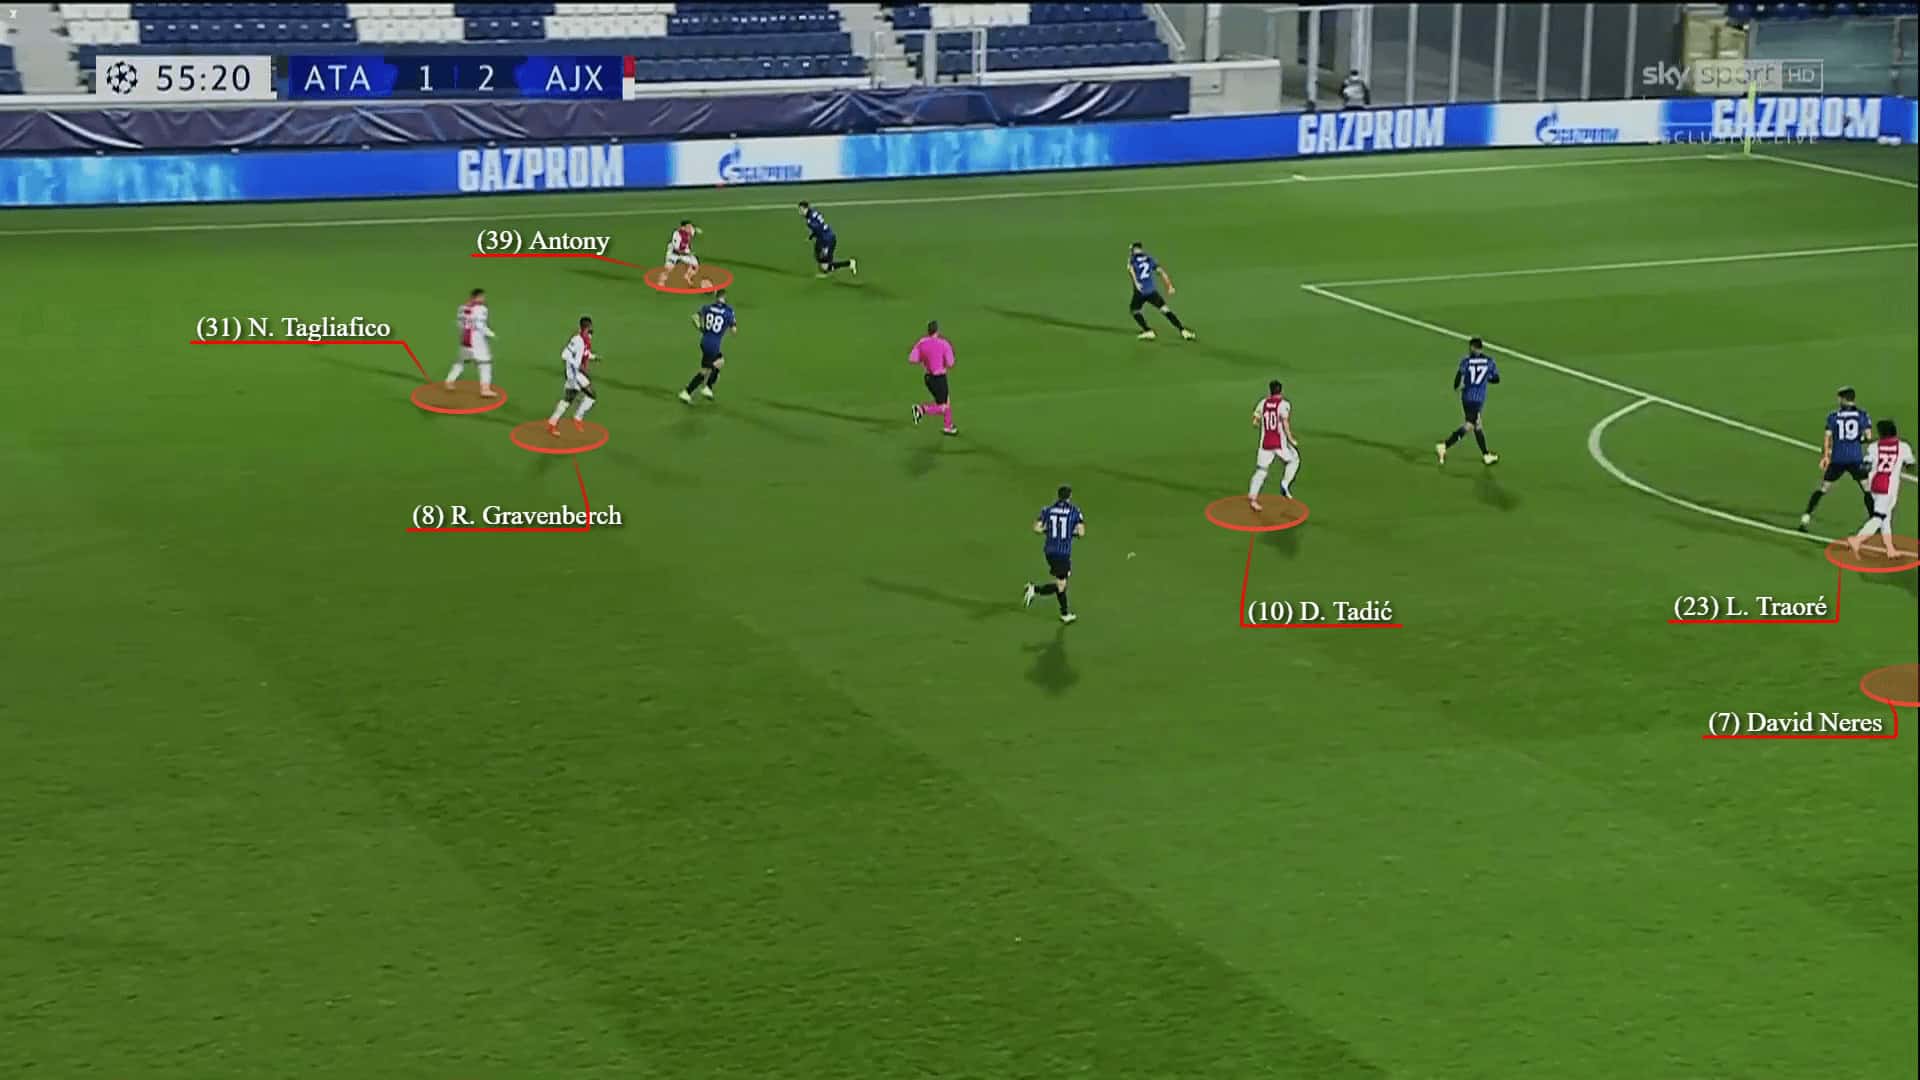
Atalanta pressed high as per usual and despite them constantly trying to recover the ball their press in the advanced areas didn’t seem very aggressive. Similarly to their opponents, Ajax tried to incorporate a lot of movement and passing into their build-up and attacking actions. They used the wide areas with the help of movement in the half-spaces to open the passing lanes and progress the ball efficiently. They would perform one-touch pass combinations in order to quickly expose their opponents and exploit the opened spaces.
The centre-defender Schuurs and later on Sean Klaiber would often go out and perform of the ball runs on the inside or help out by occupying the wide areas. Their full-backs were expectedly positioned closer to the central line during the build-up. The interchanges on the wings helped them engage Atalanta’s players and free up some space in the half-spaces that the defenders could run into and exploit being completely uncovered breaking their man-to-man marking structure.
What was noticeable throughout the whole game is the goalkeeper’s Onana involvement in the build-up. We previously mentioned about Atalanta using this method to bypass the press. But actually, it was Ajax that relied more on the balls from the keeper. He would constantly send long balls to the attacking players, most frequently trying to directly find the centre-forward Traoré. Onana was also highly involved in their build-up from the back and played the role of a passing outlet.

Conclusion
Our analysis explained the tactical battle between Gasperini and Ten Hag and how they tried to expose each other. While Ajax seemed well-prepared to stop La Dea’s attacking efforts, they didn’t manage to block their creativity and smart movement which caused them trouble. Atalanta on the other side kept trusting the process and waited for an opportunity to arise, finding their way to the goal through counter-attacking. They did experience some struggles against the similar attacking approach but eventually managed to organise their defensive actions well and didn’t concede more goals.