On Sunday afternoon, Aston Villa welcomed West Ham United to Villa Park for a Premier League fixture. West Ham had been in outstanding form before this game, winning their previous four fixtures, which included wins over Everton, Tottenham and Manchester City (via penalties). The Hammers looked to continue this run of form, knowing that a win would take them level on points with Manchester City. Villa on the other hand knew that a win would bring them to within just four points of their visitors, and provide some much-needed relief for Head Coach Dean Smith, particularly with a difficult run of games looming. It was West Ham who prevailed on the day, running away with a 4-1 victory, although the game was evenly poised at 2-1 at the time of Ezri Konsa’s sending off early in the second half. Despite a positive spell after this sending off for Villa, West Ham ended up riding this wave and scoring two more in the second half.
This tactical analysis will provide an analysis of the tactics both teams used in this game.
Lineups and formations
Villa lined up in a 4-3-3, with club captain Tyrone Mings being left on the bench in favour of a Kortney Hause and Konsa centre-back partnership. Matt Targett and Matty Cash played either side of them with Emi Martinez behind them in goal. Marvelous Nakamba played at the bottom of a midfield three, with Jacob Ramsey and John McGinn in front of him. Their front three was made up of Leon Bailey, getting his first start since his injury last month, Emi Buendia, and Ollie Watkins.
West Ham played a 4-2-3-1 with Ben Johnson keeping his place in the side despite Vladimir Coufal’s return from injury, such is the young Hammer’s form. Unsurprisingly, the rest of the defence was made up of Kurt Zouma, Angelo Ogbonna and Aaron Cresswell, with the ever-impressive Lukasz Fabianski in goal. Declan Rice and Tomas Soucek operated as a double pivot with Pablo Fornals in front. Jarrod Bowen and Said Benrahma played on either wing, with Michail Antonio playing up front by himself.
Villa’s pressing system
Villa operated with an aggressive pressing set-up in the first half, using Ollie Watkins’ high energy to consistently put West Ham’s centre-back pairing under pressure. Buendia and Bailey looked to support the centre-forward, specifically aiming to show West Ham into a crowded central area. If they could force the West Ham centre-backs into looking to play into the centre of the pitch, they would then look to ensure Rice, Soucek and Fornals were man-marked and unable to get on the ball.
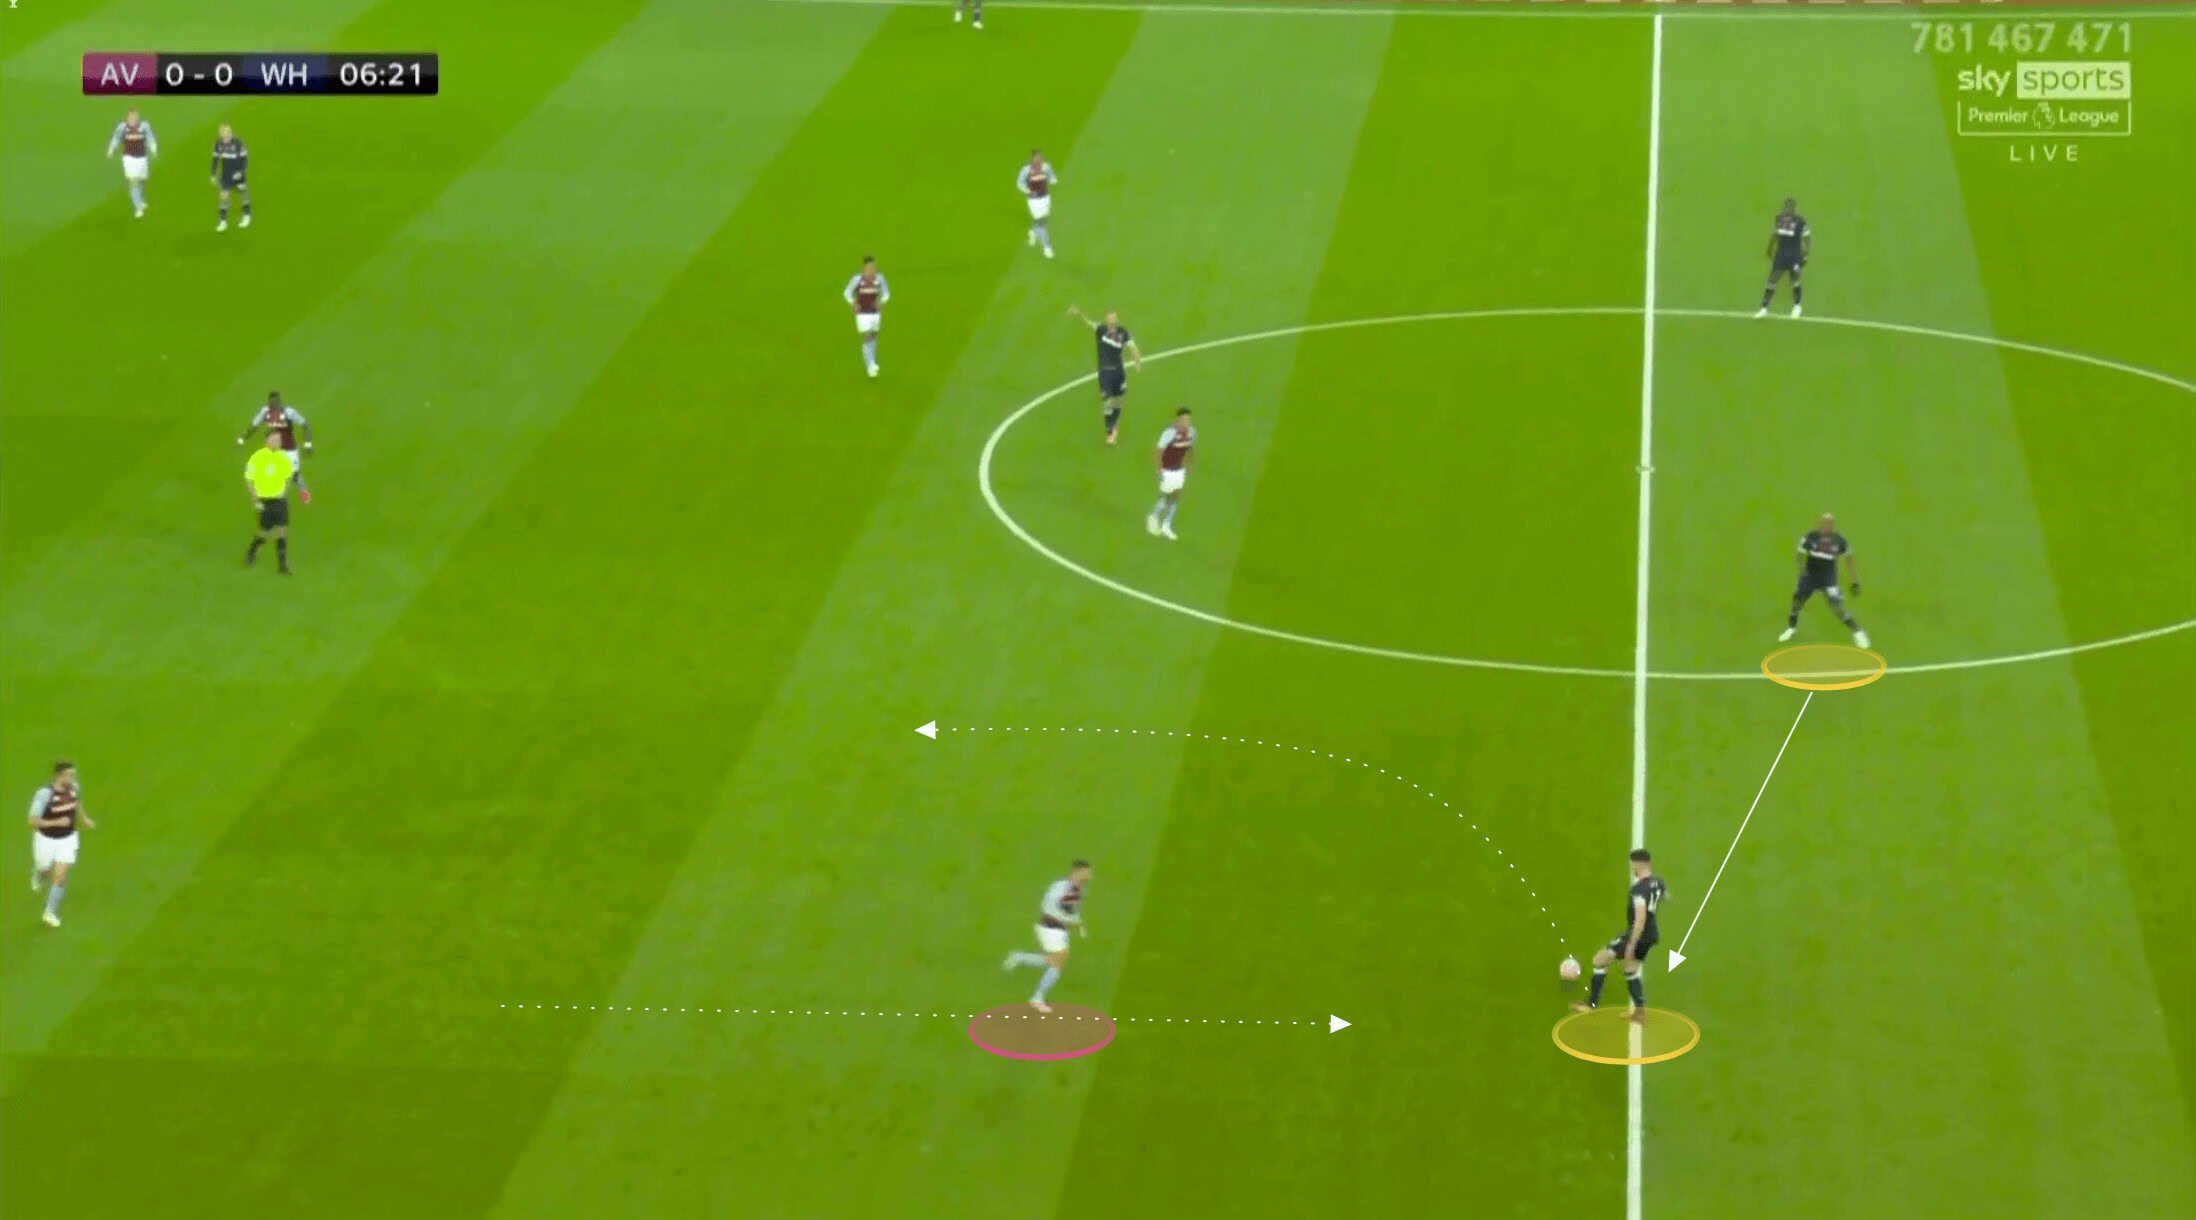
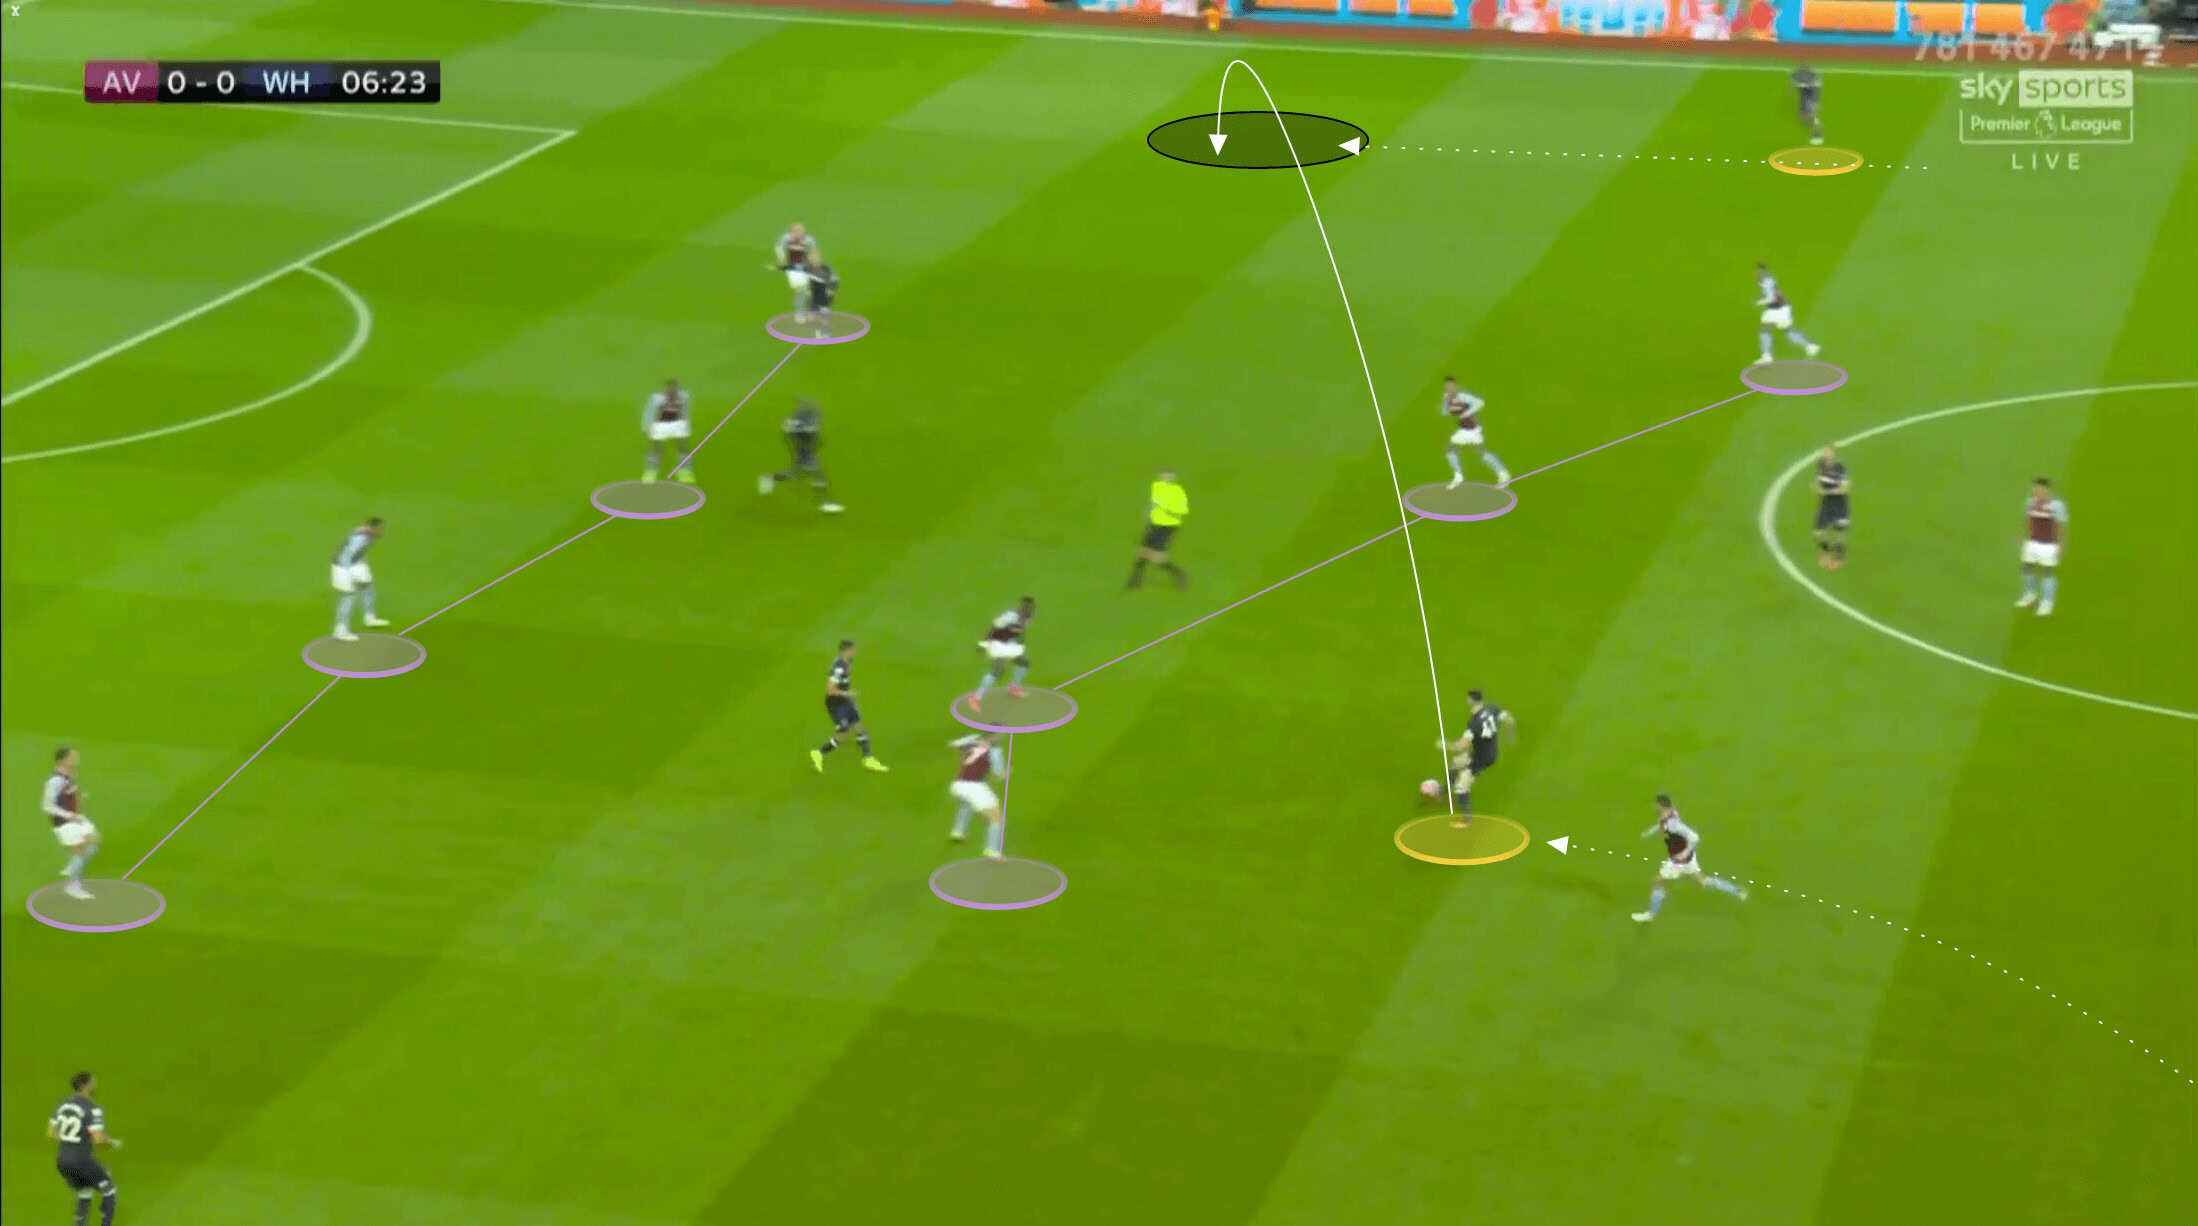
We can see this pattern occurring in the image below with Watkins shifting forward to press Ogbonna as Buendia’s curved press forced Rice to play back inside to his centre-back.
With both Fornals and Soucek being man-marked centrally in this example, Ogbonna had no choice but to play a long ball forward. Villa’s right-back Cash was alert to this and with Antonio being occupied by Villa’s centre-backs, Cash could drift inside to make the easy, unopposed interception and move the ball on quickly.
However, Rice was a constant thorn in Villa’s side, with him seeking to find space centrally or in deeper areas where he could stretch Villa’s press. Watkins was tasked with ensuring Rice was in his cover shadow until one of his central-midfield teammates could come and cover the West Ham man. We can see Watkins scanning to find Rice’s positioning as Zouma bounced the ball back in the image below.
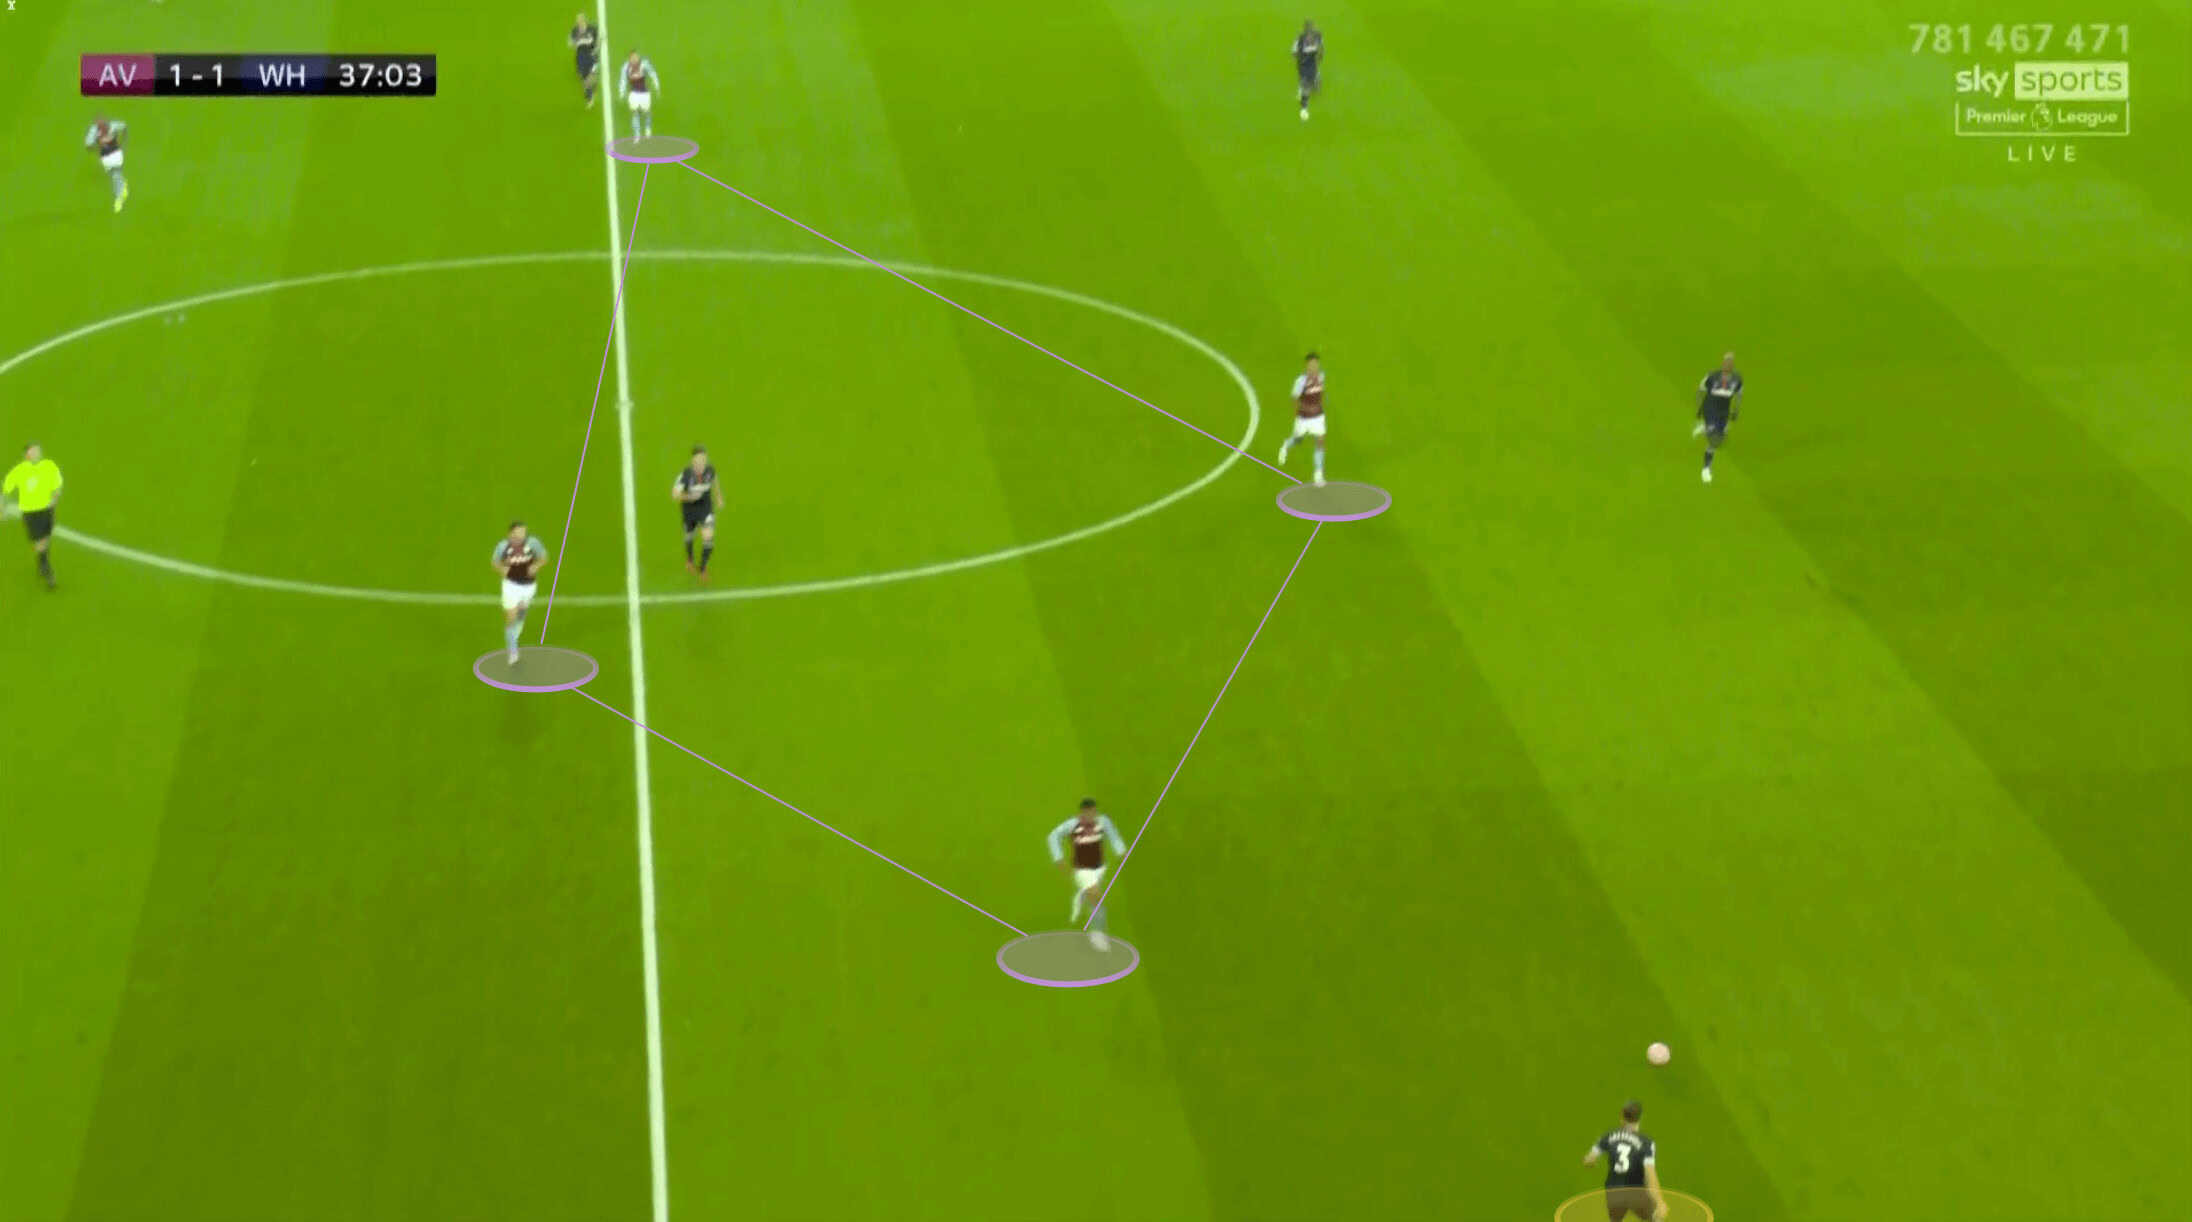
When Rice was covered, Villa would keep a compact diamond initially, and as the ball was played wide, they would then look to force West Ham to play back inside into the congested midfield again. However, this was easier said than done, and West Ham’s backline would circle possession with pace to ensure they could get around this press.
Villa’s full-backs, Cash in particular, needed to do a better job of preventing the line pass from the West Ham full-backs, with Benrahma finding space to receive in the image below. It was this pass that allowed Rice to find space and offer a pass option to his winger. Benrahma’s purposeful touch inside drew McGinn, who had previously been man-marking Rice, towards the ball. We can see Rice scanning in space in this moment.
As soon as the pass was played inside to Rice, he could then drive forward and stretch the play, and it was this move, beating Villa’s press and all starting with his movement, that would lead to him scoring less than 40 seconds later.
West Ham’s counter-attacking
According to Wyscout’s data, West Ham made six counter-attacks on the day, getting shots on goal from four of these. The graph below shows where the majority of their attacks were directed and the xG associated with these attacks.
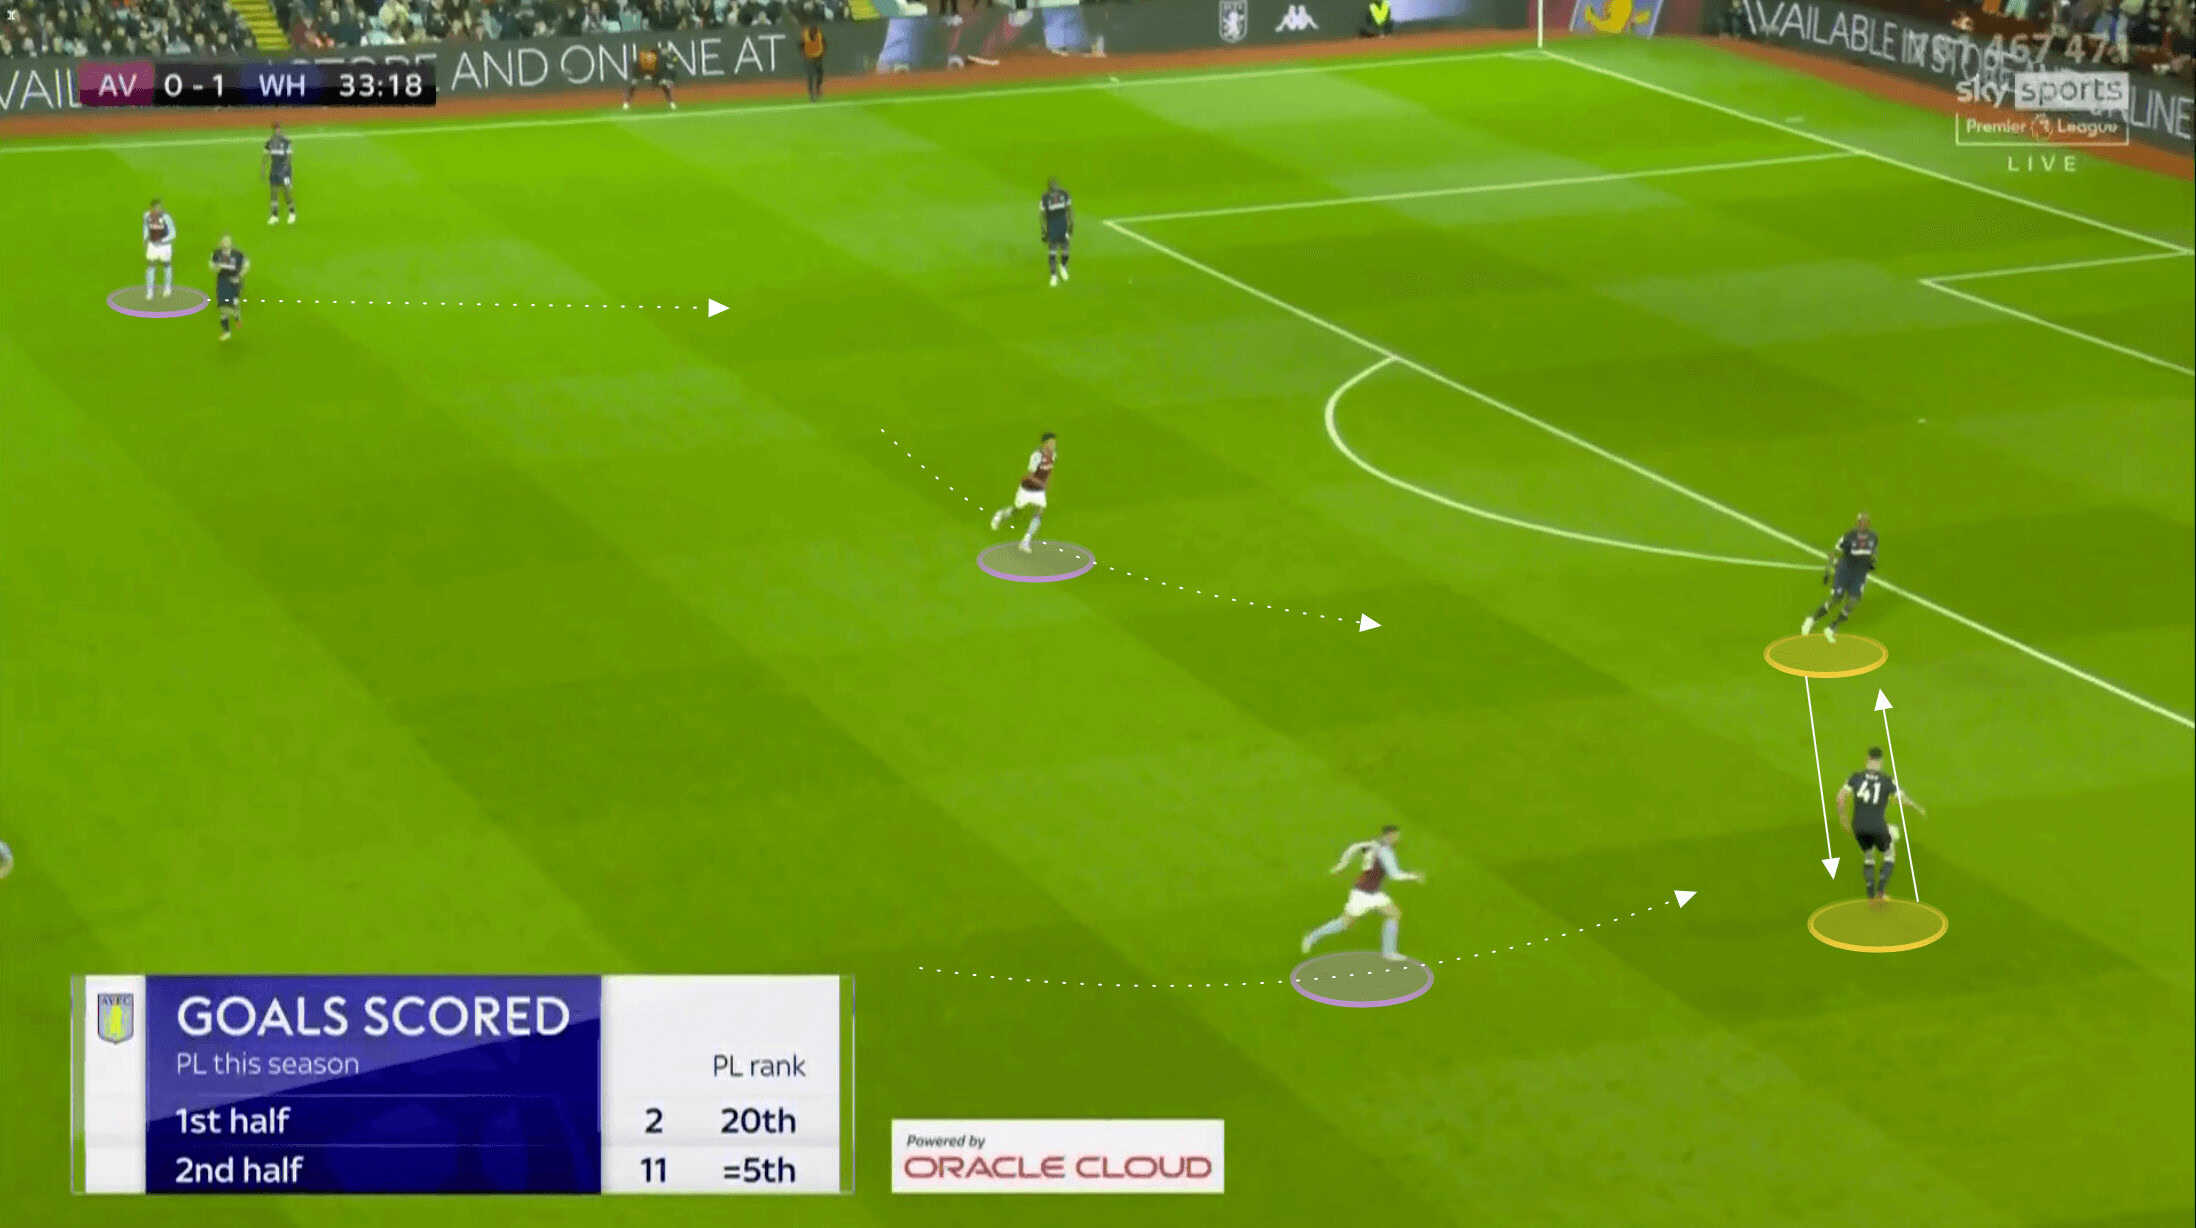
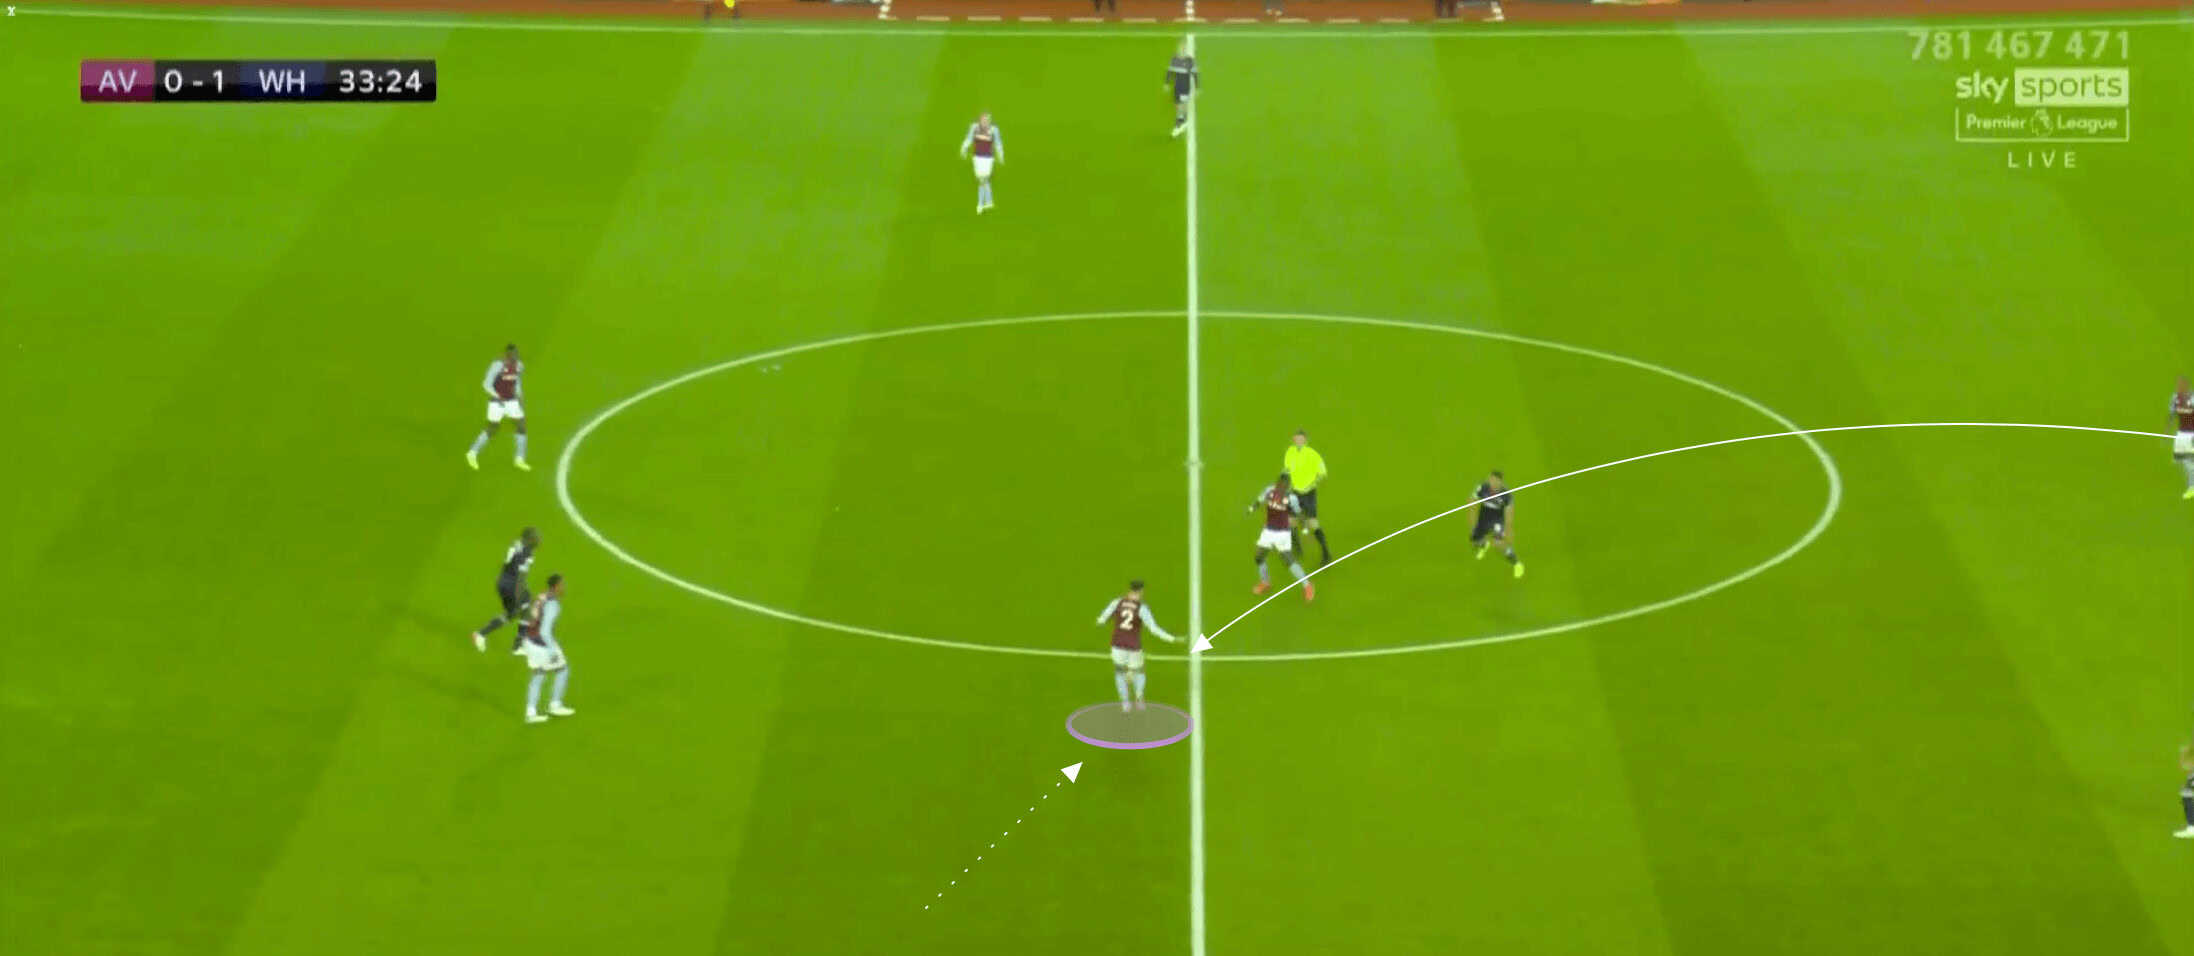
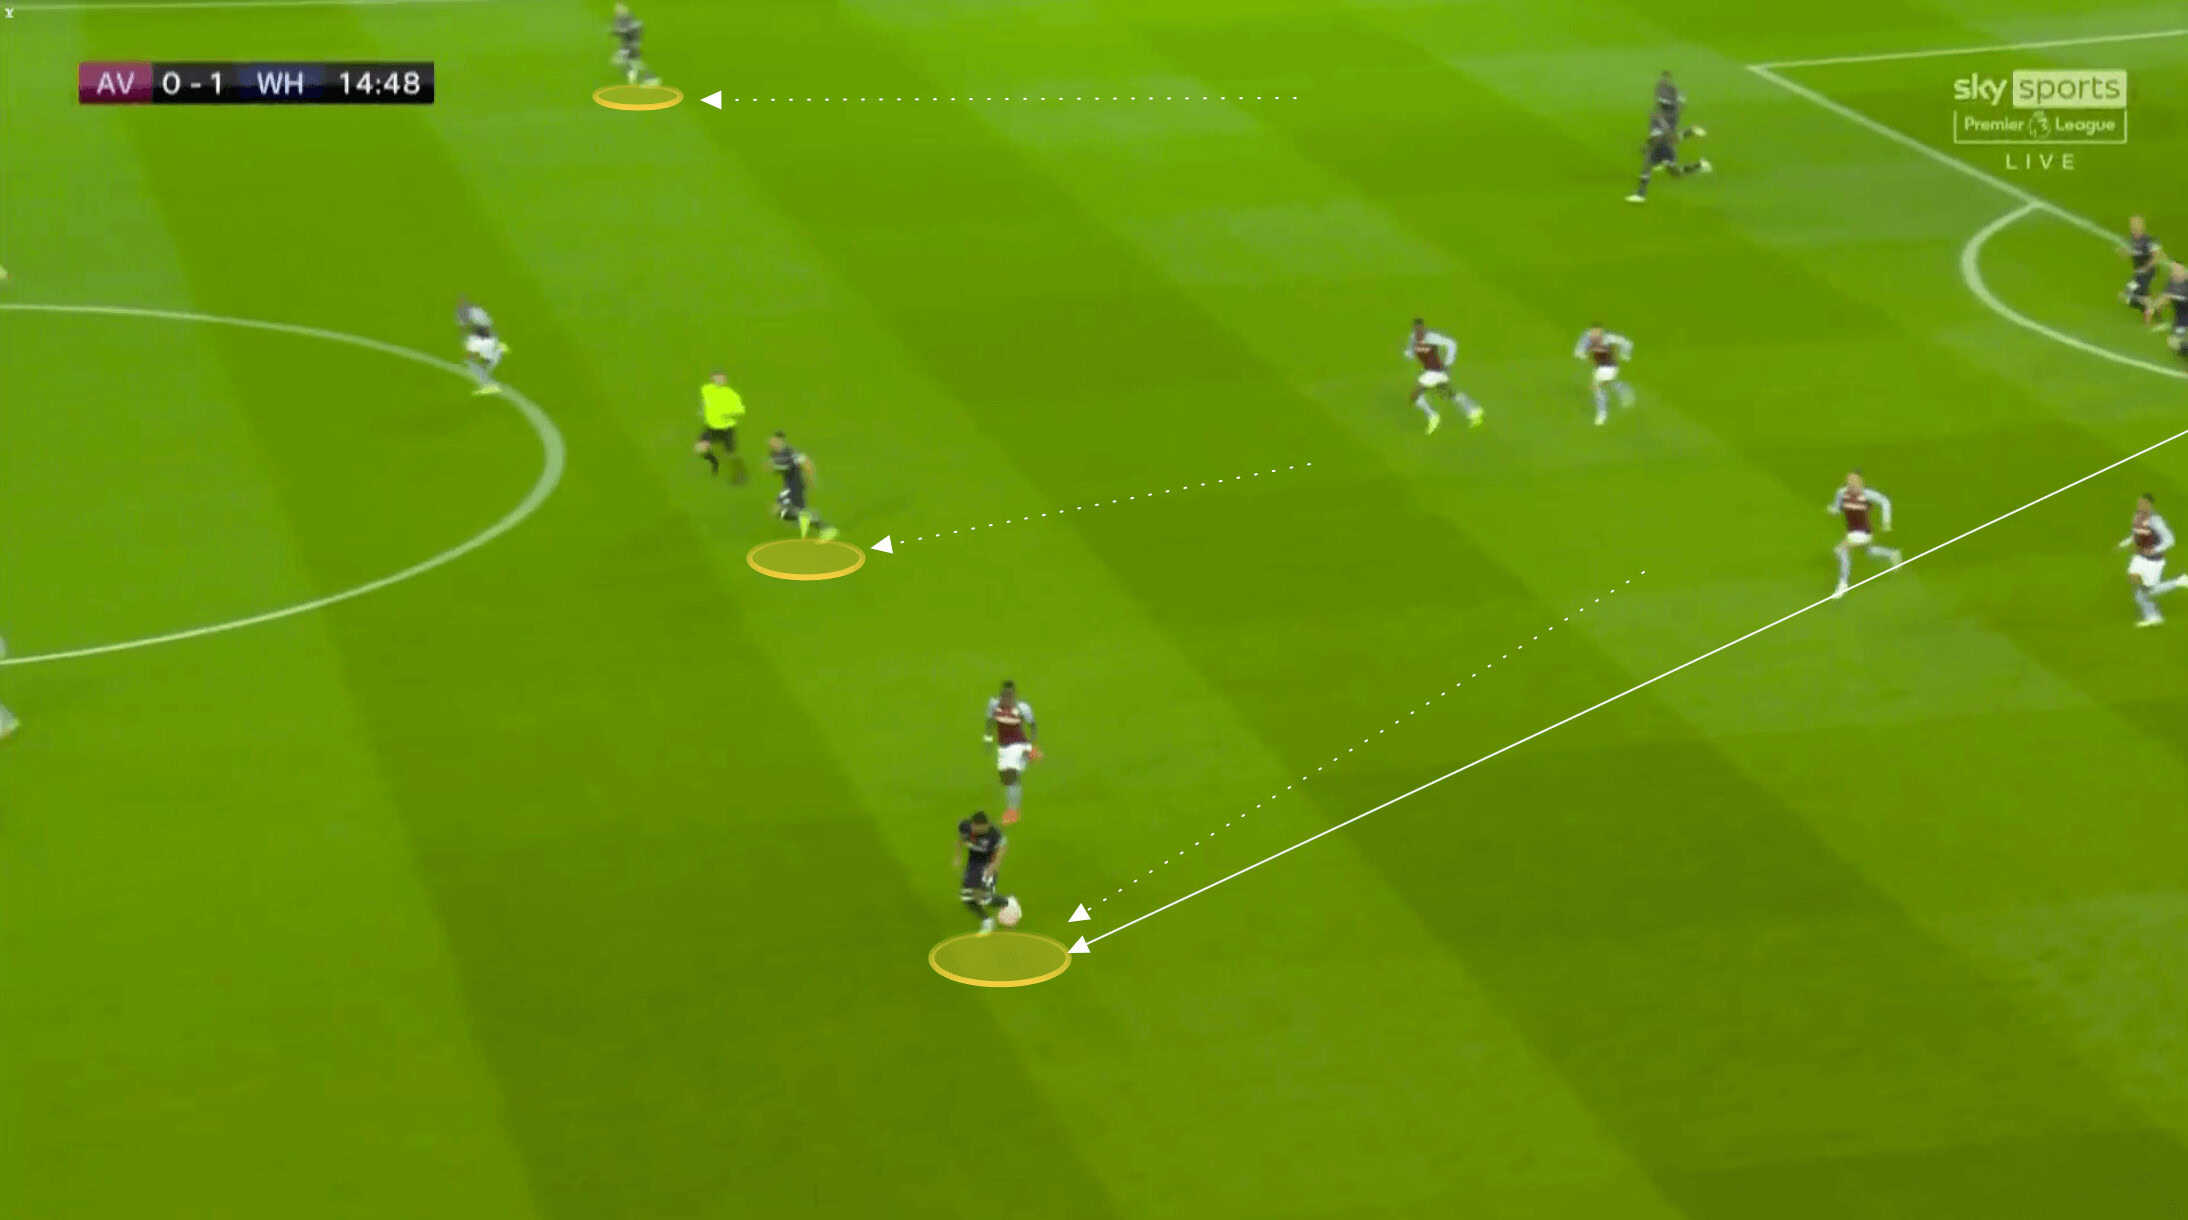
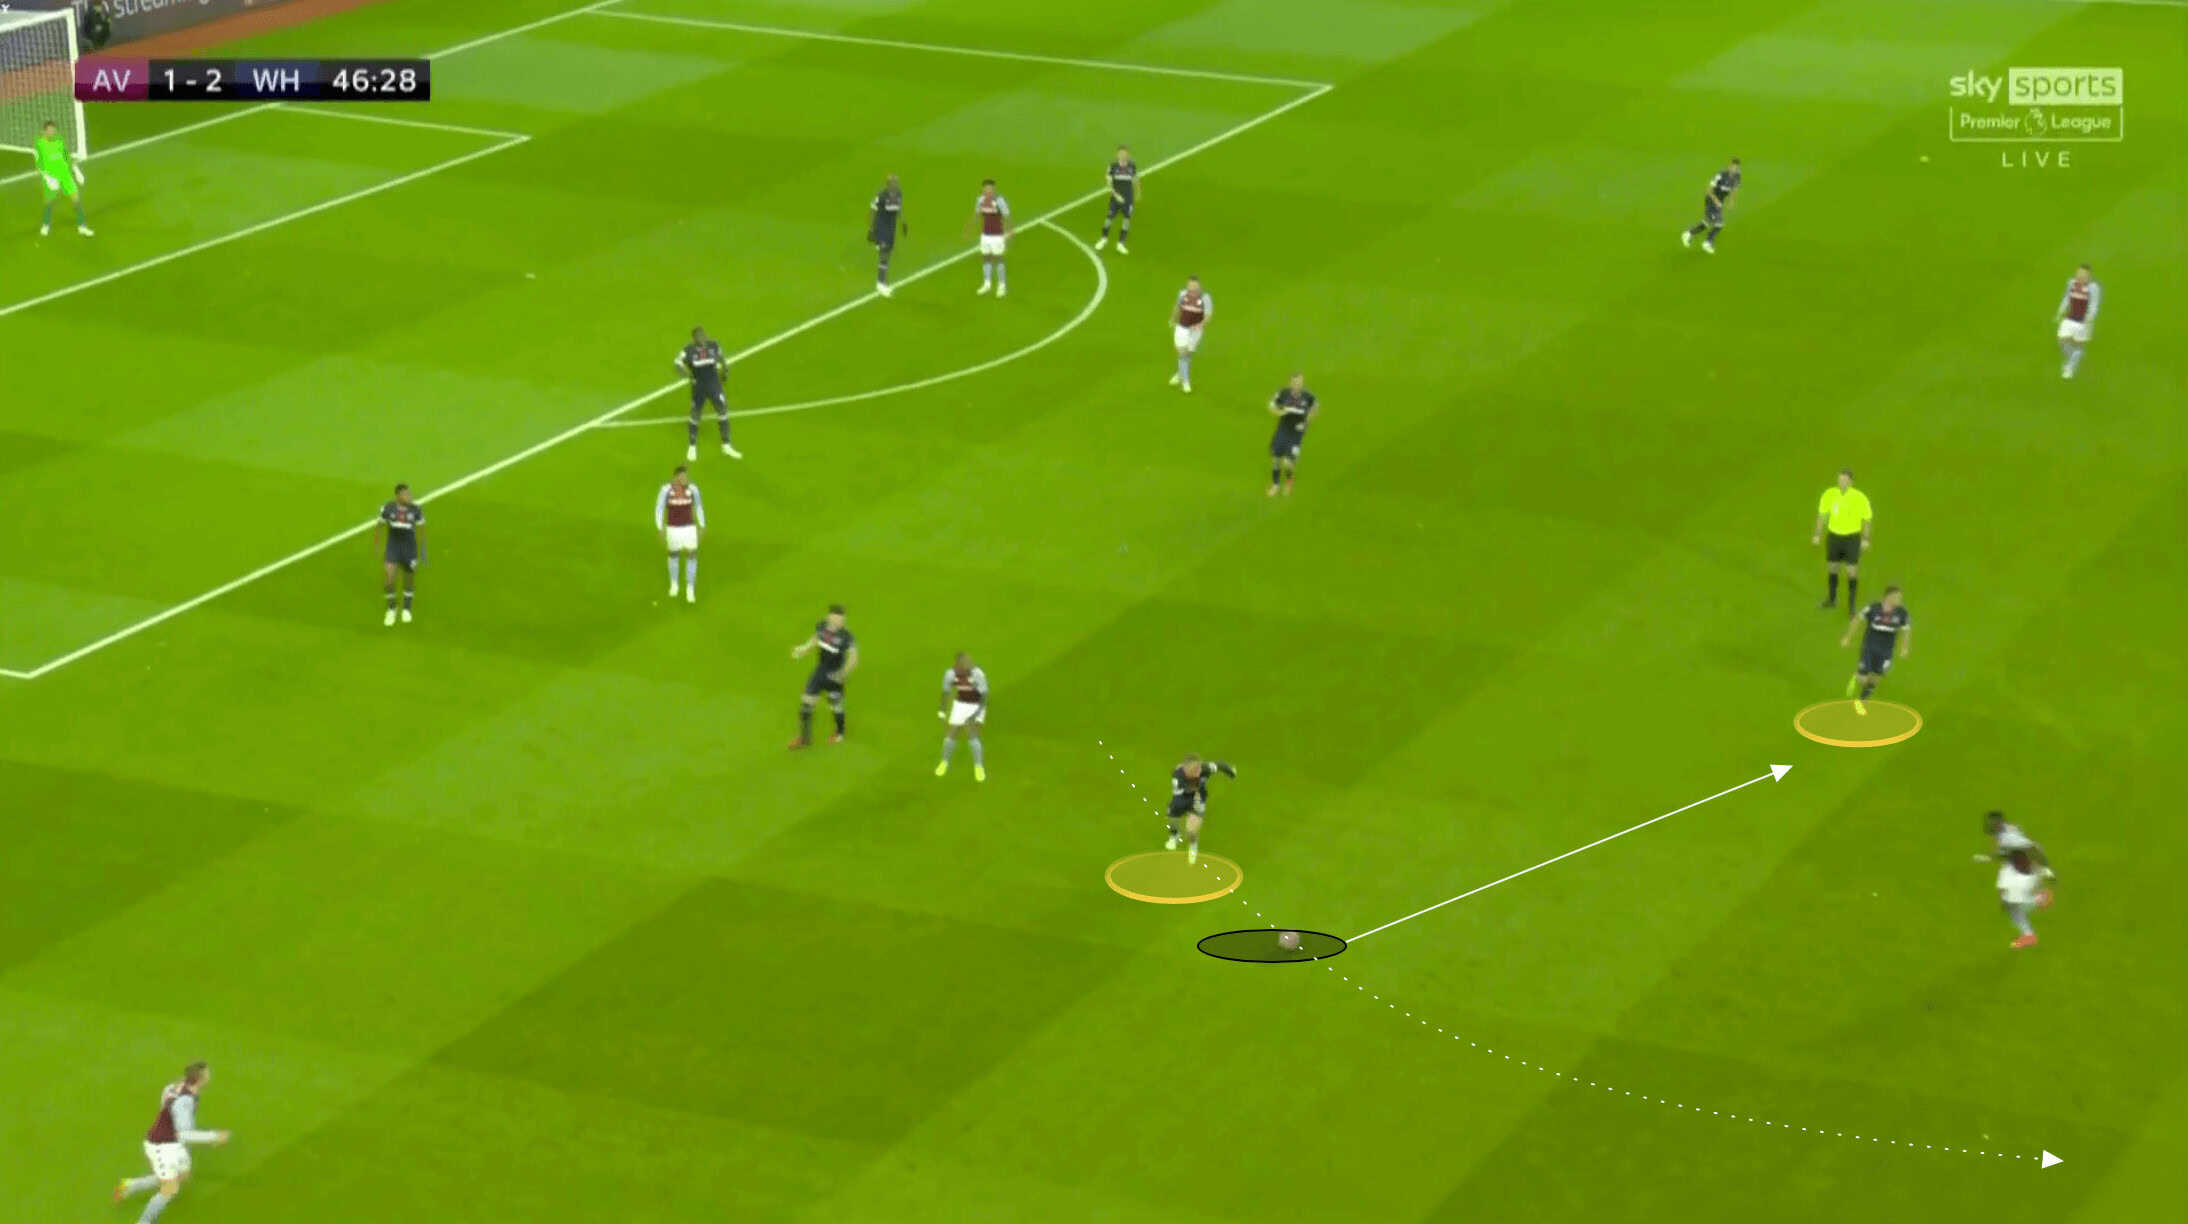
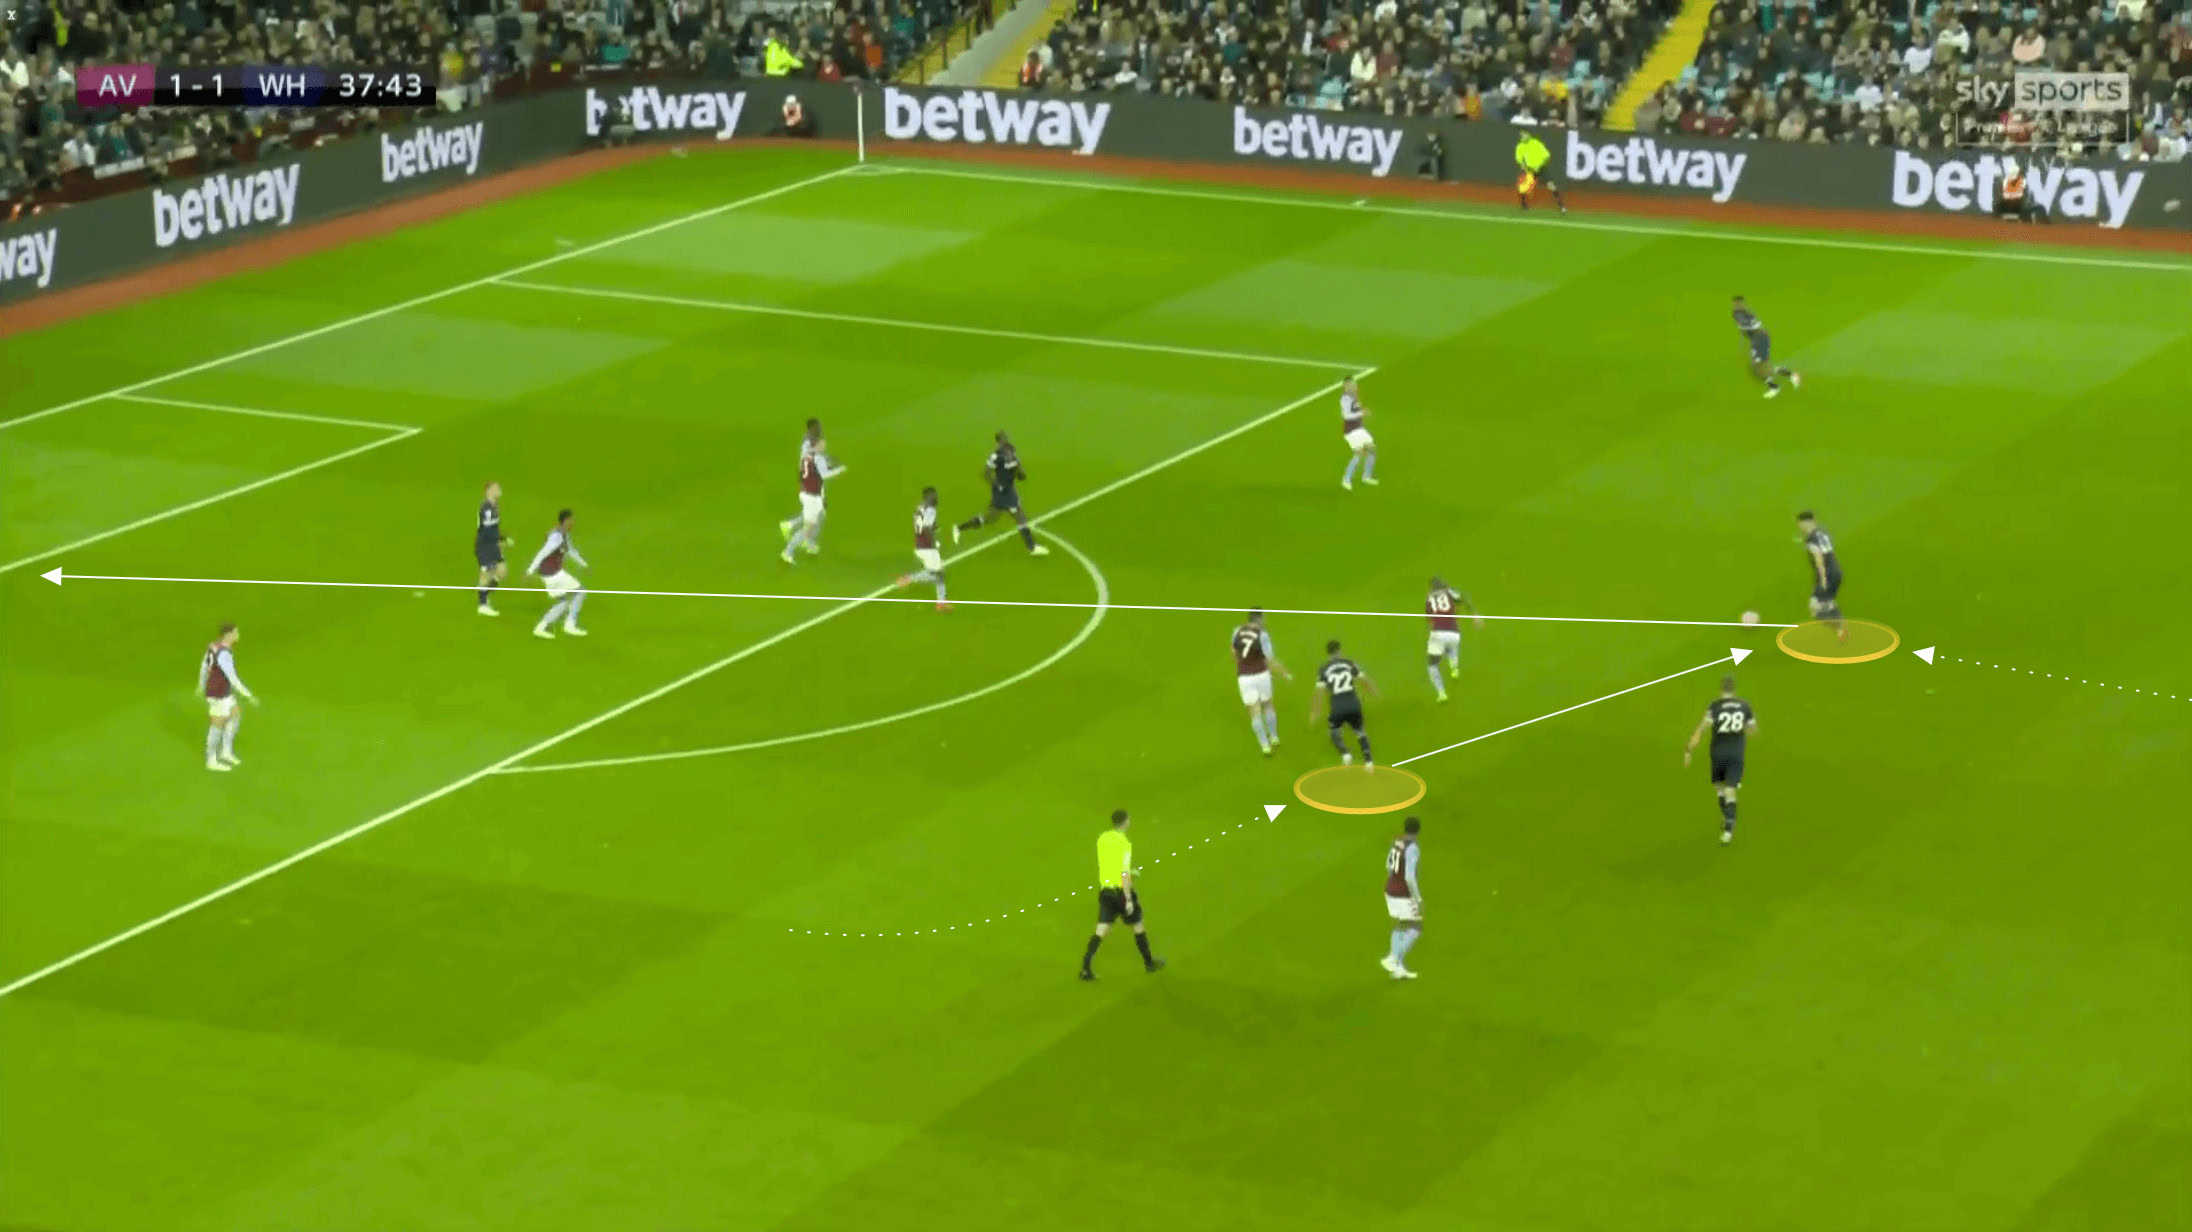
They defended in a compact, deep shape, with Antonio remaining high. The onus was on Bowen, Fornals and Benrahma to push forward quickly from their initially deep starting positions, and get beyond Villa’s midfield and full-backs as quick as possible, to create an overload on the attack. Fabianksi would look to release the ball quickly should he claim possession with Villa committing numbers to an attack. His quick throws, like in the image below, mean West Ham could get the ball beyond the bulk of Villa’s players with the aforementioned attacking trio already pushing forward.
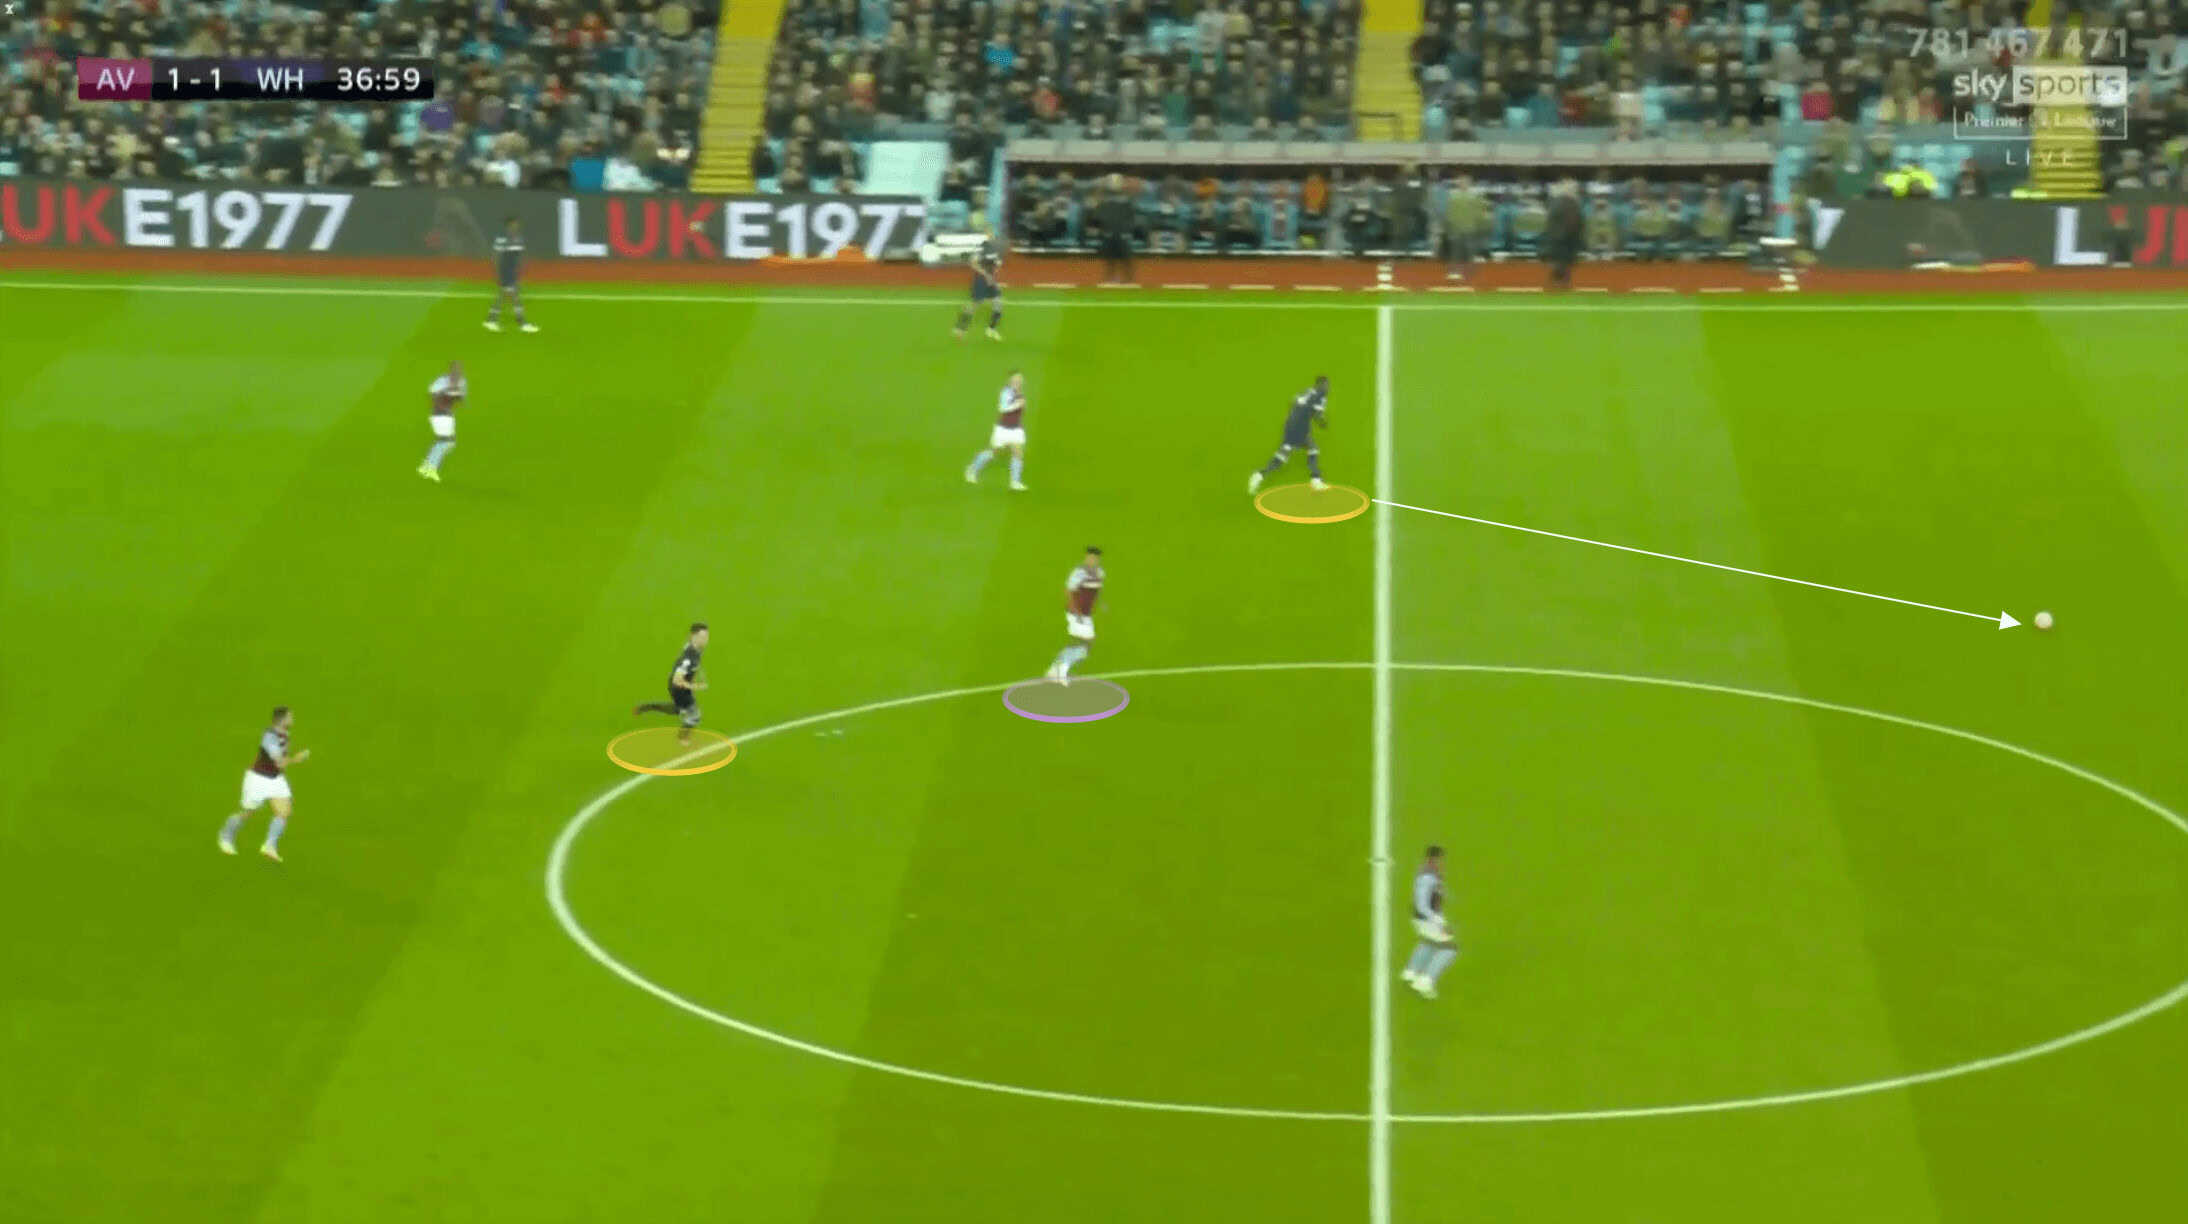
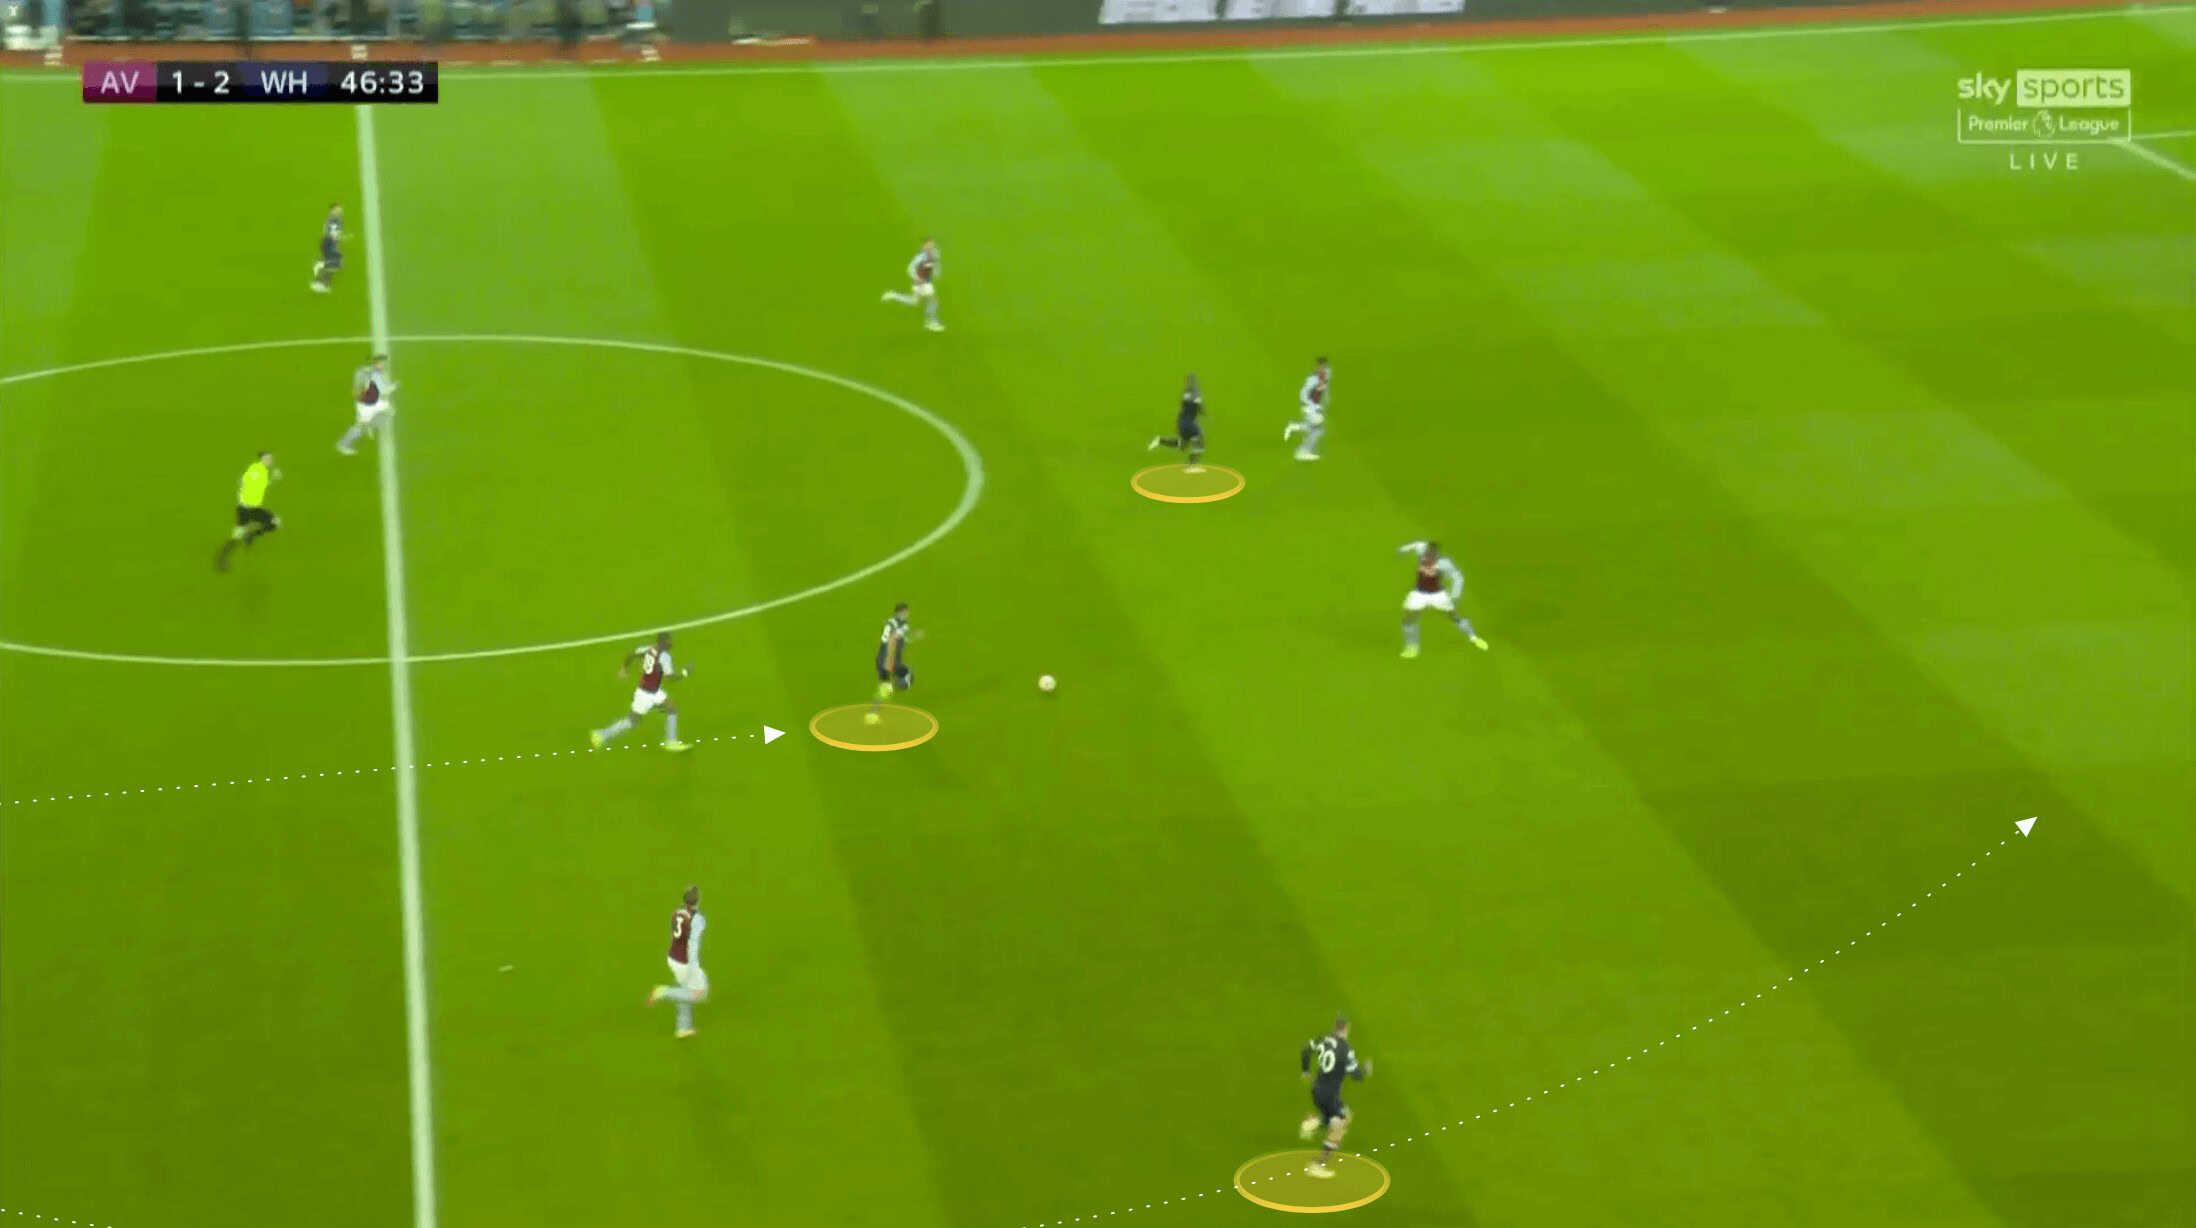
Fornals was key to the counter-attacking shape, with him sitting just ahead of the double pivot of Soucek and Rice. We can see in the following image how both Benrahma and Bowen, as well as Fornals, were clearly committed to the defensive phase, however, all were ready to push up as soon as the turnover was made.
Whilst Bowen didn’t push up in this example, as Soucek made the interception, Benrahma immediately stepped forward to give the outlet for his teammate, with Fornals pushing forward quickly himself.
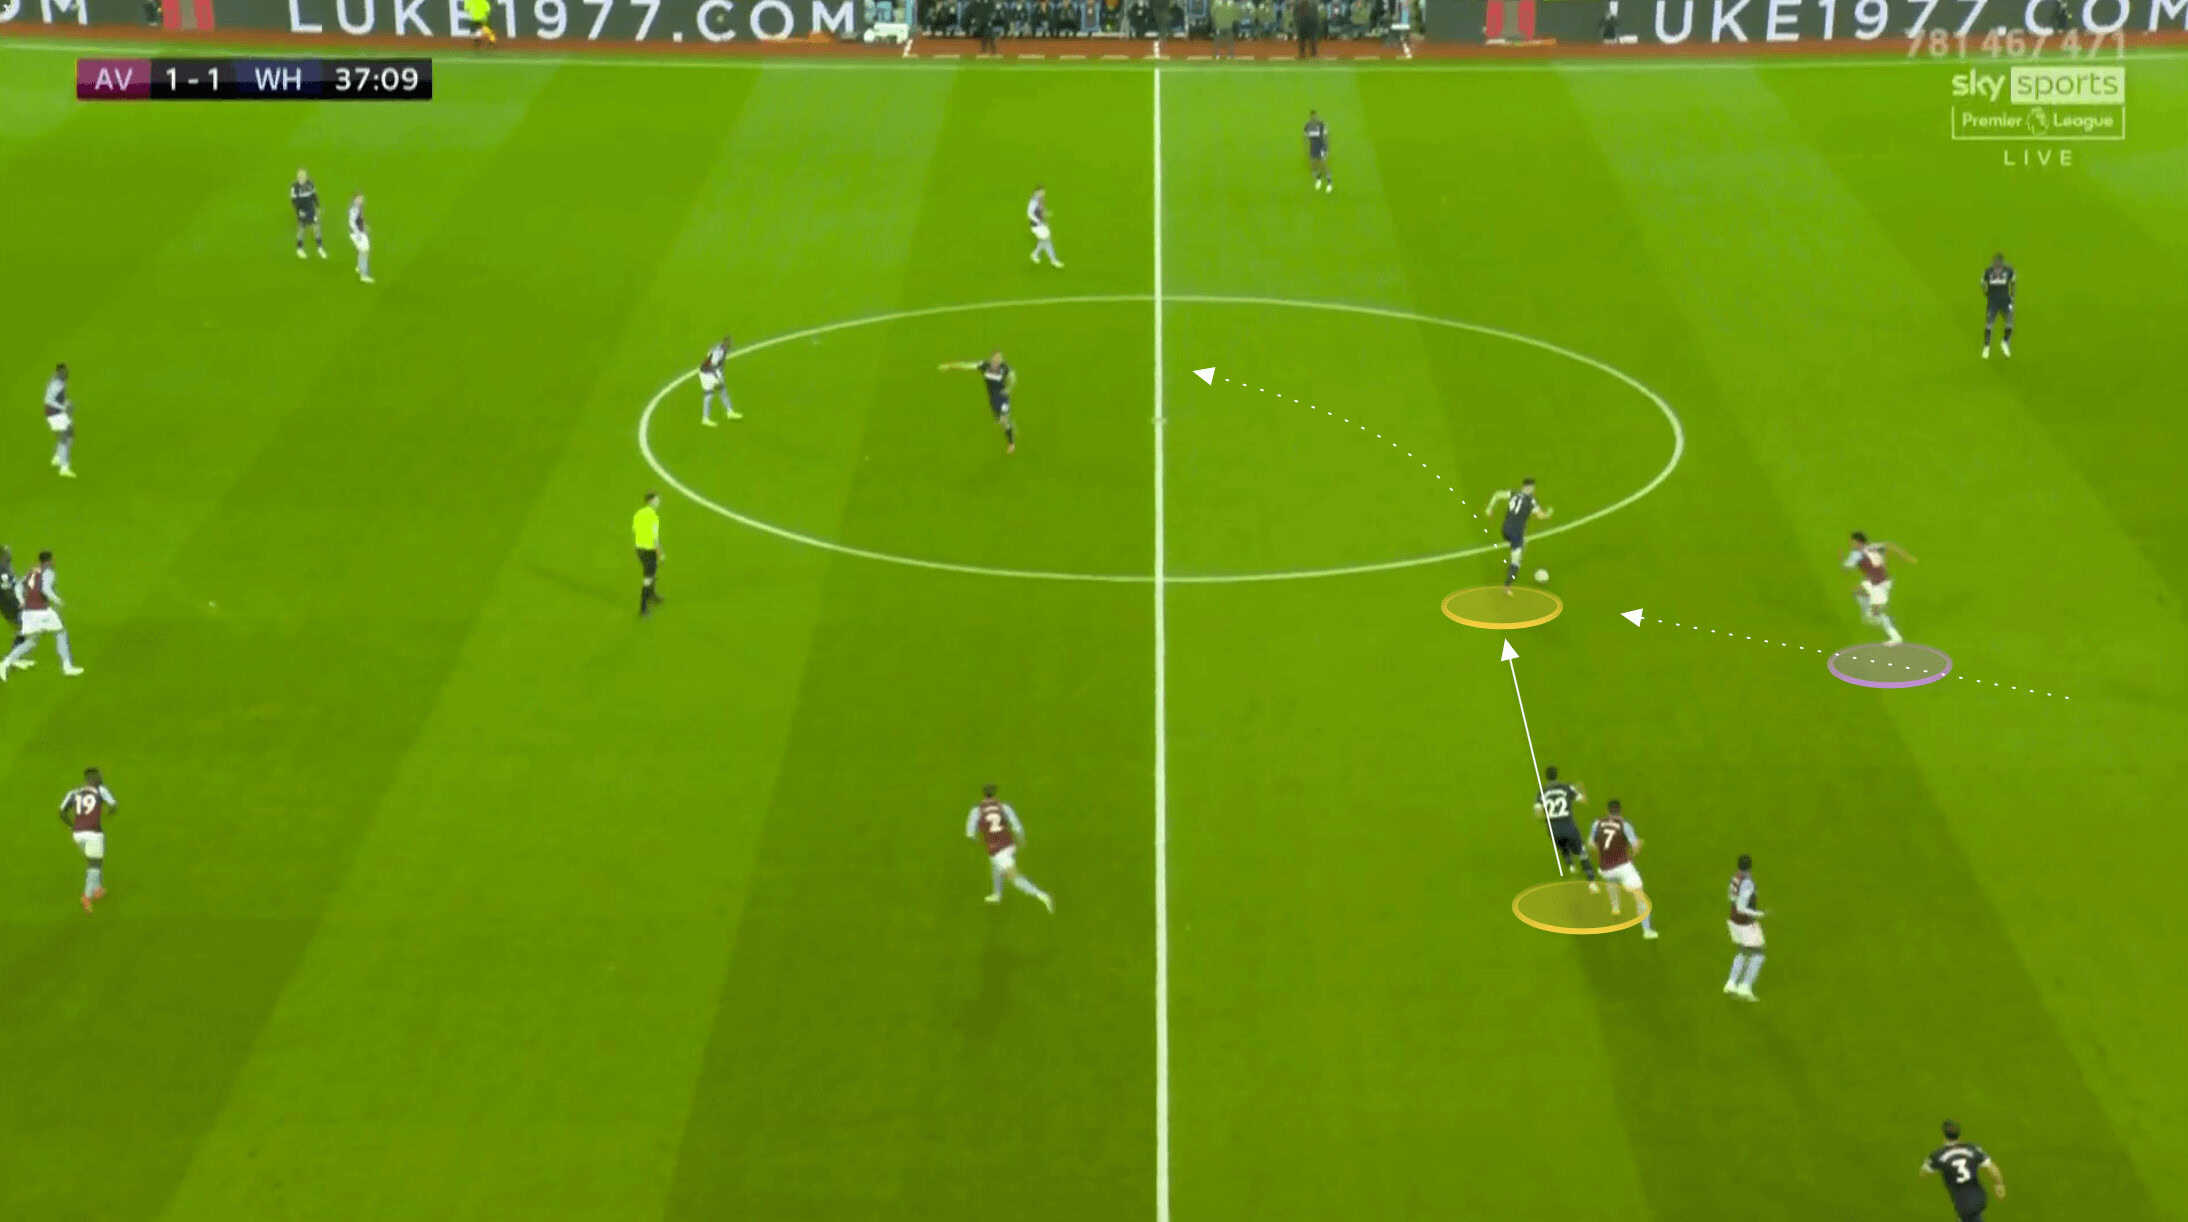
Even in the situations where the counters didn’t end in shots, they still caused issues, and it was a counter that led to Konsa’s red card. Bowen regained the loose ball in this instance and quickly played inside to Fornals, who once more was key to linking the counter-attack.
Fornals used his outstanding ball-carrying to move the ball up the pitch at pace, with Antonio’s presence on the centre-backs preventing Konsa and Hause from stepping forward earlier to cut out this attack. Bowen’s run on the outside was equally important in ensuring West Ham’s counter had more than one possible option and Fornals chose to slide in his winger rather than Antonio.
An outstanding performance from Declan Rice
Rice continues to shine in West Ham’s midfield, and has a growing fan base of appreciators not just in East London, and his price tag likely grows at a similar rate too. Rice was exceptional in West Ham’s midfield, anchoring possession, but continually breaking up play, and screening his back four effectively.
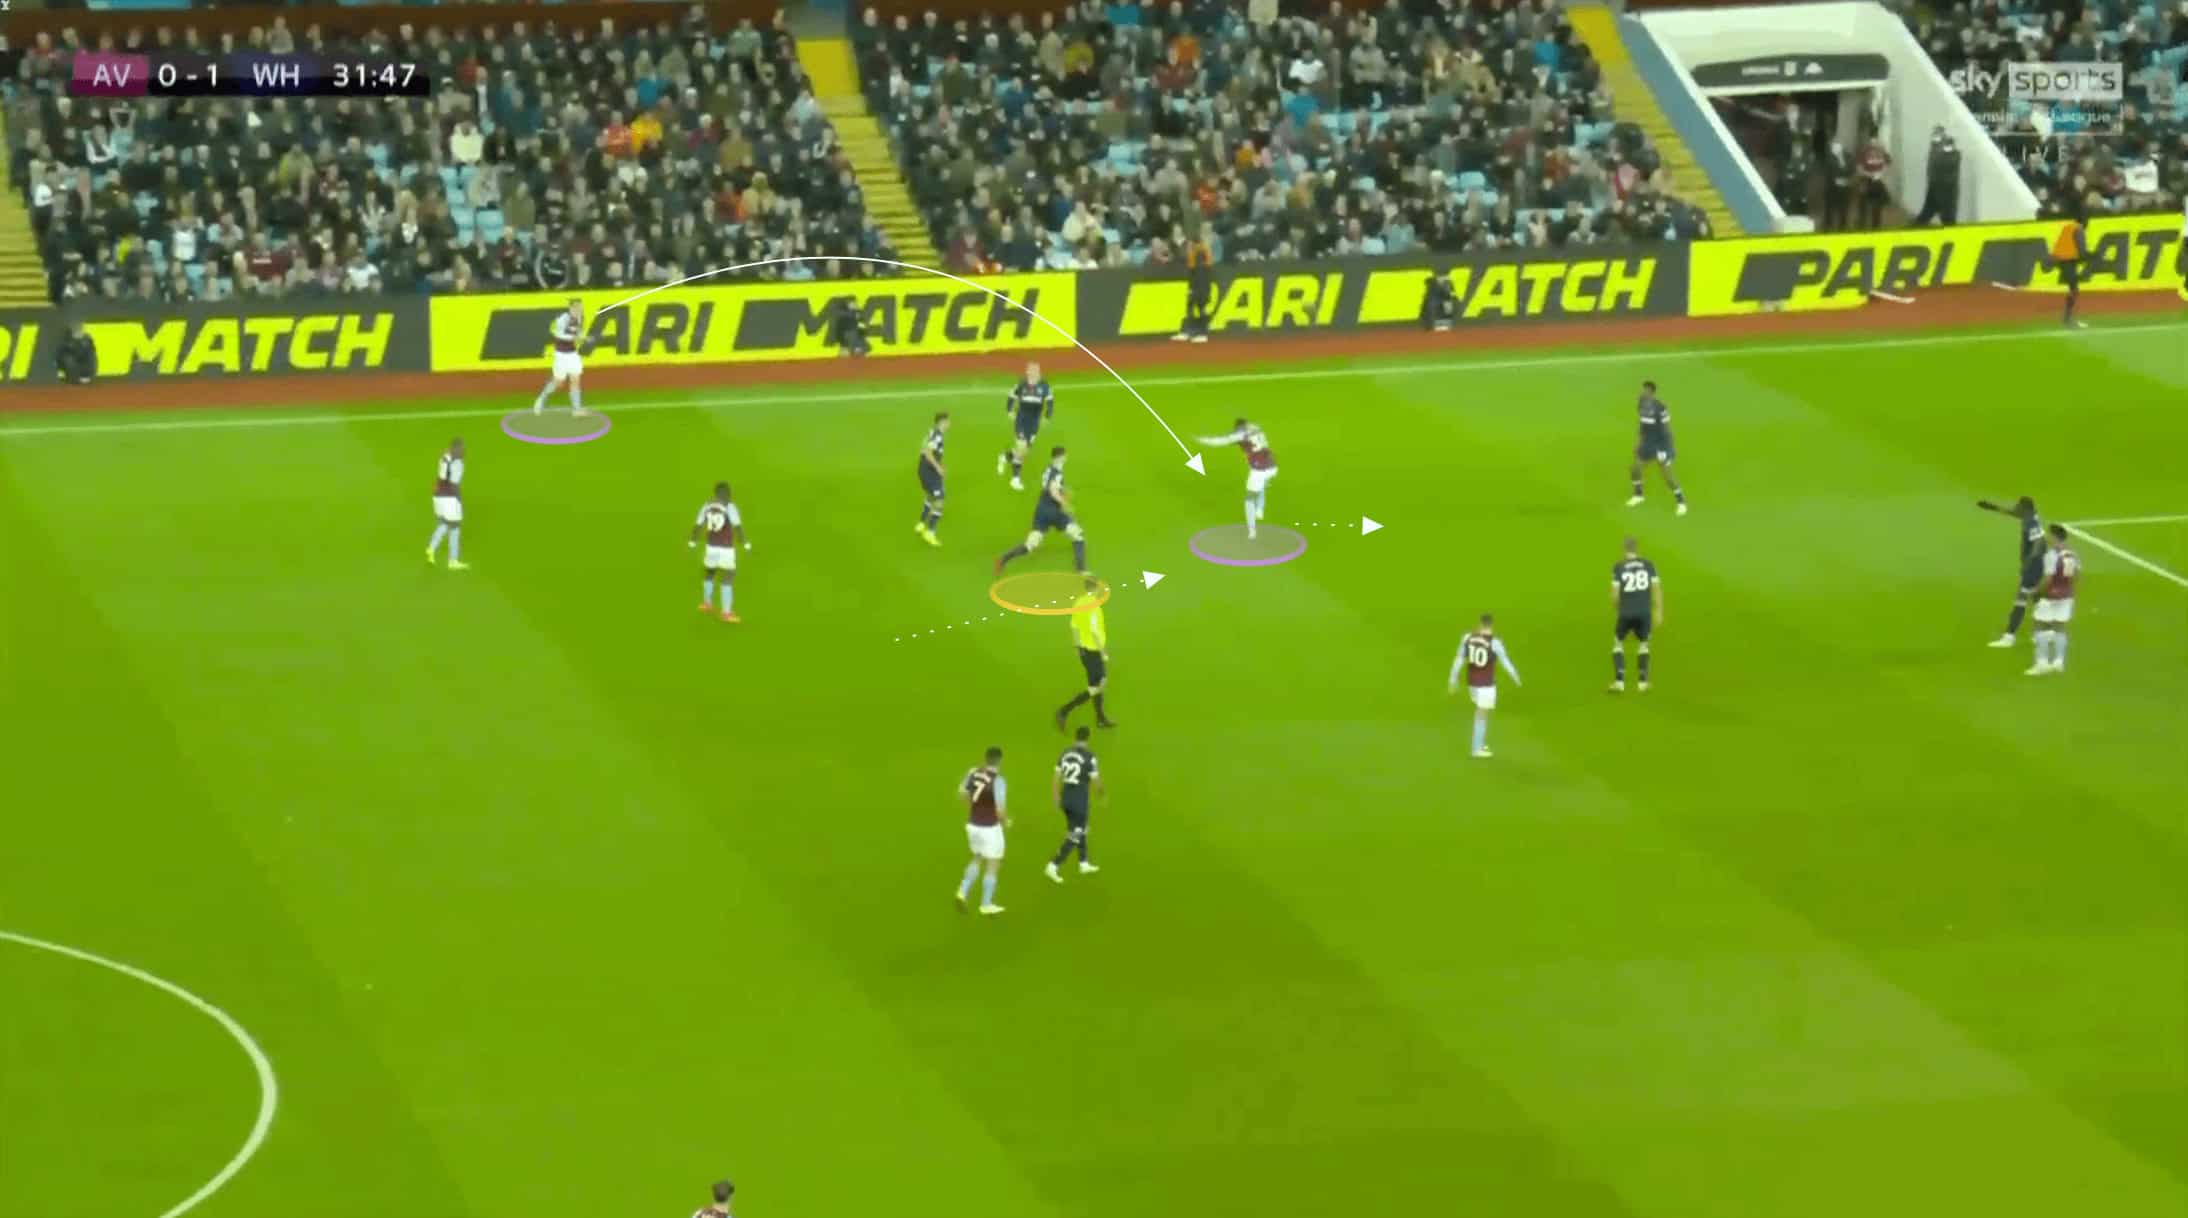
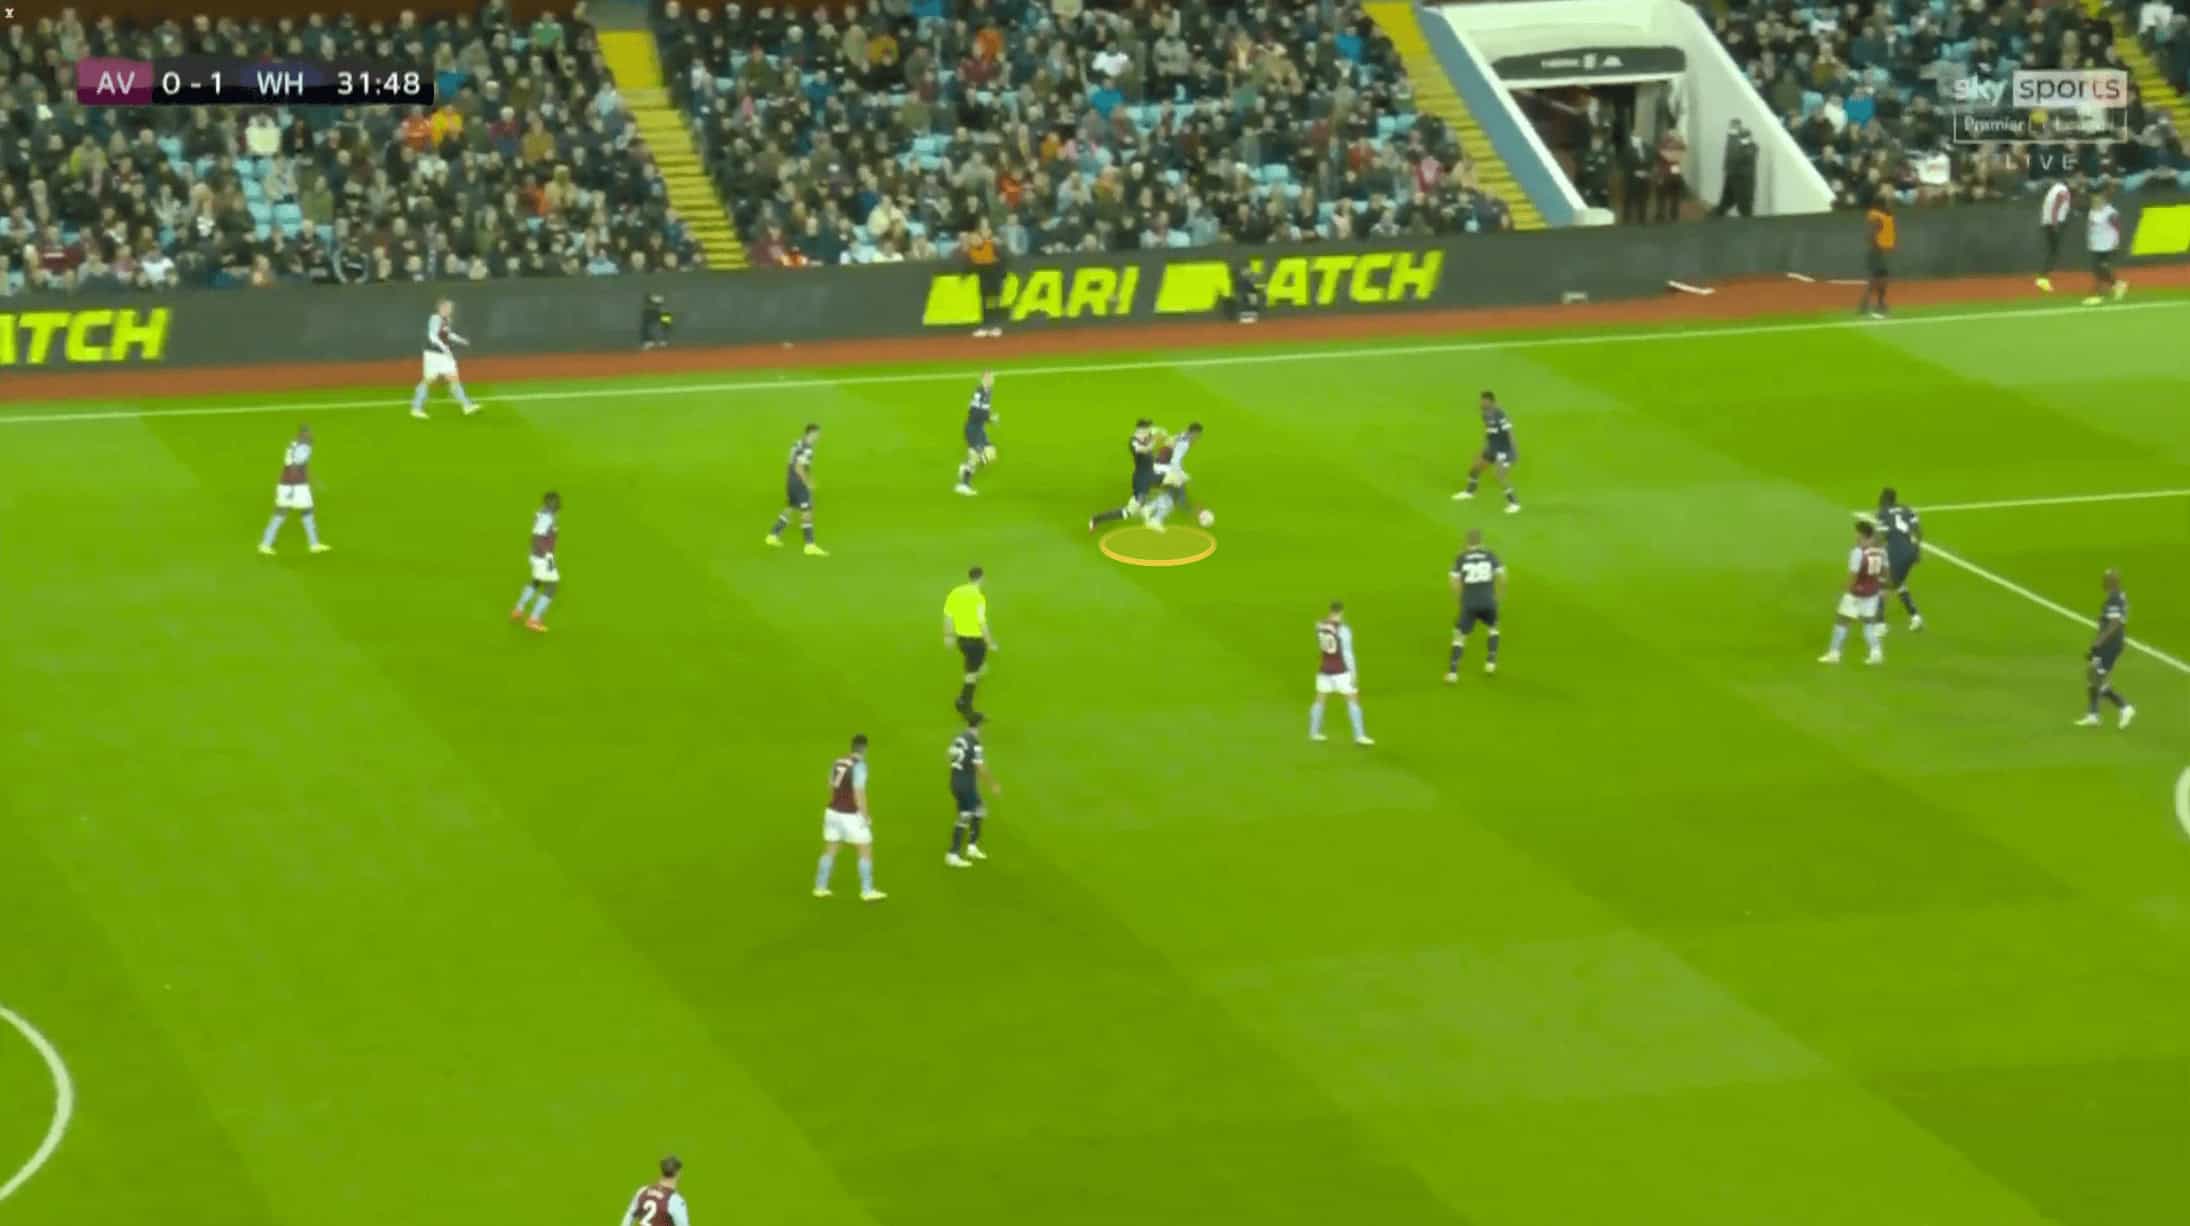
The young English midfielder shows an outstanding reading of the game when making challenges. An example of this can be seen over the two following images.
Rice’s awareness of where an opponent is likely to move in possession affects how he approaches the tackle, and he displays vision and timing to make these tackles and interceptions.
Below, as the ball is thrown into the highlighted Villa midfielder, Rice assesses that the ball-carrier is likely to open up and move forward.
As a result, Rice doesn’t go to get touch-tight on the player’s back but instead immediately moves to their right shoulder, reaching across with his left leg. By going with his left, rather than his right, Rice was able to get his body between the player and the ball, whereas leading with his right would have likely led to making contact and potentially developed into a slide tackle.
It is these small details that make Rice such an exceptional ball-winner, patrolling the space in front of his back four.
He has developed two areas of his game that were criticised, and fairly so, last season. Firstly, as a ball-carrier, Rice has become more progressive. Last season Rice averaged 2.27 progressive runs per 90 in the Premier League, whereas this season he has increased this amount to 3.88.
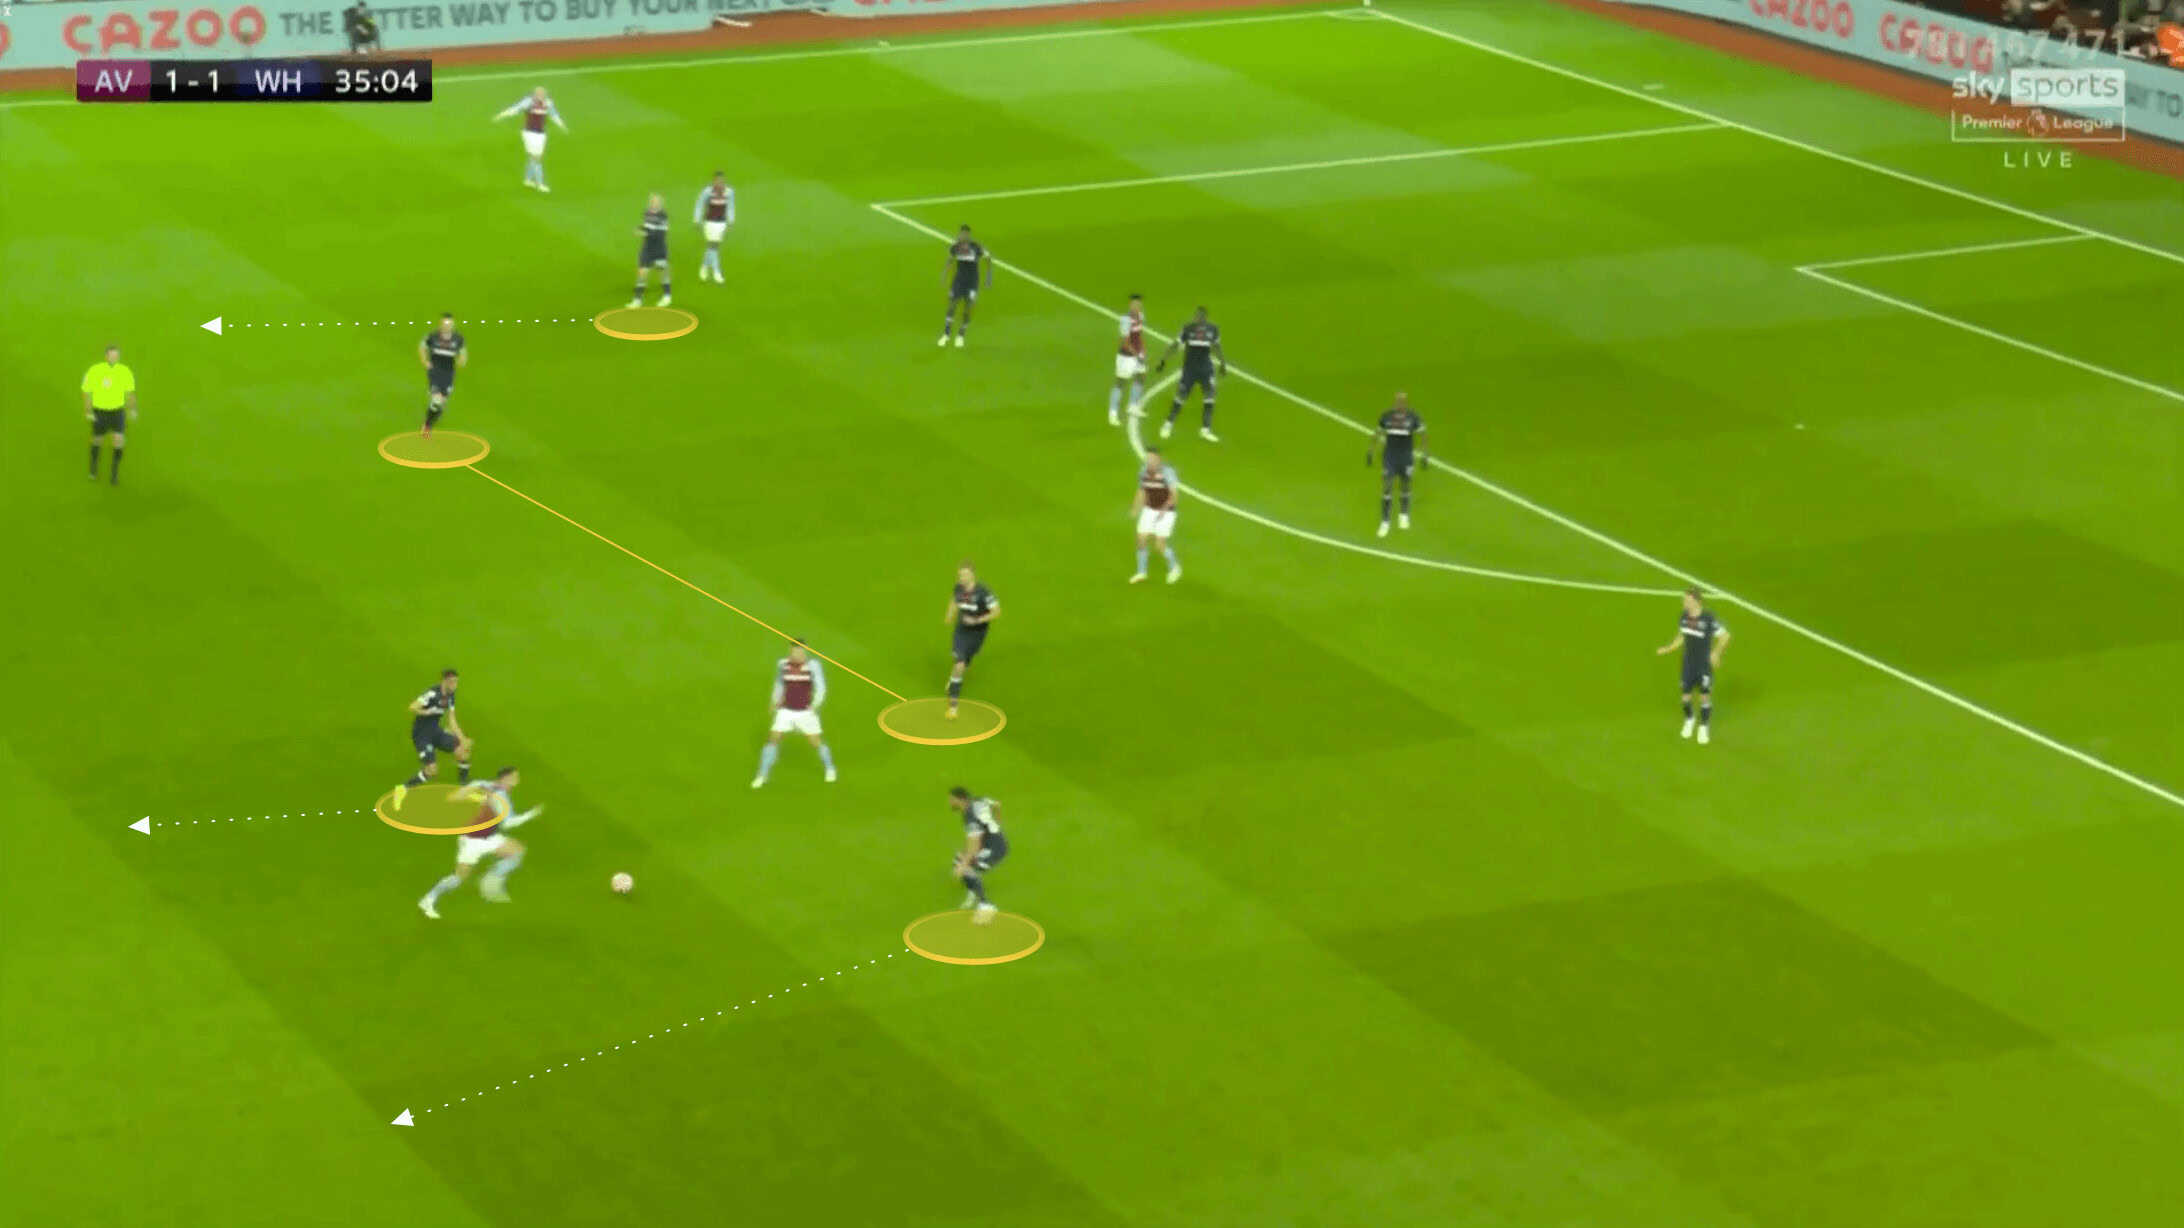
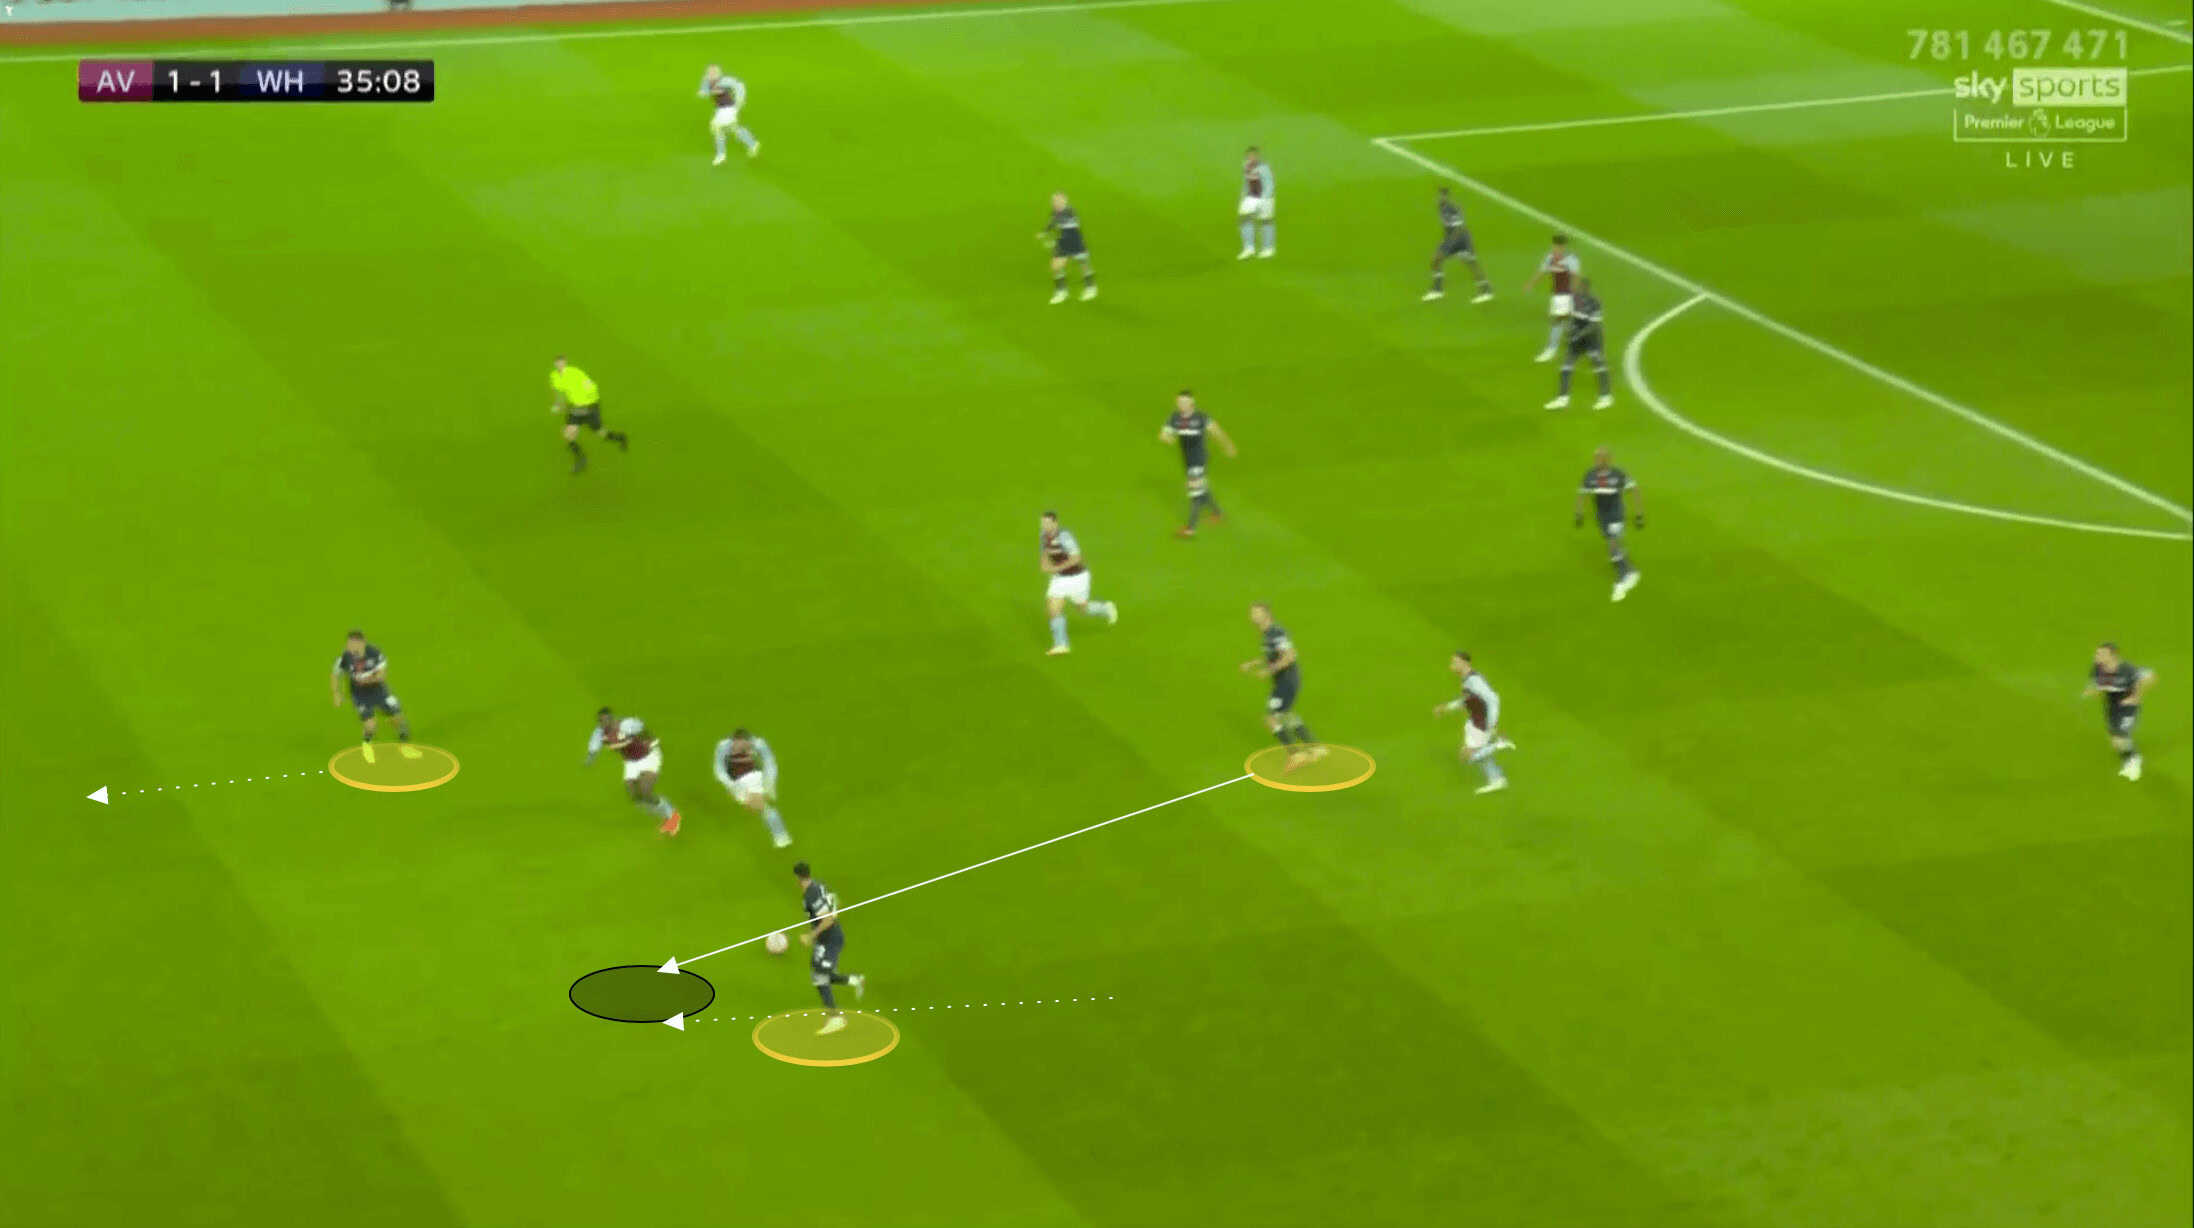
Rice is clever when gaining possession, and understands how to create space for himself to drive into and how to draw the opponent towards him. We saw in an earlier image how Rice would drop into a left-back position, vacating central space for him to attack, and allowing Cresswell to push higher. When receiving in this position, and knowing that Villa were being aggressive with their pressing he would use his first-touch to draw the press, only taking a second touch when the presser was almost upon him. We can see this happening in the image below as he draws Buendia forward before simply bypassing him into the space inside.
We can see how this narrowed Villa’s defensive shape in the image below, and Rice recognised this, switching the ball out wide into the open space on the right, for Johnson to run onto. The right-back would drive into the Villa area and open the scoring as a result.
Rice has improved with his goal contributions too. Last season he managed just two goals and one assist in all competitions, but this season he already has three goals and two assists for West Ham. He is showing a confidence to take on shots from further out, and he recognised Benrahma had drawn the attention of Villa’s midfield so he pushed up into the vacant space to the right of Benrhama, receiving the ball across his body and finishing from distance.
Conclusion
David Moyes’ side continues to impress, with their team built upon a defensive solidity and organisation absent in previous managerial regimes, a hard-working and robust double-pivot in Soucek and Rice, a full-of-flair and pacy attacking midfield trio in Bowen, Fornals and Benrhama who are dangerous in developed attacking phases as well as in creating successful counter-attacks, and an imposing and physical centre-forward who consistently commands the attention of the centre-backs he faces. Villa will be disappointed with the result and may well have taken something from this game had they not been reduced to ten men, however, with Brighton, City, Liverpool and Leicester in their next four league games, there will be pressure for them to pick up wins against Southampton and Crystal Palace who they also face this month.


